Knowledgebase
Welcome to our KnowledgebBase, a comprehensive resource designed to help you find answers, troubleshoot issues, and enhance your understanding of our software. If you need further assistance, do not hesitate to contact our support team.
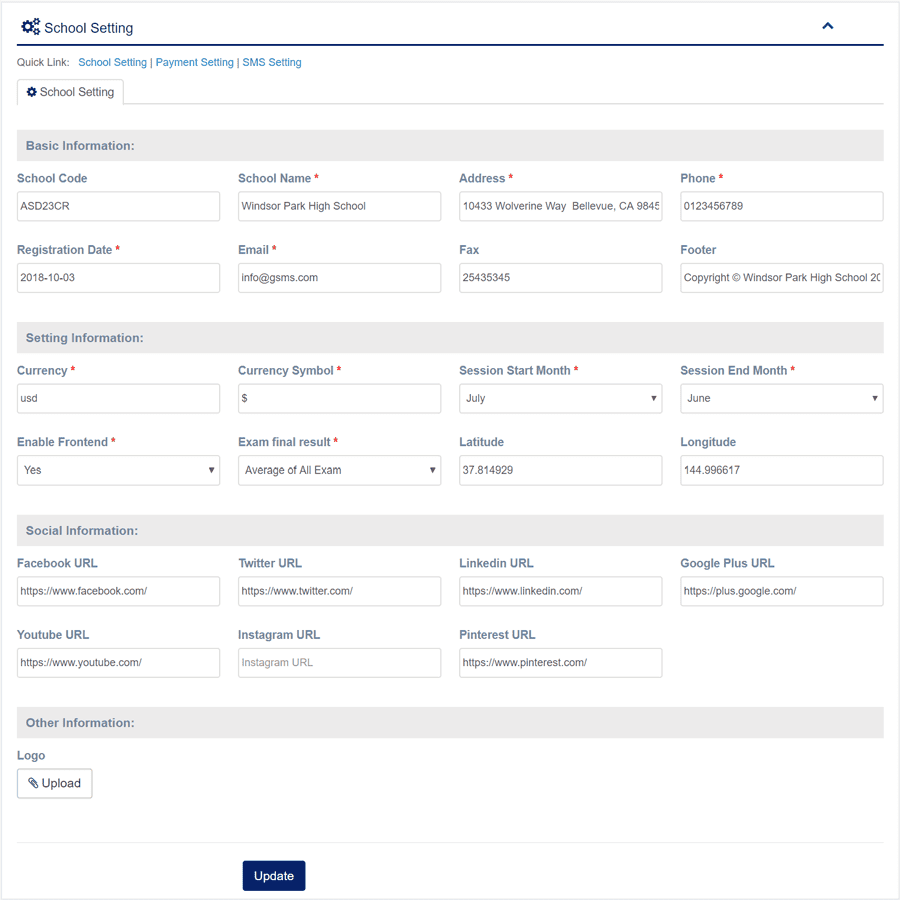
1. Login to System Admin Panel.
2. Select School Setting sub menu under Setting menu from left side bar.
3. Fill up all required fields as per expected value/data.
4. Then Click to Update Button.
5. You are done with School Settings.
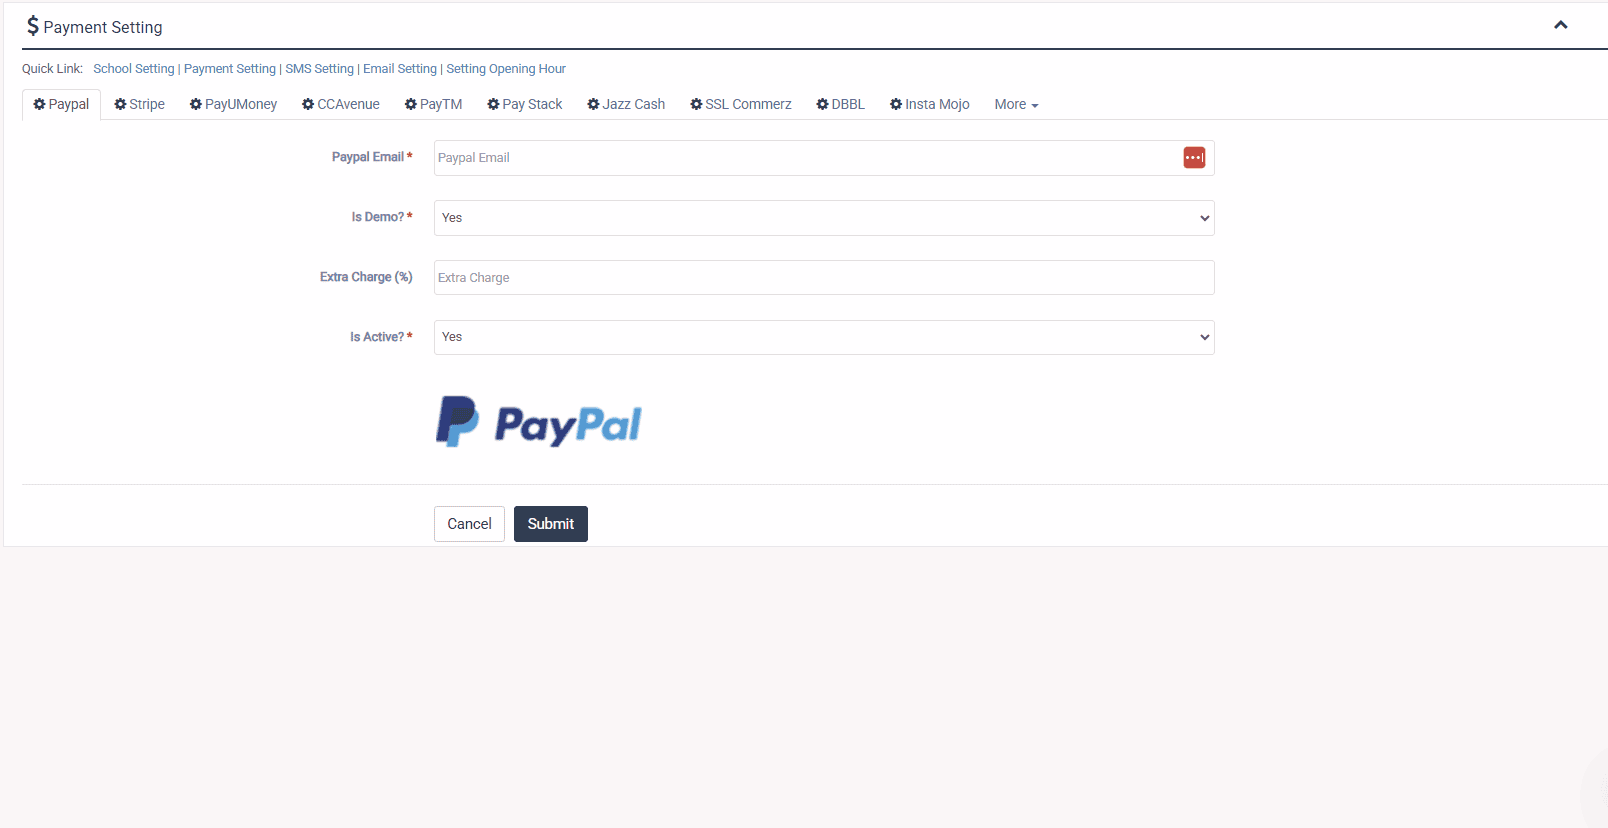
1. Login to System Admin Panel.
2. Select Payment Setting sub menu under Setting menu from left side bar.
3. Fill up all required fields as per expected value/data.
4. Then Click to Update Button.
5. Same way follow all payment gateway setting.
6. You are done with Payment Settings.
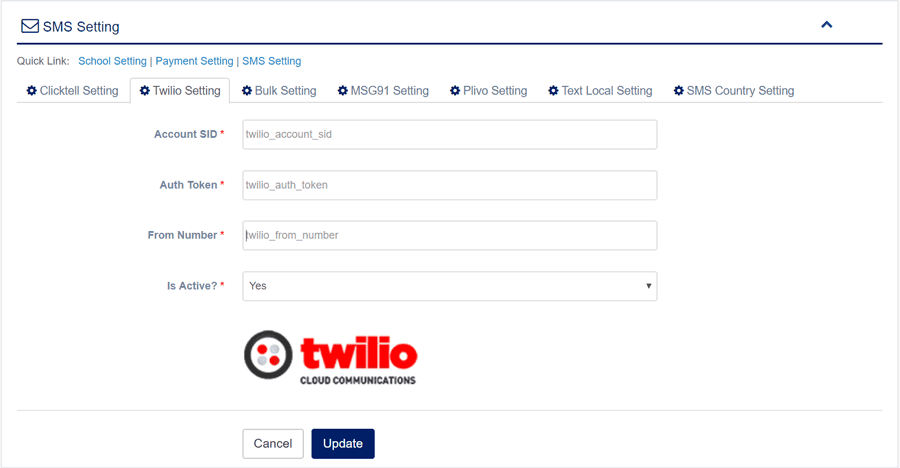
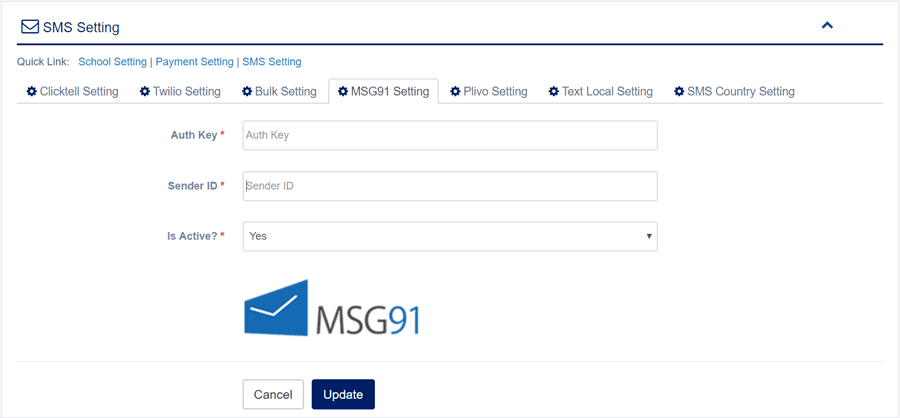
1. Login to System Admin Panel.
2. Select SMS Setting sub menu under Setting menu from left side bar.
3. Fill up all required fields as per expected value/data.
4. Then Click to Update Button.
5. Same way follow all SMS gateway setting.
6. You are done with SMS Settings.
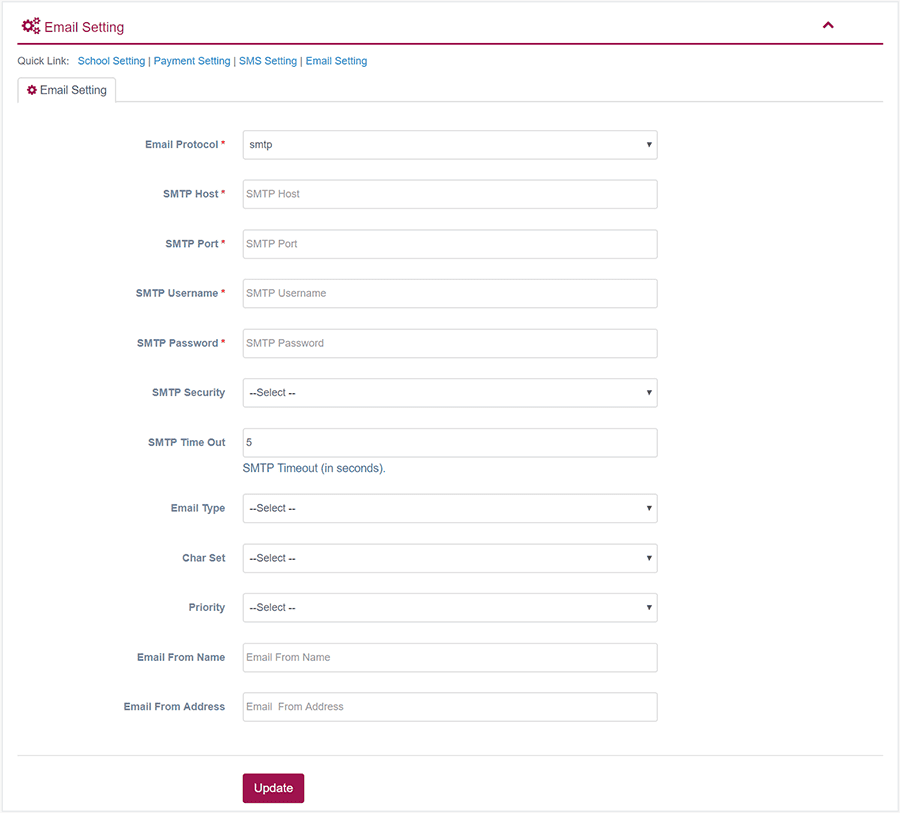
1. Login to System Admin Panel.
2. Select SMTP Setting sub menu under Setting menu from left side bar.
3. Fill up all required fields as per expected value/data.
4. Then Click to Update Button.
6. You are done with Emai/SMTP Settings.
1. Login to System Admin Panel.
2. Select Theme menu from left side bar.
3. Then choose your theme and Click to Activate Button.
4. You are done with Theme module.

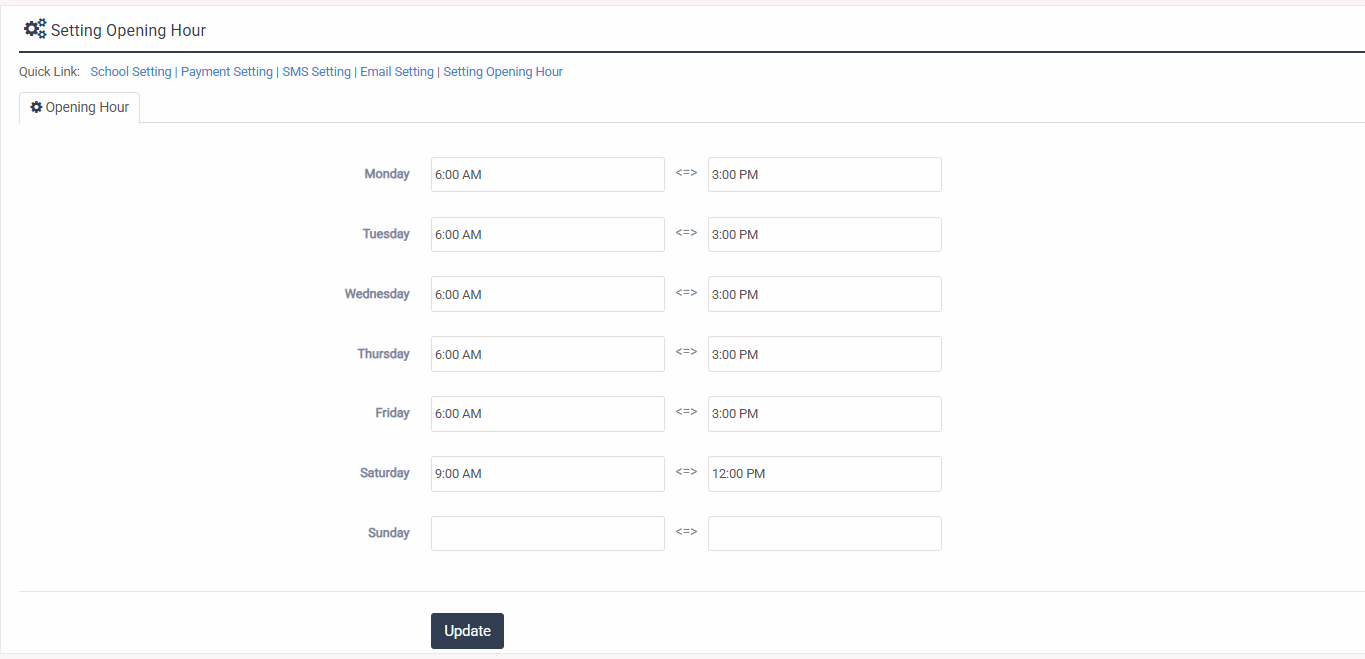
1. Login to System Admin Panel.
2. Select Open Hours menu from left side bar.
3. Fill all info and Click to Activate Button.
4. You are done with Open Hours module.
1. Login to System Admin Panel.
2. Select Academic Year sub menu under Administrator menu from left side bar.
3. To add/create new Academic Year click Add Academic Year  tab.
4. To edit Academic Year Click Edit  button in the Academic Year list.
5. To Delete Academic Year Click Delete  button in the Academic Year list.
6. You are done with Academic Year feature.


1. Login to System Admin Panel.
2. Select Manage User sub menu under Administrator menu from left side bar.
3. Then select User Type and filter specific user by click Find button.
5. By filter you will get a list of user
6. From the user list you can Activate, Inactivate, Edit & View a user.
7. You are done with User Manage feature.
Instruction: Please add Teacher, Employee, Student and Guardian before manage users.

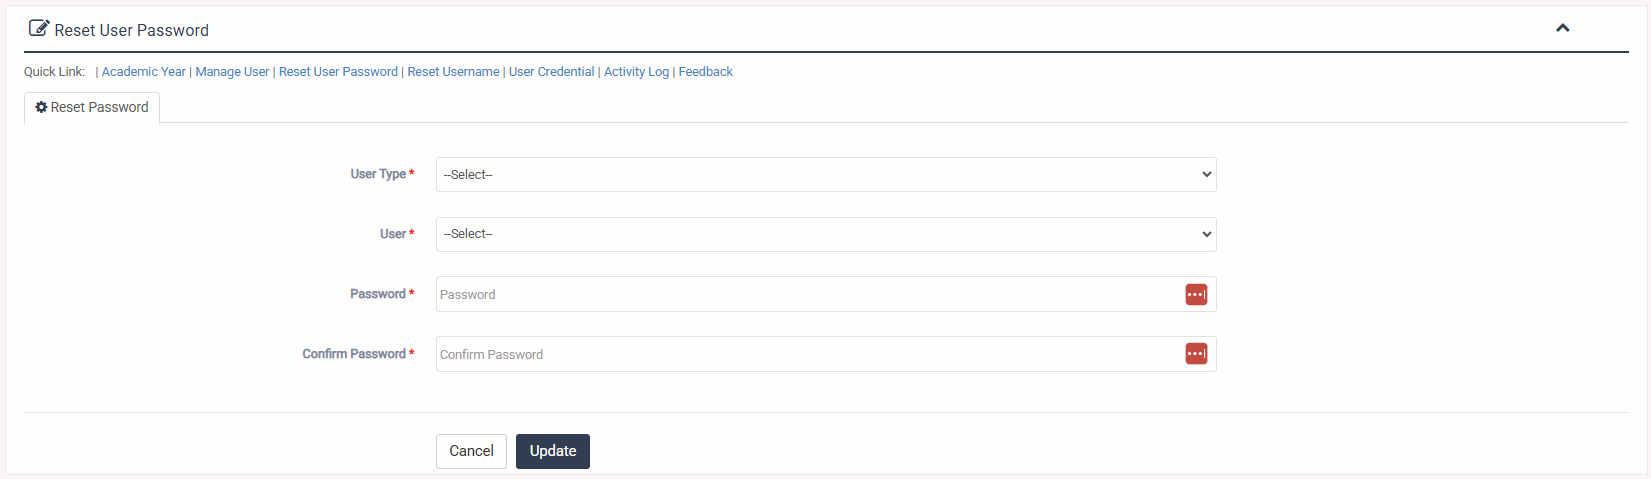
1. Login to System Admin Panel.
2. Select Reset User Password sub menu under Administrator menu from left side bar.
3. Then select User Type & User and fill up Password & Confirm Password Fields with expected value/data.
5. Then click Update button to reset user password
6. You are done with Reset User Password feature.
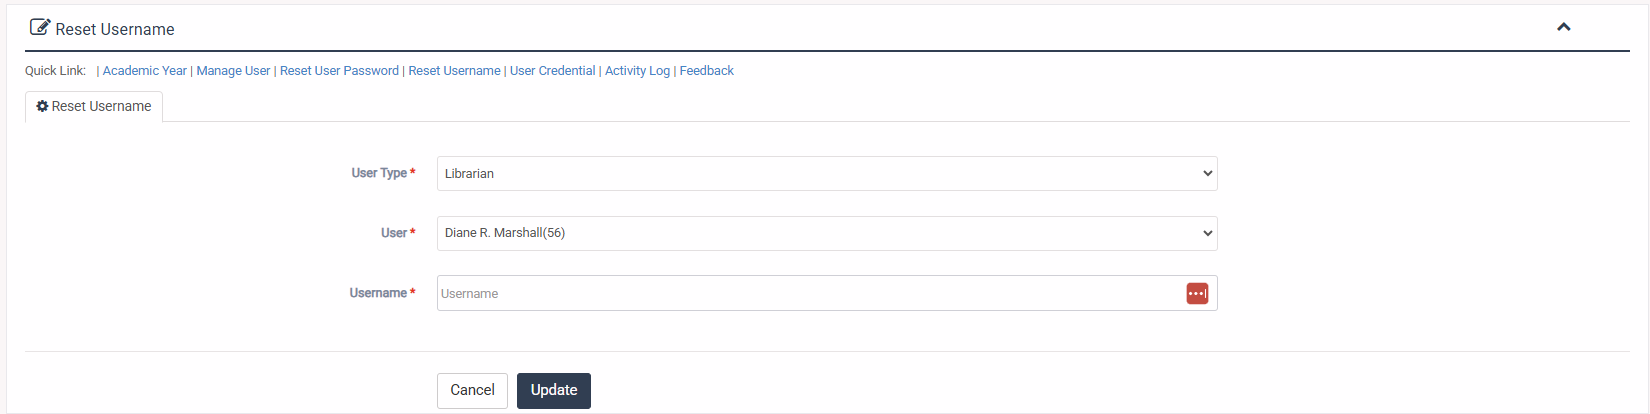
1. Login to System Admin Panel.
2. Select Reset Username sub menu under Administrator menu from left side bar.
3. Then select User Type & User and fill up the Username Field with expected value/data.
5. Then click Update button to reset user password
6. You are done with Reset Username feature.
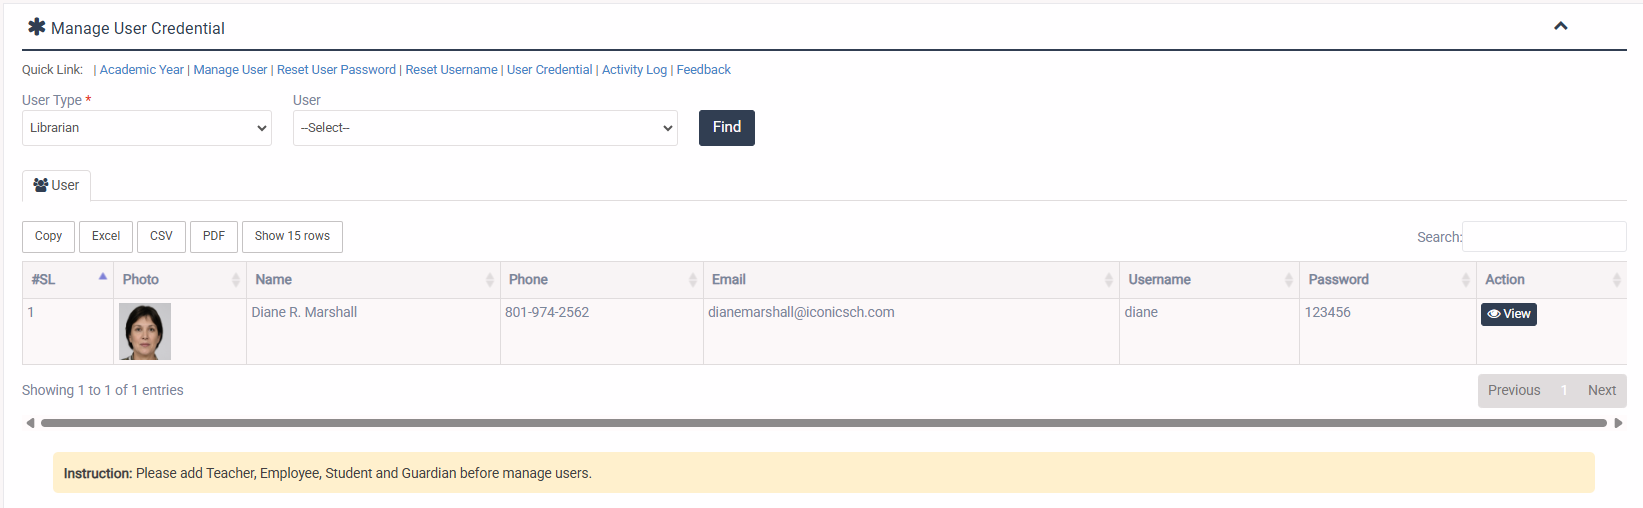
1. Login to System Admin Panel.
2. Select User Credentials sub menu under Administrator menu from left side bar.
3. Then select User Type and filter specific user by click Find button.
5. By filter you will get a list of user
6. From the user list you can see user username and Credentials.
7. You are done with User Credentials feature.
1. Login to System Admin Panel.
2. Select Activity Log sub menu under Administrator menu from left side bar.
5. To Delete Activity Log Click Delete  button in the Activity Log list.
6. You are done with Activity Log feature.

1. Login to System Admin Panel.
2. Select Manage Feedback sub menu under Administrator menu from left side bar.
5. To Delete A Feedback Click Delete  button in the Guardian Feedback list.
5. To Publish/unpubluish A Feedback Click Publish Now/ Unpublish Now  button in the Guardian Feedback list.
6. You are done with Manage Feedback feature.

Ac non ac hac ullamcorper rhoncus velit maecenas convallis torquent elit accumsan eu est pulvinar pretium congue a vestibulum suspendisse scelerisque condimentum parturient quam.Aliquet faucibus condimentum amet nam a nascetur suspendisse habitant a mollis senectus suscipit a vestibulum primis molestie parturient aptent nisi aenean.A scelerisque quam consectetur condimentum risus lobortis cum dignissim mi fusce primis rhoncus a rhoncus bibendum parturient condimentum odio a justo a et mollis pulvinar venenatis metus sodales elementum.Parturient ullamcorper natoque mi sagittis a nibh nisi a suspendisse a.
Ac non ac hac ullamcorper rhoncus velit maecenas convallis torquent elit accumsan eu est pulvinar pretium congue a vestibulum suspendisse scelerisque condimentum parturient quam.Aliquet faucibus condimentum amet nam a nascetur suspendisse habitant a mollis senectus suscipit a vestibulum primis molestie parturient aptent nisi aenean.A scelerisque quam consectetur condimentum risus lobortis cum dignissim mi fusce primis rhoncus a rhoncus bibendum parturient condimentum odio a justo a et mollis pulvinar venenatis metus sodales elementum.Parturient ullamcorper natoque mi sagittis a nibh nisi a suspendisse a.
Ac non ac hac ullamcorper rhoncus velit maecenas convallis torquent elit accumsan eu est pulvinar pretium congue a vestibulum suspendisse scelerisque condimentum parturient quam.Aliquet faucibus condimentum amet nam a nascetur suspendisse habitant a mollis senectus suscipit a vestibulum primis molestie parturient aptent nisi aenean.A scelerisque quam consectetur condimentum risus lobortis cum dignissim mi fusce primis rhoncus a rhoncus bibendum parturient condimentum odio a justo a et mollis pulvinar venenatis metus sodales elementum.Parturient ullamcorper natoque mi sagittis a nibh nisi a suspendisse a.
Ac non ac hac ullamcorper rhoncus velit maecenas convallis torquent elit accumsan eu est pulvinar pretium congue a vestibulum suspendisse scelerisque condimentum parturient quam.Aliquet faucibus condimentum amet nam a nascetur suspendisse habitant a mollis senectus suscipit a vestibulum primis molestie parturient aptent nisi aenean.A scelerisque quam consectetur condimentum risus lobortis cum dignissim mi fusce primis rhoncus a rhoncus bibendum parturient condimentum odio a justo a et mollis pulvinar venenatis metus sodales elementum.Parturient ullamcorper natoque mi sagittis a nibh nisi a suspendisse a.
Ac non ac hac ullamcorper rhoncus velit maecenas convallis torquent elit accumsan eu est pulvinar pretium congue a vestibulum suspendisse scelerisque condimentum parturient quam.Aliquet faucibus condimentum amet nam a nascetur suspendisse habitant a mollis senectus suscipit a vestibulum primis molestie parturient aptent nisi aenean.A scelerisque quam consectetur condimentum risus lobortis cum dignissim mi fusce primis rhoncus a rhoncus bibendum parturient condimentum odio a justo a et mollis pulvinar venenatis metus sodales elementum.Parturient ullamcorper natoque mi sagittis a nibh nisi a suspendisse a.
Ac non ac hac ullamcorper rhoncus velit maecenas convallis torquent elit accumsan eu est pulvinar pretium congue a vestibulum suspendisse scelerisque condimentum parturient quam.Aliquet faucibus condimentum amet nam a nascetur suspendisse habitant a mollis senectus suscipit a vestibulum primis molestie parturient aptent nisi aenean.A scelerisque quam consectetur condimentum risus lobortis cum dignissim mi fusce primis rhoncus a rhoncus bibendum parturient condimentum odio a justo a et mollis pulvinar venenatis metus sodales elementum.Parturient ullamcorper natoque mi sagittis a nibh nisi a suspendisse a.
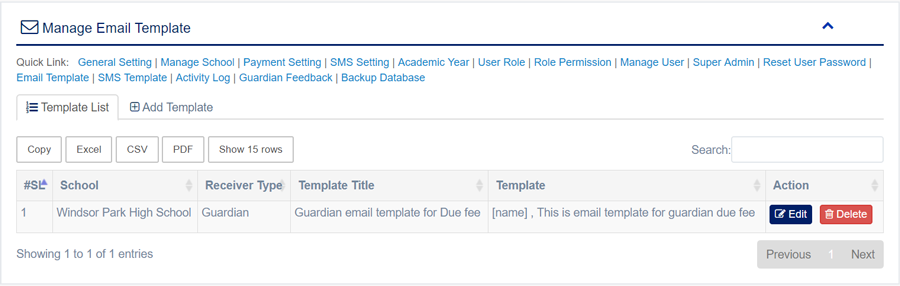
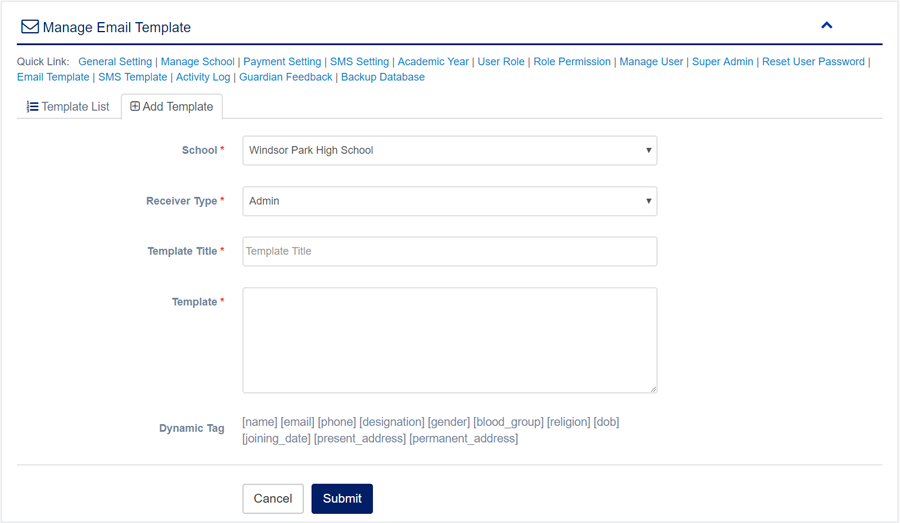
1. Login to System Admin Panel.
2. Select Email Template sub menu under Template menu from left side bar.
3. To add/create new Email Template click Add Email Template  tab.
4. To edit Email Template Click Edit  button in the Email Template list.
5. To Delete Email Template Click Delete  button in the Email Template list.
6. You are done with Email Template feature.
1. Login to System Admin Panel.
2. Select SMS Template sub menu under Administrator menu from left side bar.
3. To add/create new SMS Template click Add SMS Template  tab.
4. To edit SMS Template Click Edit  button in the SMS Template list.
5. To Delete SMS Template Click Delete  button in the SMS Template list.
6. You are done with SMS Template feature.


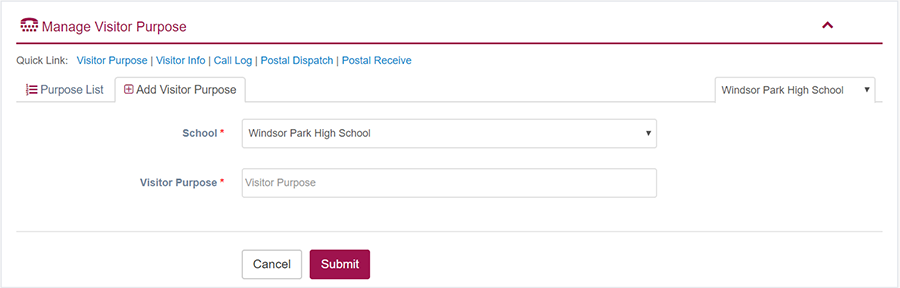
1. Login to System Admin Panel.
2. Select Visitor Purpose sub menu under Front Office menu from left side bar.
3. To add/create new Visitor Purpose click Add Visitor Purpose  tab.
4. To edit Visitor Purpose Click Edit  button in the Visitor Purpose list.
5. To Delete Visitor Purpose Click Delete  button in the Visitor Purpose list.
6. You are done with Visitor Purpose feature.

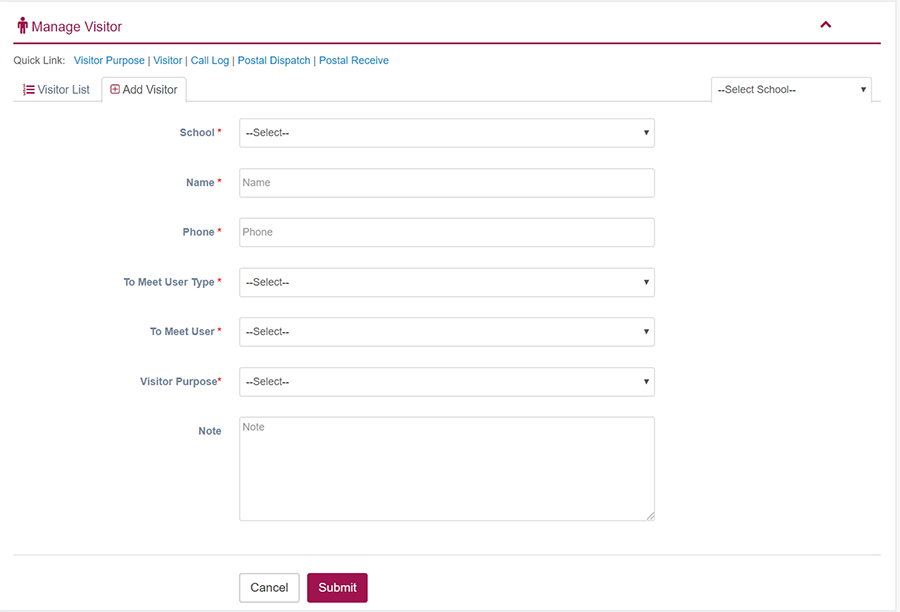
1. Login to System Admin Panel.
2. Select Visitor Info sub menu under Front Office menu from left side bar.
3. To add/create new Visitor Info click Add Visitor Info  tab.
4. To edit Visitor Info Click Edit  button in the Visitor Info list.
5. To Delete Visitor Info Click Delete  button in the Visitor Info list.
6. You are done with Visitor Info feature.

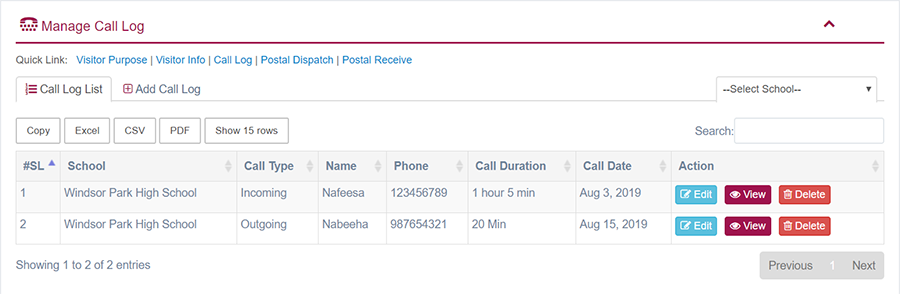
1. Login to System Admin Panel.
2. Select Call Log sub menu under Front Office menu from left side bar.
3. To add/create new Visitor Info click Add Call Log  tab.
4. To edit Call Log Click Edit  button in the Call Log list.
5. To Delete Call Log Click Delete  button in the Call Log list.
6. You are done with Call Log feature.

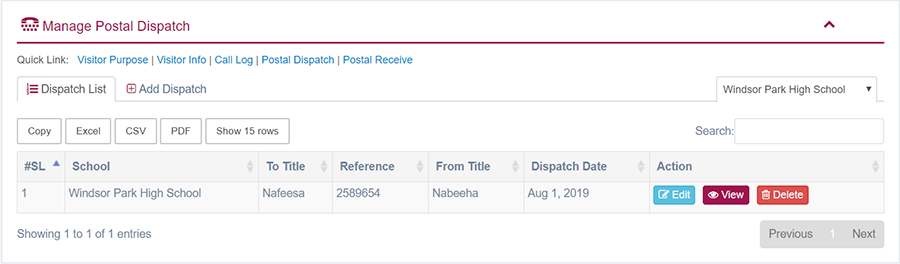
1. Login to System Admin Panel.
2. Select Postal Dispatch sub menu under Front Office menu from left side bar.
3. To add/create new Postal Dispatch click Add Postal Dispatch  tab.
4. To edit Postal Dispatch Click Edit  button in the Postal Dispatch list.
5. To Delete Postal Dispatch Click Delete  button in the Postal Dispatch list.
6. You are done with Postal Dispatch feature.

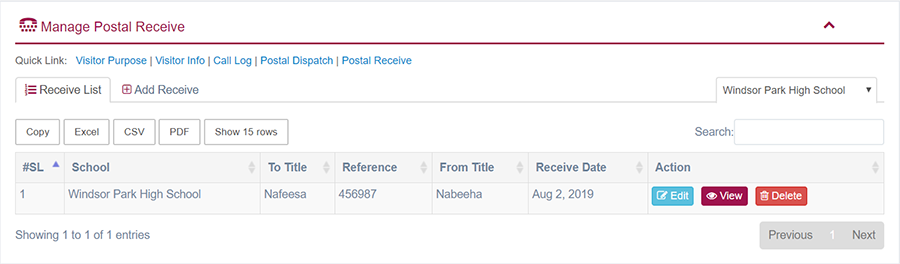
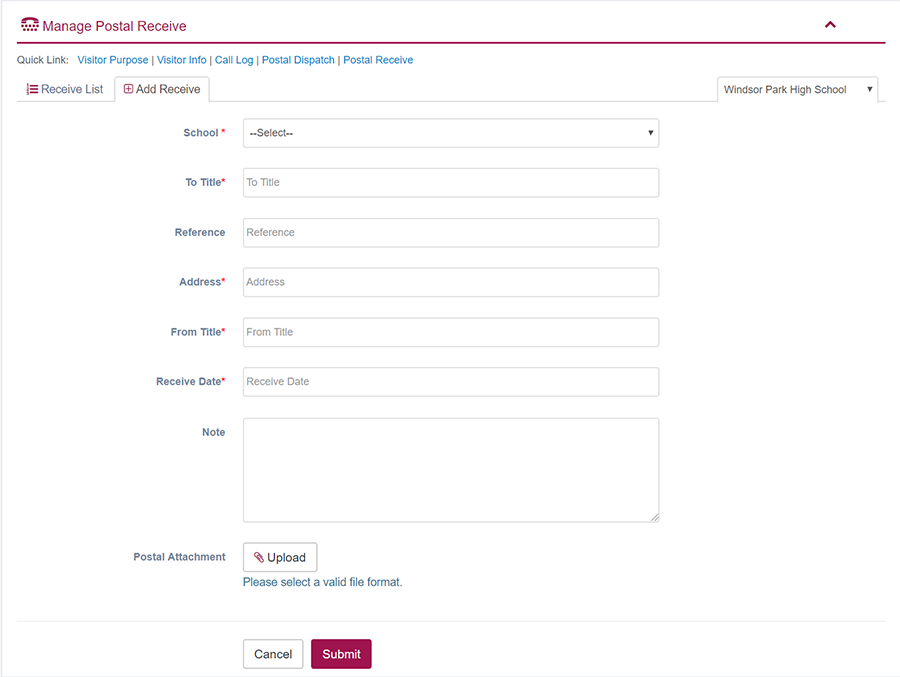
1. Login to System Admin Panel.
2. Select Postal Receive sub menu under Front Office menu from left side bar.
3. To add/create new Postal Receive click Add Postal Receive  tab.
4. To edit Postal Receive Click Edit  button in the Postal Receive list.
5. To Delete Postal Receive Click Delete  button in the Postal Receive list.
6. You are done with Postal Receive feature.
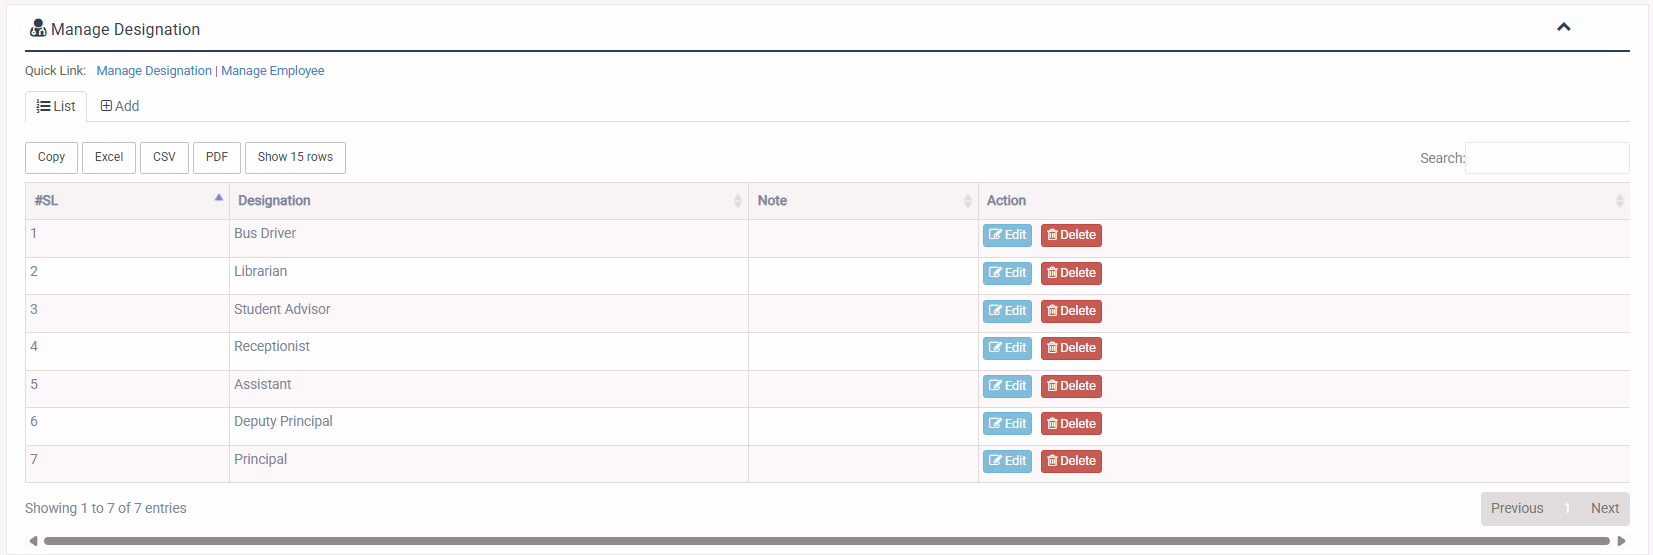
1. Login to System Admin Panel.
2. Select Manage Designation sub menu under Human Resource menu from left side bar.
3. To Add/Create new Designation click Add Designation  tab.
4. To Edit Designation Click Edit  button in the Designation list.
5. To Delete Designation Click Delete  button in the Designation List.
6. You are done with Manage Designation feature.

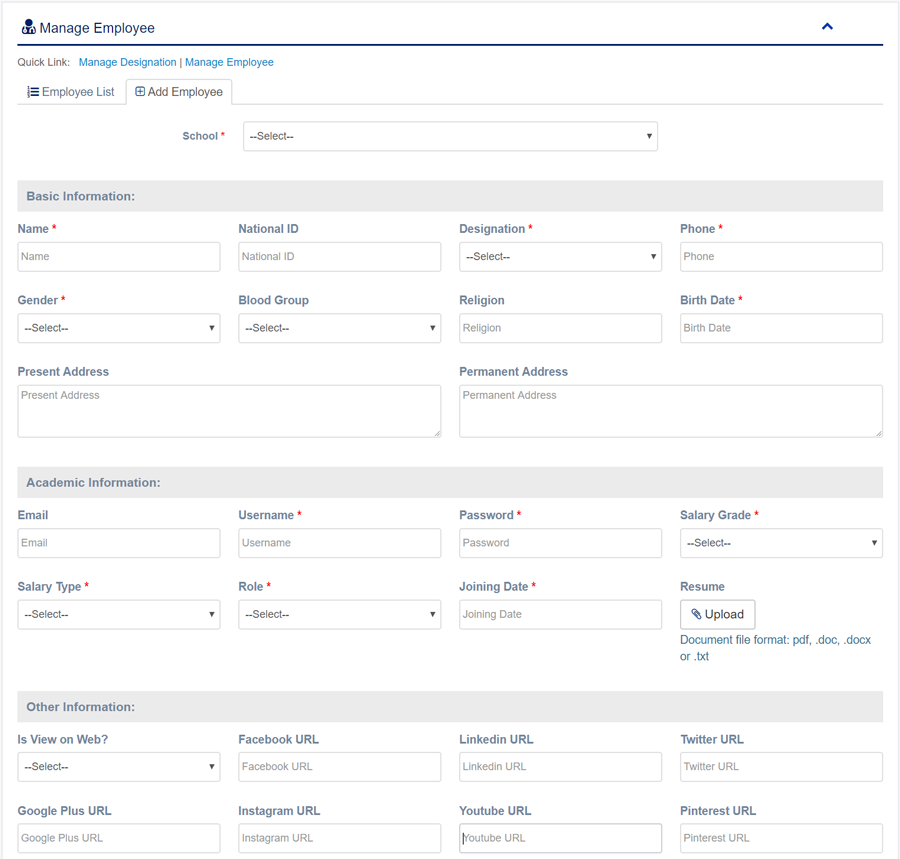
1. Login to System Admin Panel.
2. Select Manage Employee sub menu under Human Resource menu from left side bar.
3. To Add/Create new Employee click Add Employee  tab.
4. To Edit Employee Click Edit  button in the Employee list.
5. To Delete Employee Click Delete  button in the Employee List.
6. You are done with Manage Employee feature.

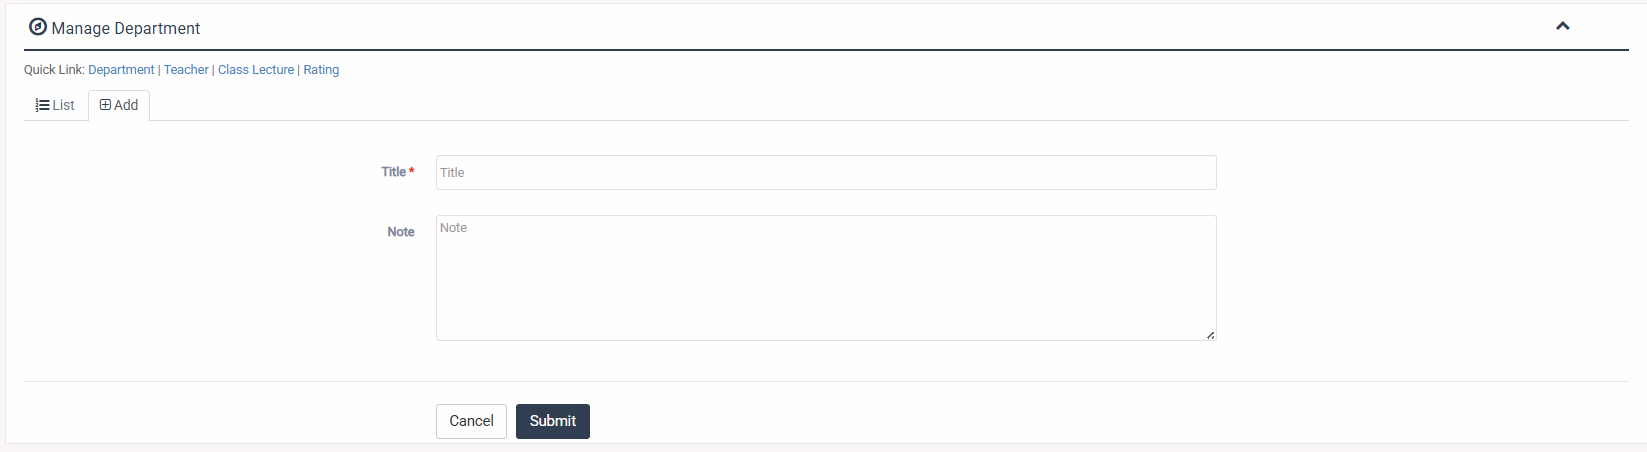
1. Login to System Admin Panel.
2. Select Department menu from left side bar.
3. To Add/Create new Department click Add tab.
4. To Edit Department Click Edit  button in the Teacher list.
5. To Delete Department Click Delete  button in the Teacher List.
6. You are done with Department feature.

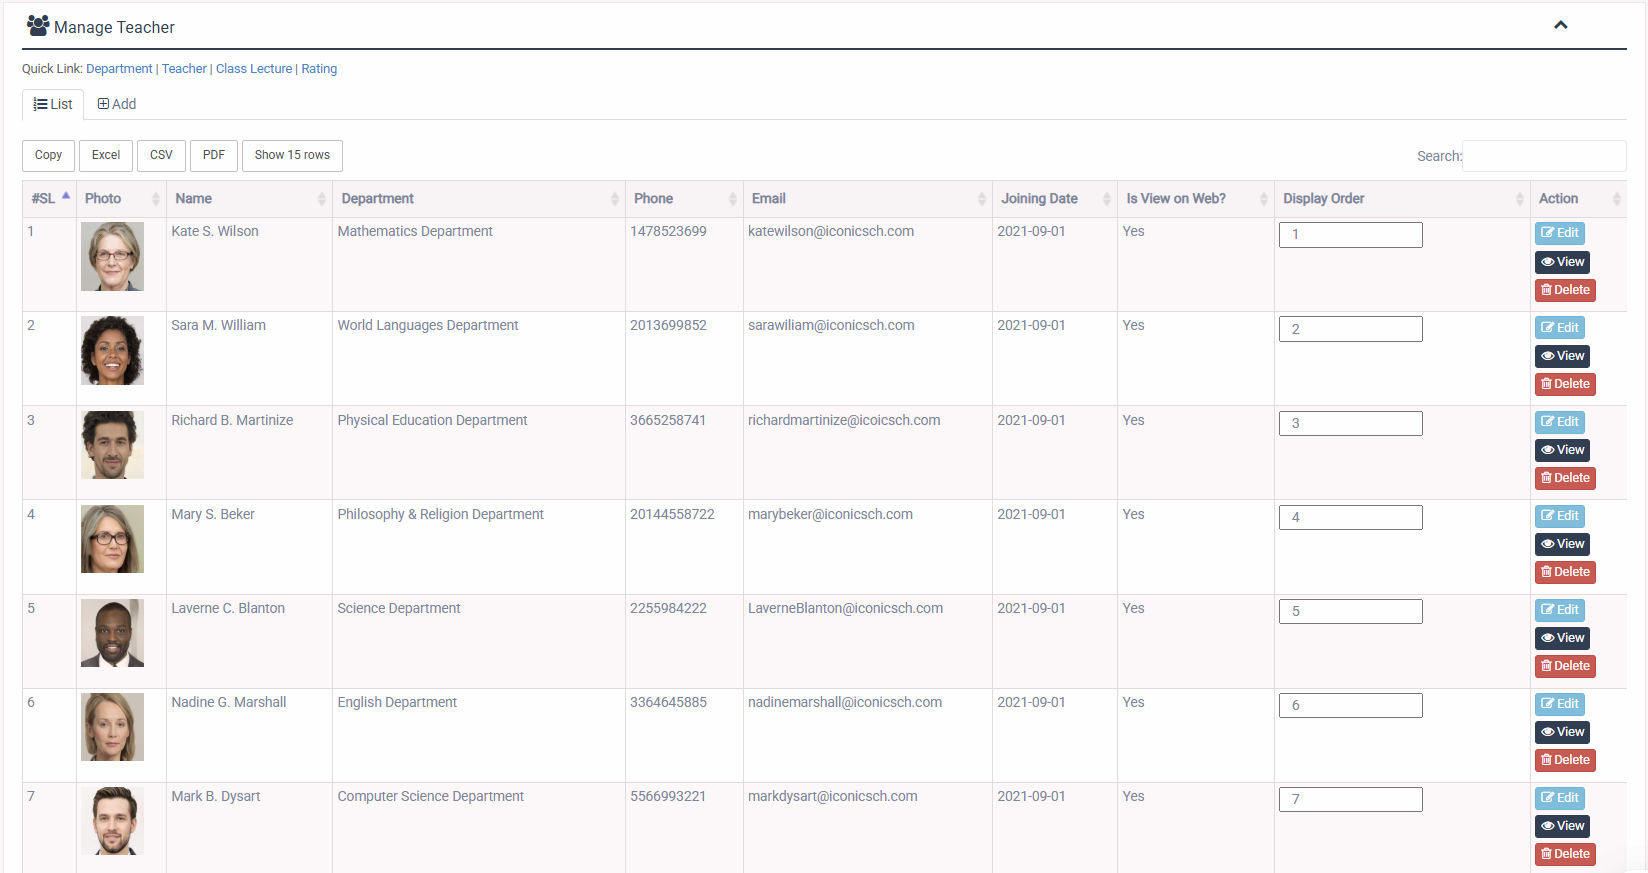
1. Login to System Admin Panel.
2. Select Teacher menu from left side bar.
3. To Add/Create new Teacher click Add Teacher  tab.
4. To Edit Teacher Click Edit  button in the Teacher list.
5. To Delete Teacher Click Delete  button in the Teacher List.
6. You are done with Manage Teacher feature.

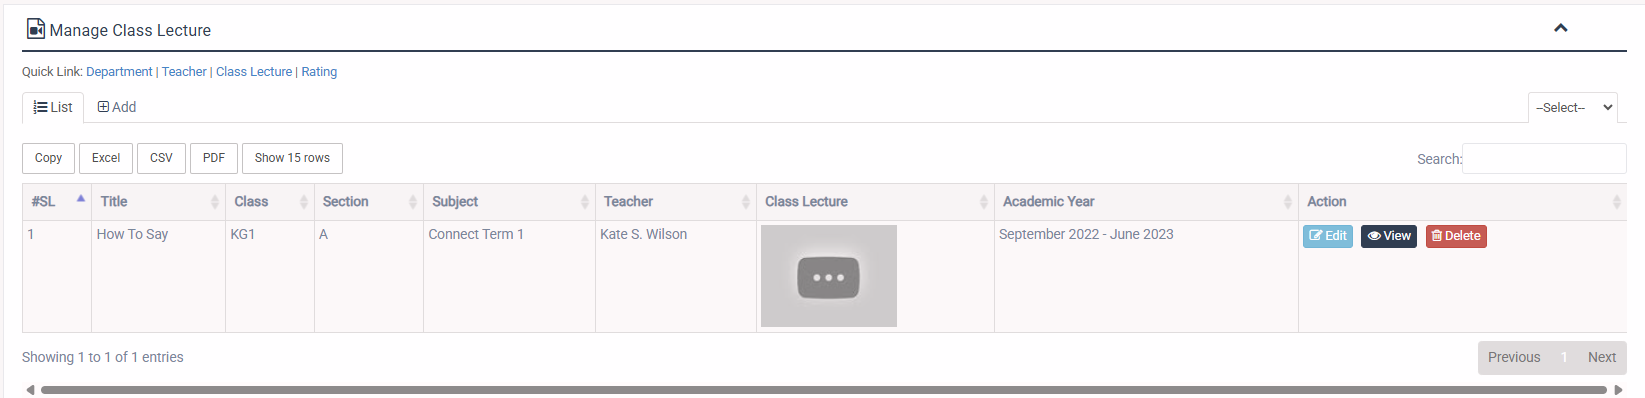
1. Login to System Admin Panel.
2. Select Class Lecture menu from left side bar.
3. To Add/Create new Lecture click Add tab and add the required info.
4. To Edit Lecture Click Edit  button in the Lectuers list.
5. To Delete Lecture Click Delete  button in the Teacher List.
6. You are done with Class Lecture feature.

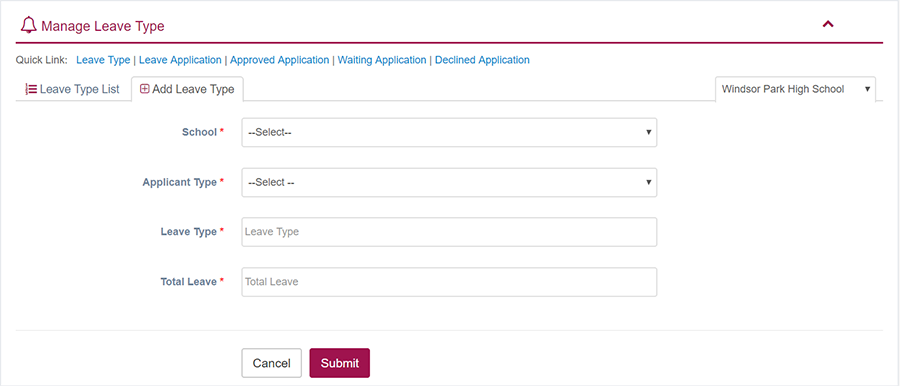
1. Login to System Admin Panel.
2. Select Manage Leave menu from left side bar.
3. To Add/Create new Leave Type click Add Leave Type tab.
4. To Edit Leave Type Click Edit  button in the Leave Type list.
5. To Delete Leave Type Click Delete  button in the Leave Type List.
6. You are done with Leave Type feature.

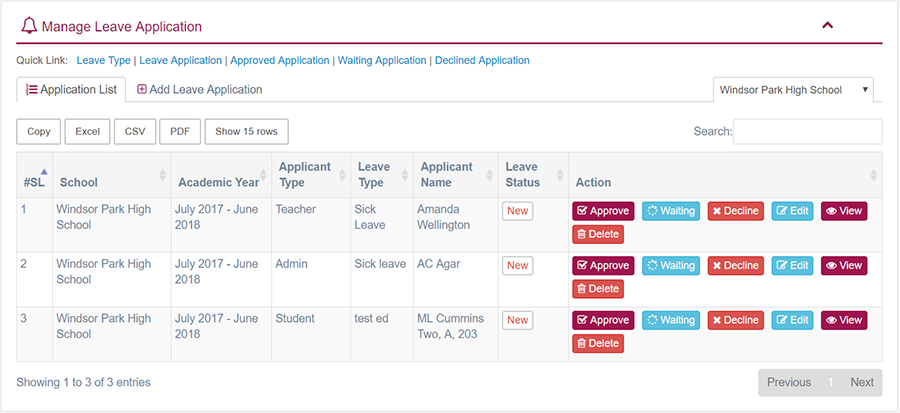
1. Login to System Admin Panel.
2. Select Manage Leave Application sub menu under Leave menu from left side bar.
3. To Add/Create new Leave Application click Add Leave Application  tab.
4. To Edit Leave Application Click Edit  button in the Leave Application list.
5. To Delete Leave Application Click Delete  button in the Leave Application List.
6. You are done with Manage Leave Application feature.

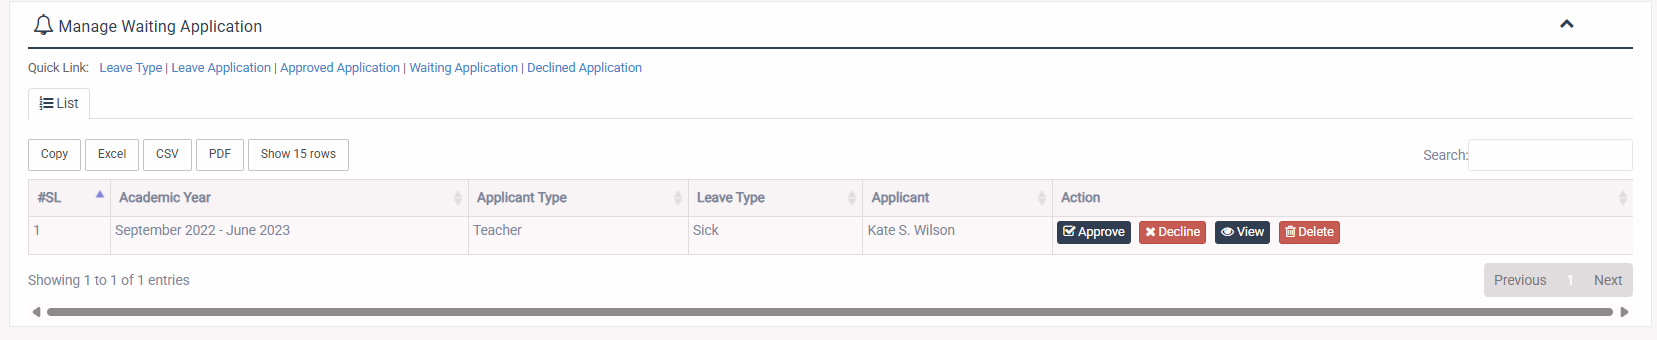
1. Login to System Admin Panel.
2. Select Waiting Application sub menu under Manage Leave menu from left side bar.
3. Admin can approve or decline or view or delete the waiting application.
4. You are done with Waiting Application feature.
1. Login to System Admin Panel.
2. Select Approved Application sub menu under Manage Leave menu from left side bar.
3. Admin can view the approved or delete the application.
4. You are done with Approved Application feature.

1. Login to System Admin Panel.
2. Select Declined Application sub menu under Manage Leave menu from left side bar.
3. Admin can view, approve, put in waiting or delete the declined application.
4. You are done with Declined Application feature.

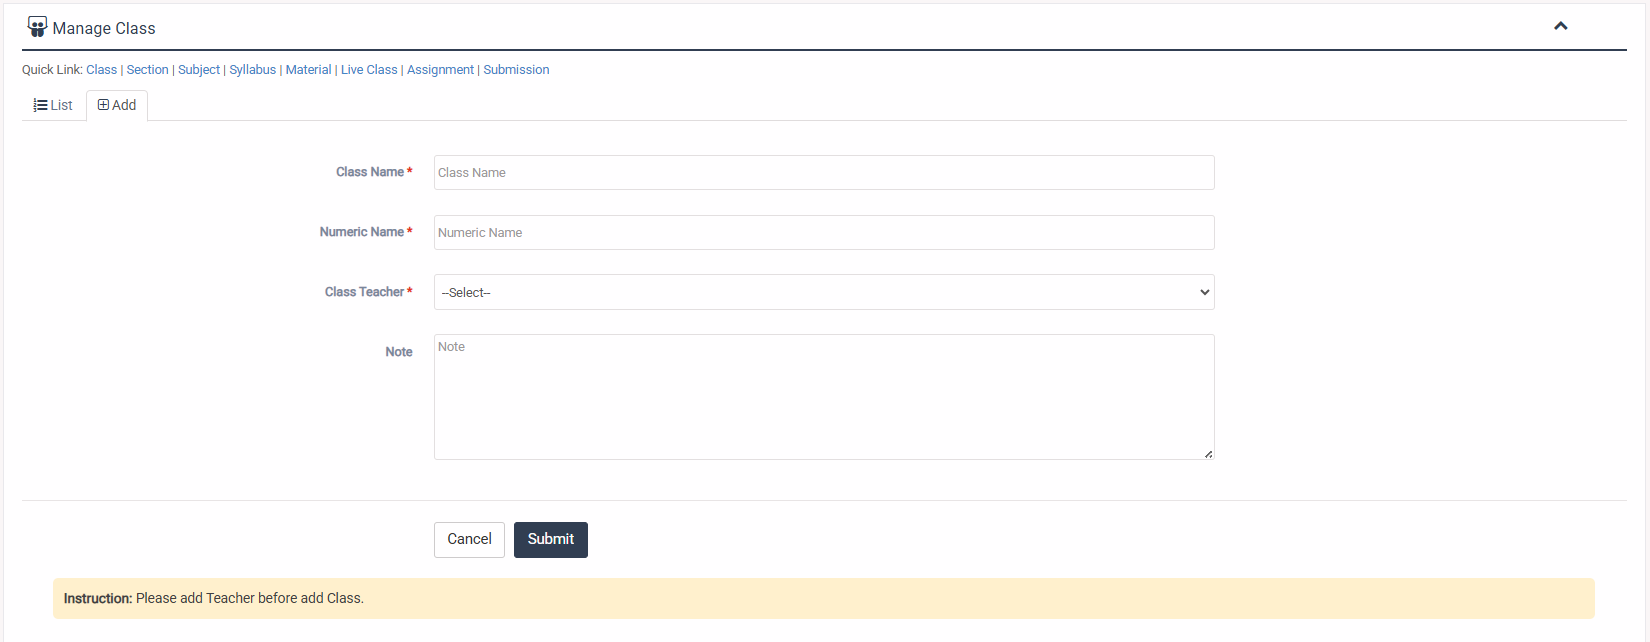
1. Login to System Admin Panel.
2. Select Class menu under Academin main menu from left side bar.
3. To Add/Create new Class click Add Class  tab.
4. To Edit Class Click Edit  button in the Class list.
5. To Delete Class Click Delete  button in the Class List.
6. You are done with Manage Class feature.
Instruction: Please add Teacher before add Class.

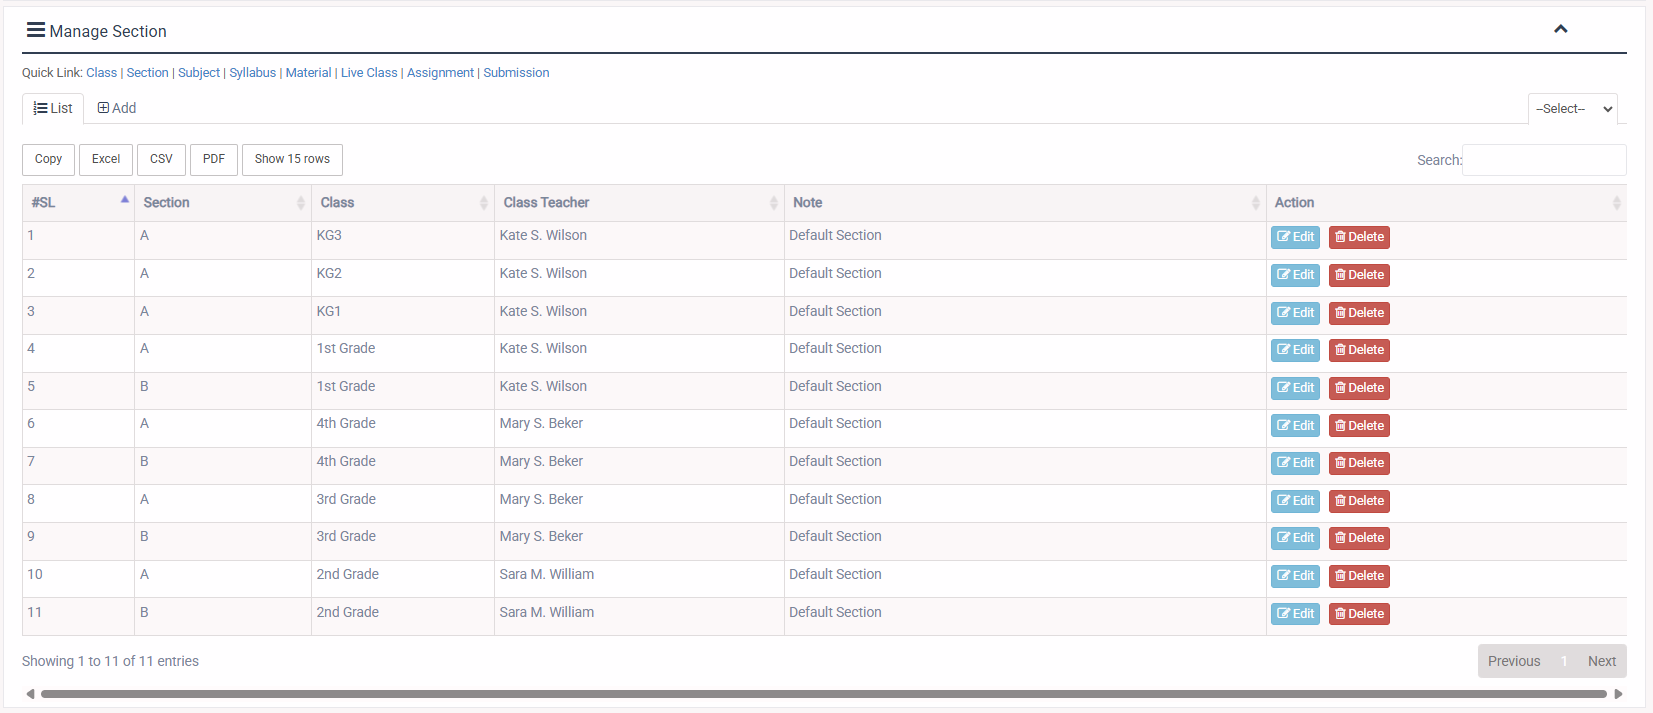
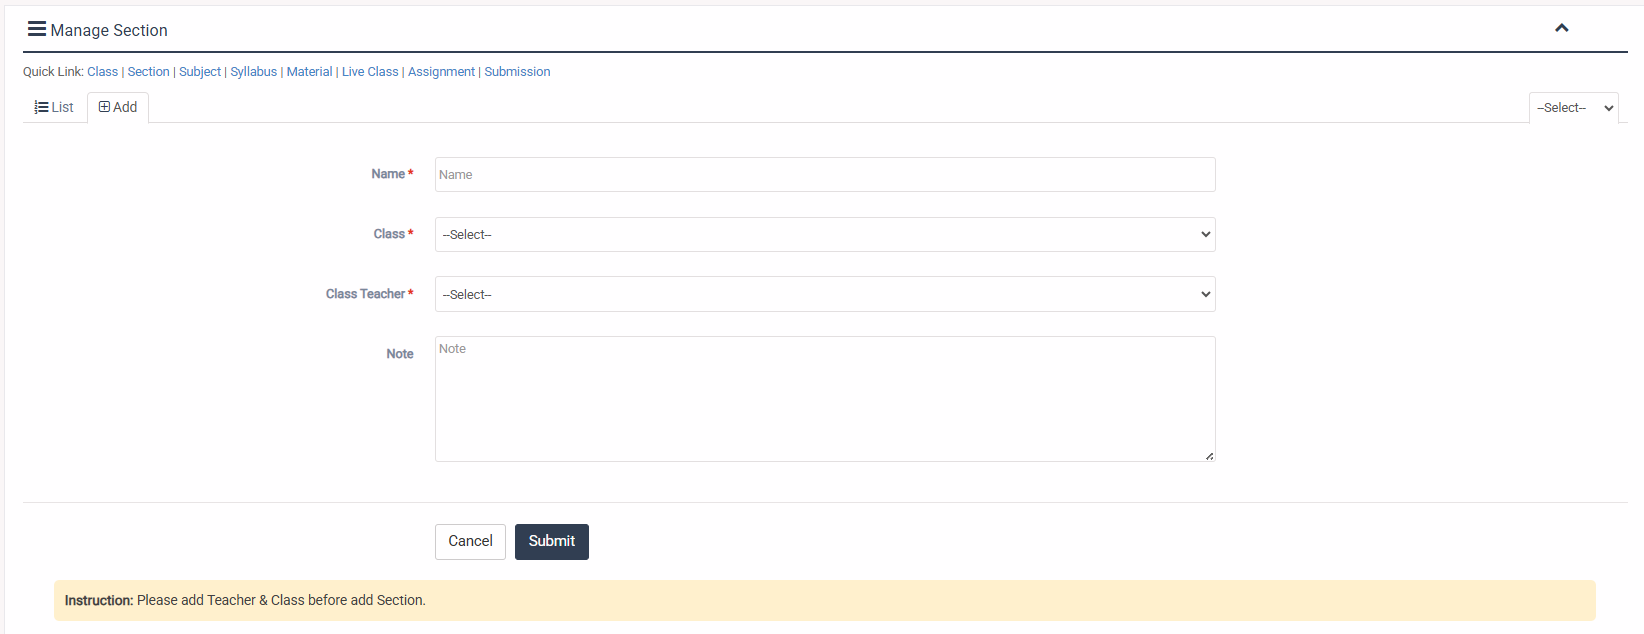
1. Login to System Admin Panel.
2. Select Section sub menu under Academic main menu from left side bar.
3. To Add/Create new Section click Add Section  tab.
4. To Edit Section Click Edit  button in the Section list.
5. To Delete Section Click Delete  button in the Section List.
6. You are done with Manage Section feature.
Instruction: Please add Teacher & Class before add Section.
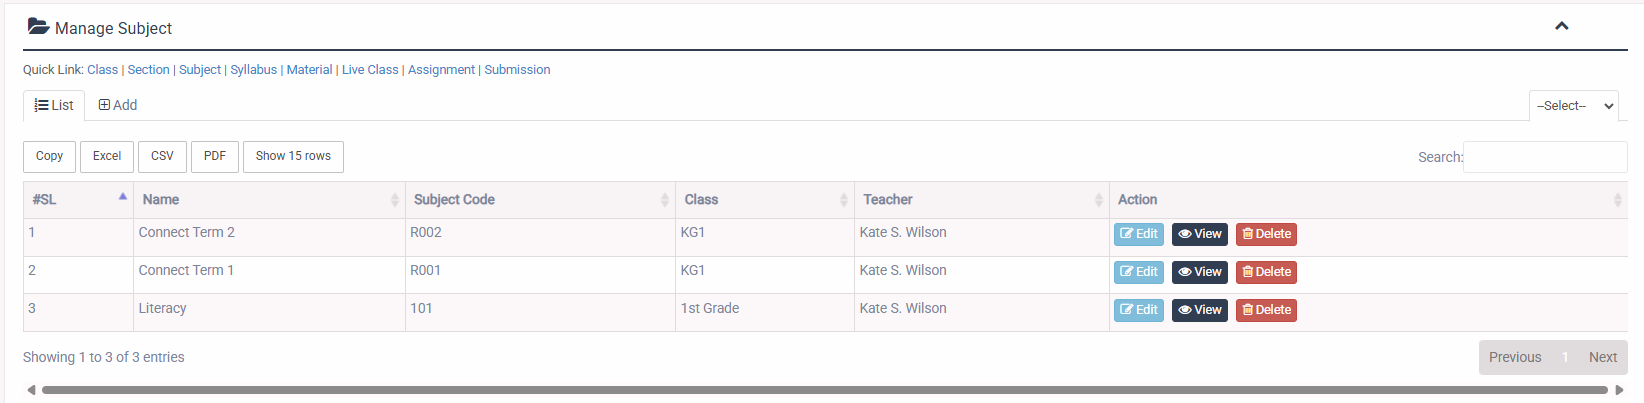
1. Login to System Admin Panel.
2. Select Subject sub menu under Academic main menu from left side bar.
3. To Add/Create new Subject click Add Subject  tab.
4. To Edit Subject Click Edit  button in the Subject list.
5. To Delete Subject Click Delete  button in the Subject List.
6. You are done with Manage Section feature.

1. Login to System Admin Panel.
2. Select Syllabus sub menu under Academic main menu from left side bar.
3. To Add/Create new Syllabus click Add Syllabus  tab.
4. To Edit Syllabus Click Edit  button in the Syllabus list.
5. To Delete Syllabus Click Delete  button in the Syllabus List.
6. You are done with Manage Syllabus feature.
Instruction: Please add academic year before create syllabus.


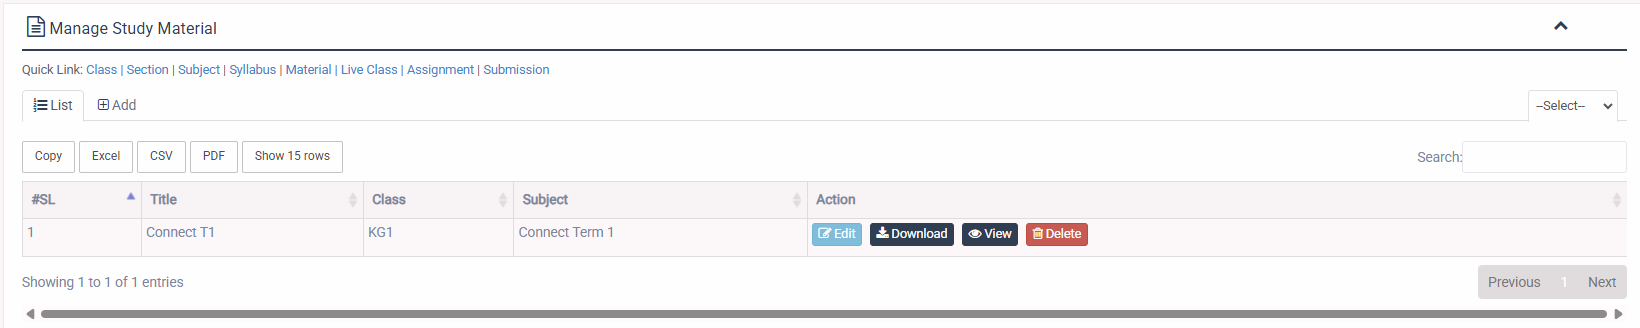
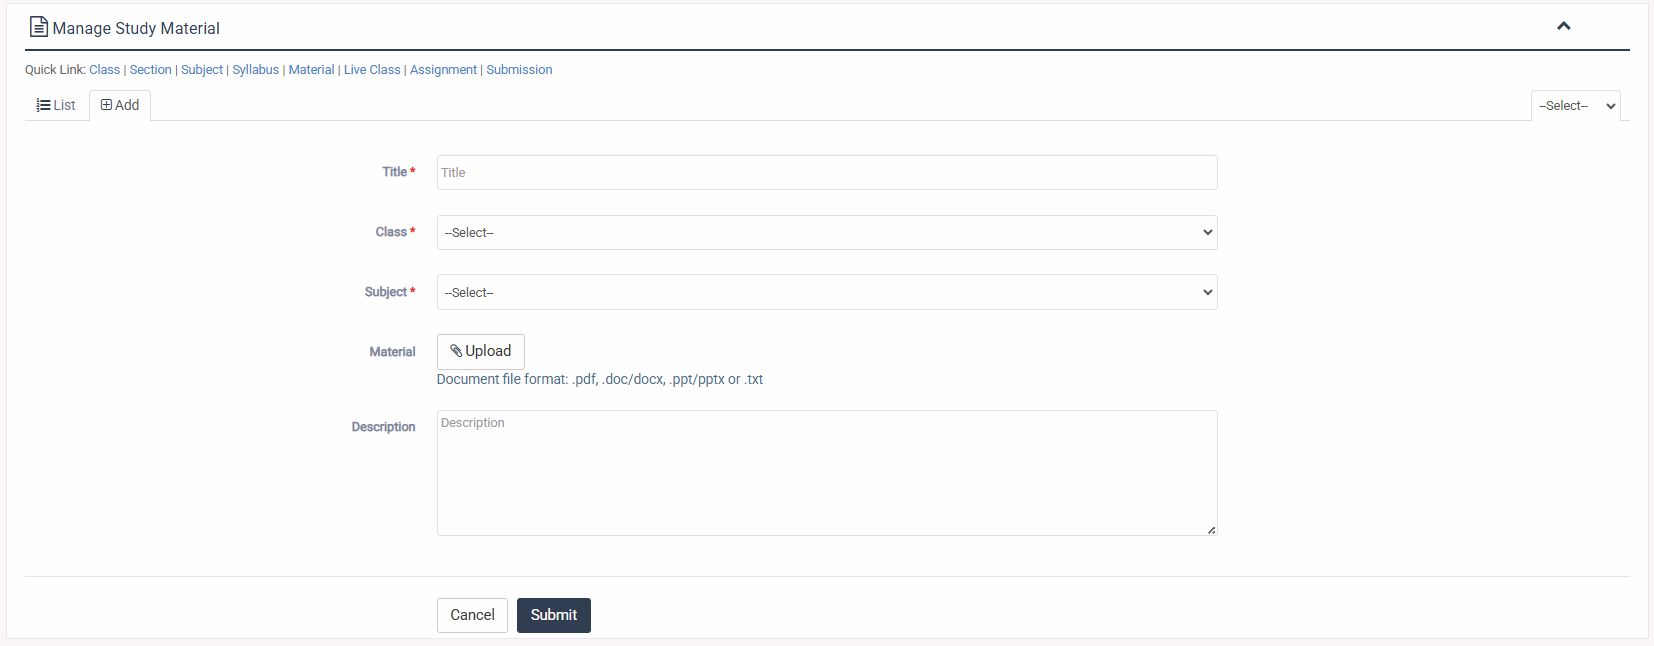
1. Login to System Admin Panel.
2. Select Study Material sub menu under Academic main menu from left side bar.
3. To Add/Create new Study Material click Add Study Material  tab.
4. To Edit Study Material Click Edit button in the Study Material list.
5. To Delete Study Material Click Delete button in the Study Material List.
6. You are done with Manage Study Material feature.
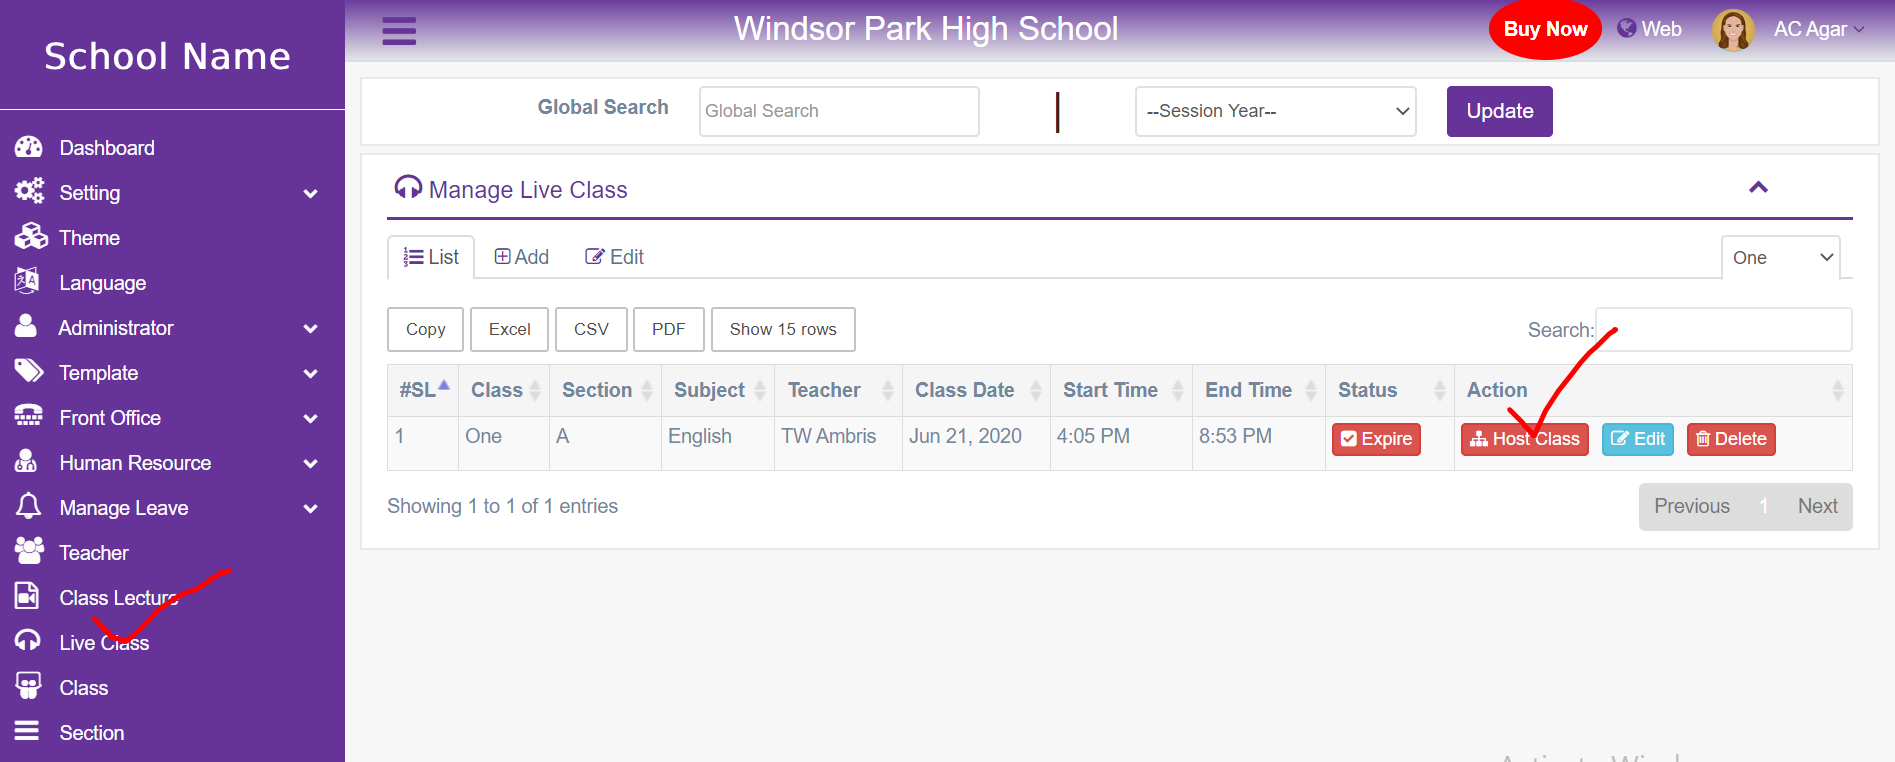
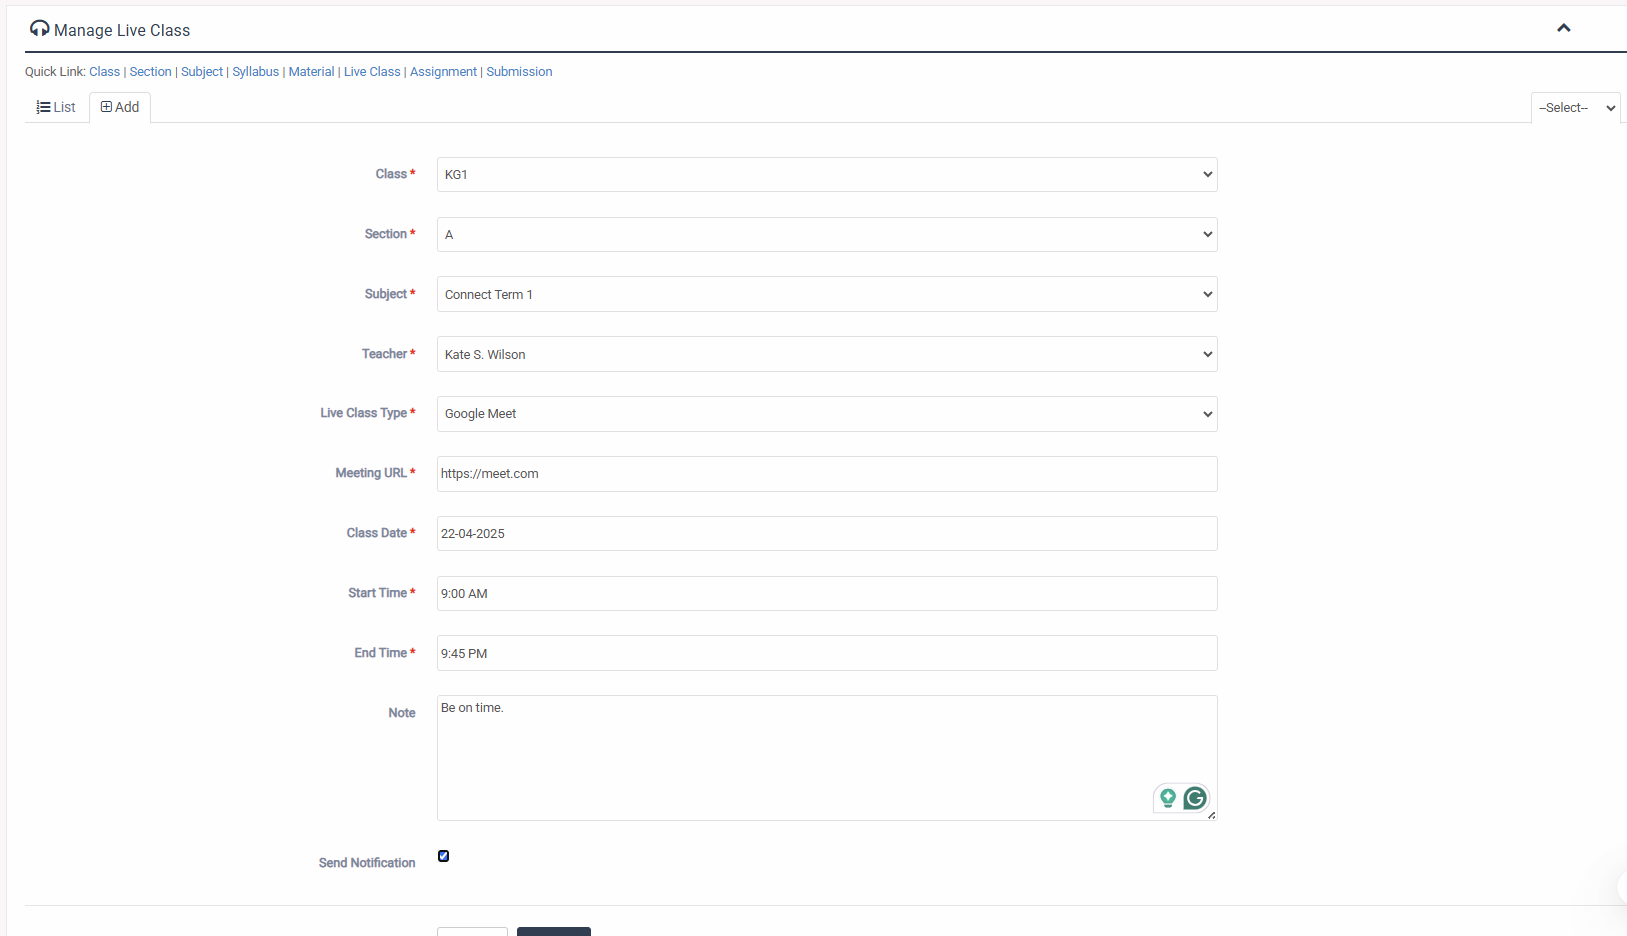
1. Login to System Admin Panel.
2. Select Live Class sub menu under Academic main menu from left side bar.
3. To Add/Create new Live Class click Add tab.
4. To Edit Live Class Click Edit button in the Class Routine list.
5. To Delete Live Class Click Delete button in the Class Routine List.
6. You are done with Live Class feature.

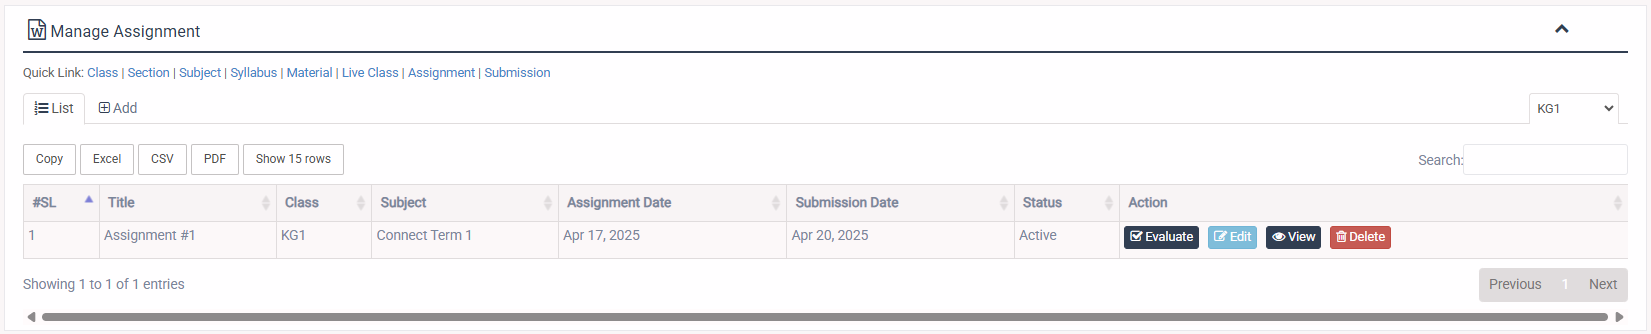
1. Login to System Admin Panel.
2. Select Assignment sub menu under Academic main menu from left side bar.
3. To Add/Create new Assignment click Add tab.
4. To Edit Assignment Click Edit button in the Study Material list.
5. To Delete Assignment Click Delete button in the Study Material List.
6. You are done with Assignment feature.
Instruction: Please add Class & Subject before add Assignment.

1. Login to System Admin Panel.
2. Select Submission sub menu under Academic main menu from left side bar.
3. To Add/Create new Submission click Add tab.
4. To Edit Submission Click Edit button in the Study Material list.
5. To Delete Submission Click Delete  button in the Study Material List.
6. You are done with Manage Submission feature.


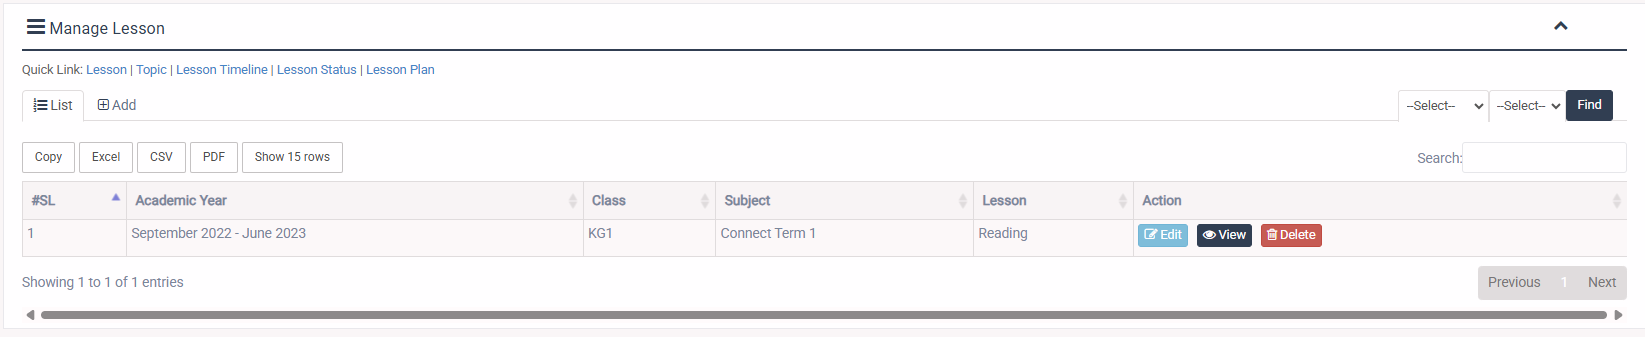
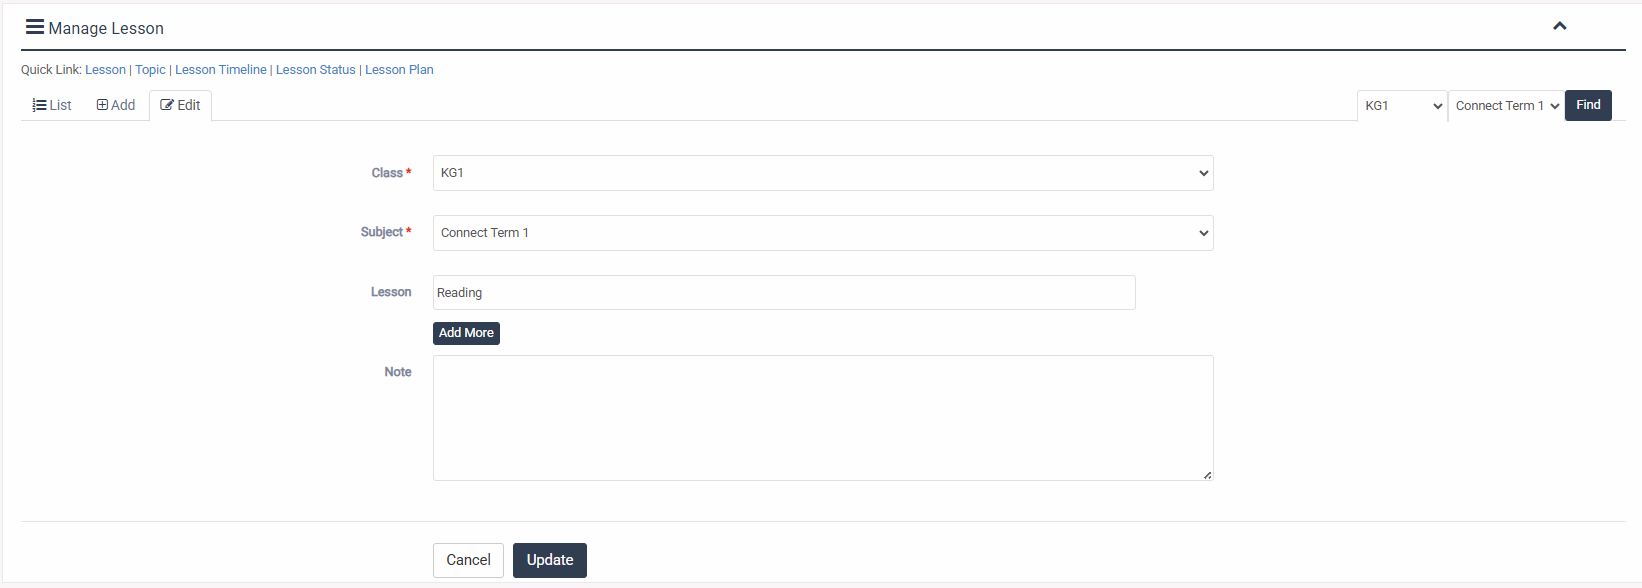
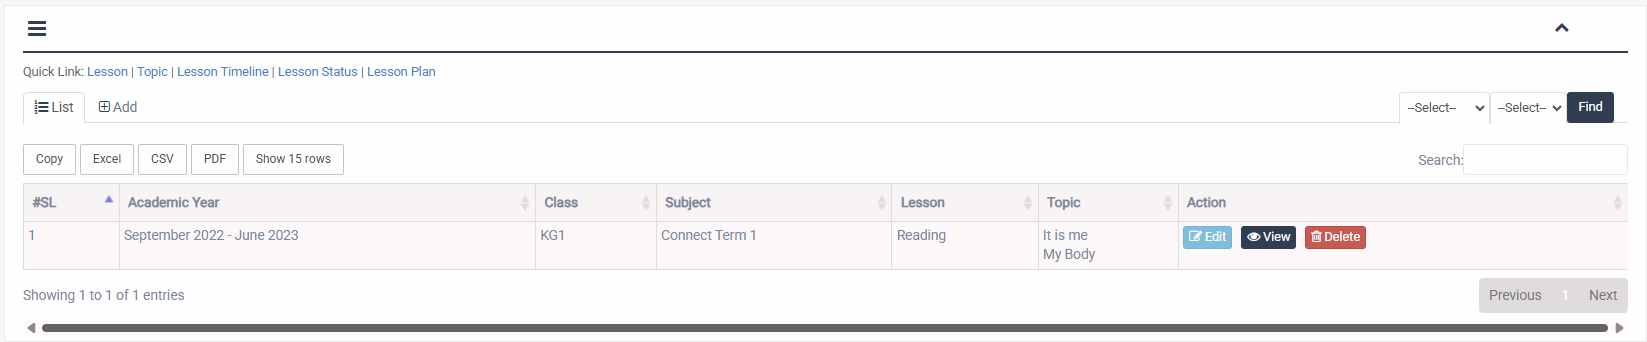
1. Login to System Admin Panel.
2. Select Lesson menu under Lesson Plan main menu from left side bar.
3. To Add/Create new Lesson click Add Lesson tab.
4. To Edit Lesson Click Edit button in the Lesson list.
5. To Delete Lesson Click Delete button in the Lesson List.
6. You are done with Manage Lesson feature.
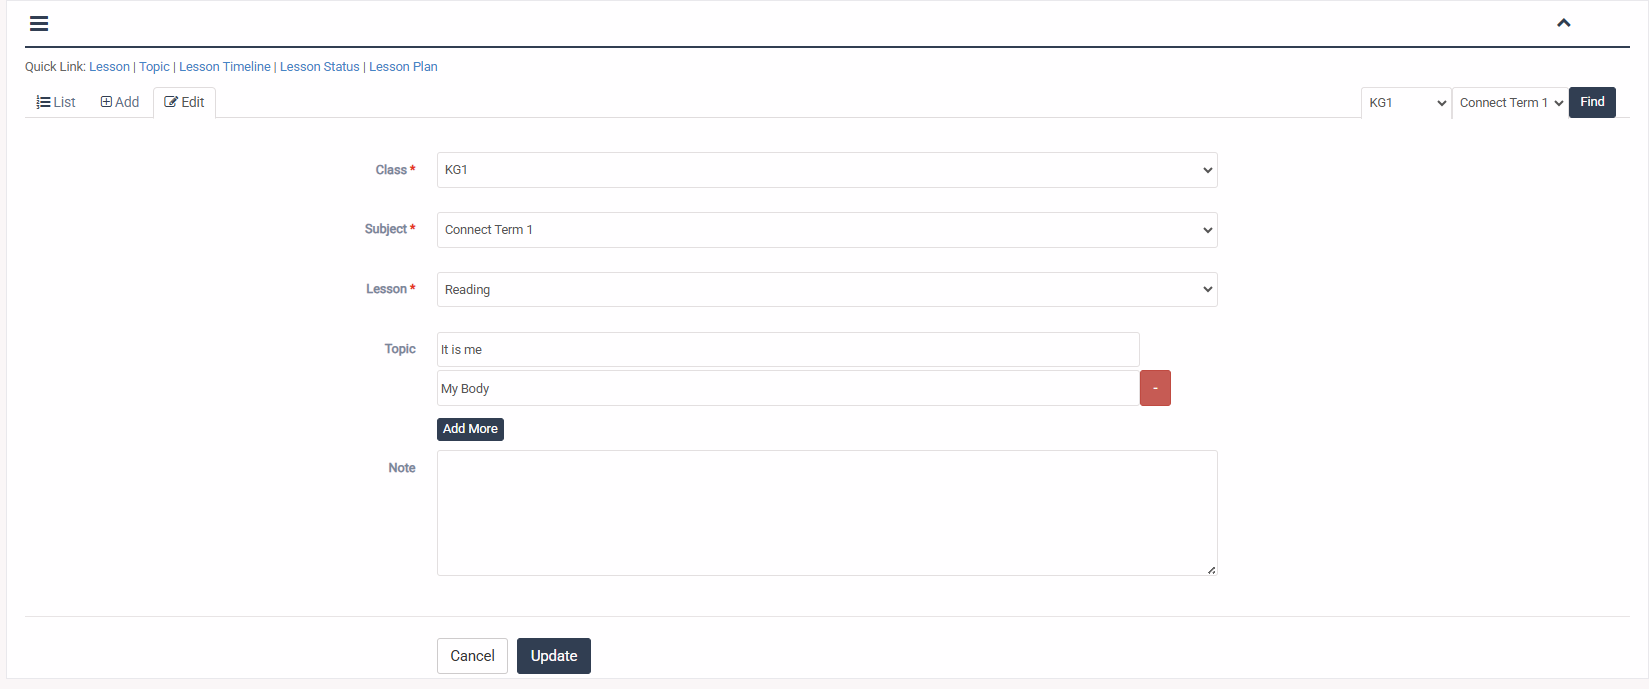
1. Login to System Admin Panel.
2. Select Topic menu under Lesson Plan main menu from left side bar.
3. To Add/Create new Topic click Add Lesson tab.
4. To Edit Topic Click Edit button in the Topic list.
5. To Delete Topic Click Delete button in the Topic List.
6. You are done with Manage Topic feature.
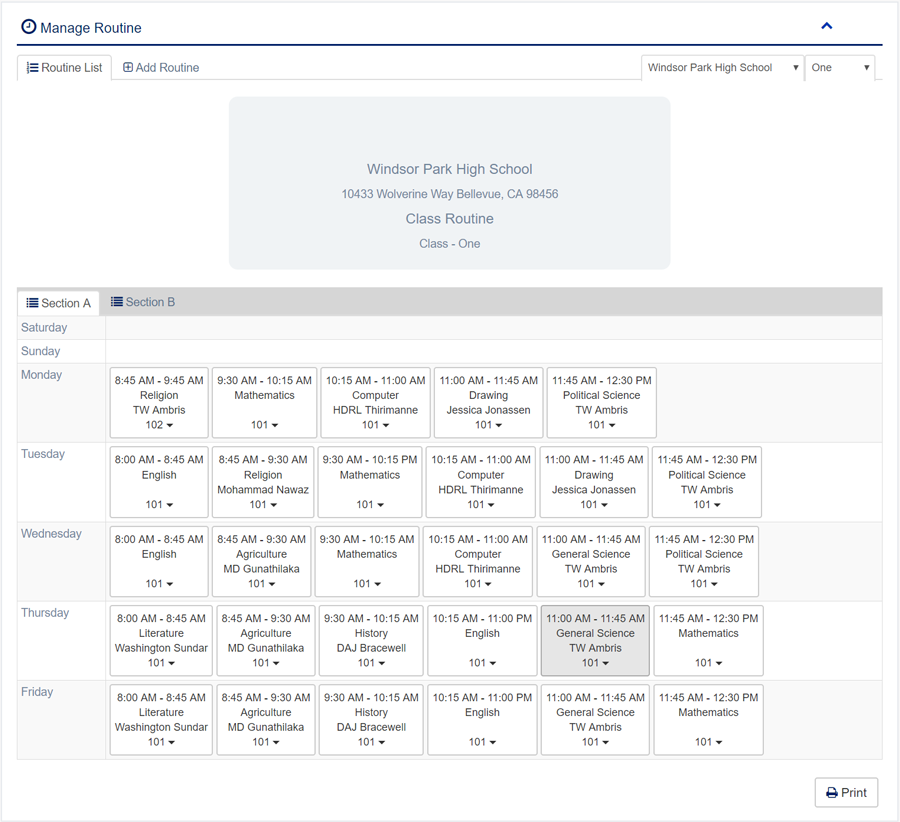
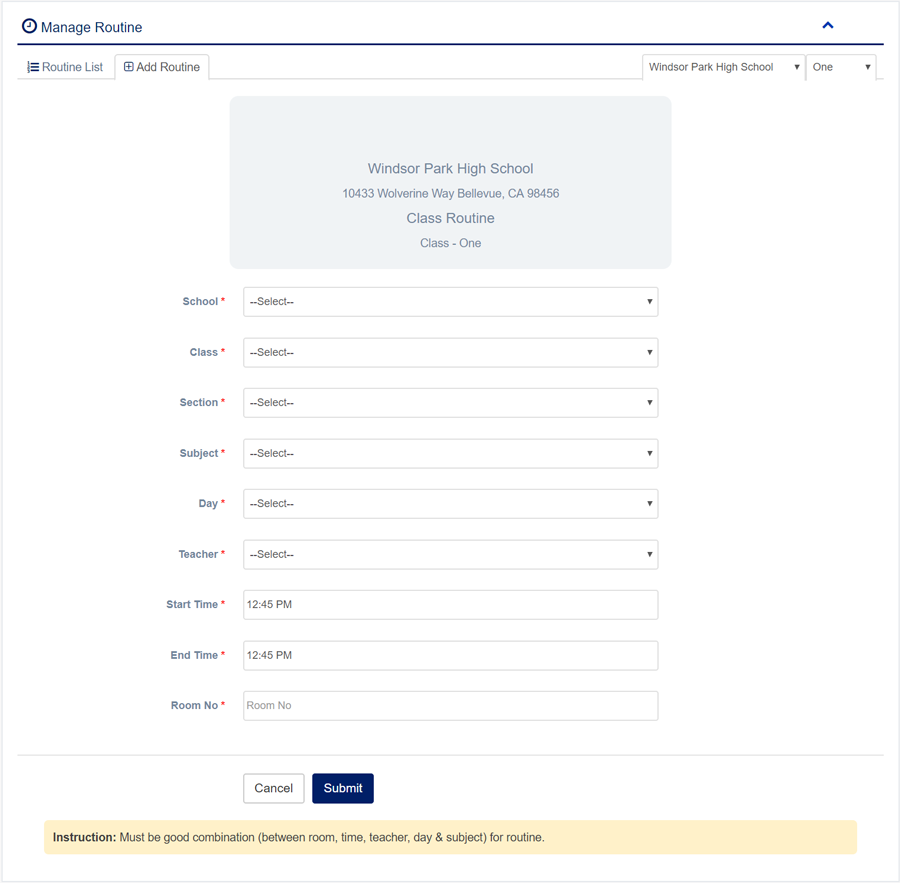
1. Login to System Admin Panel.
2. Select Class sub menu under Class Routine main menu from left side bar.
3. To Add/Create new Class Routine click Add Class Routine  tab.
4. To Edit Class Routine Click Edit button in the Class Routine list.
5. To Delete Class Routine Click Delete button in the Class Routine List.
6. You are done with Manage Class Routine feature.
Instruction: Must be good combination (between room, time, teacher, day & subject) for routine.
1. Login to System Admin Panel.
2. Select Guardian main menu from left side bar.
3. To Add/Create new Guardian click Add Guardian  tab.
4. To Edit Guardian Click Edit  button in the Guardian list.
5. To Delete Guardian Click Delete  button in the Guardian List.
6. You are done with Manage Guardian feature.


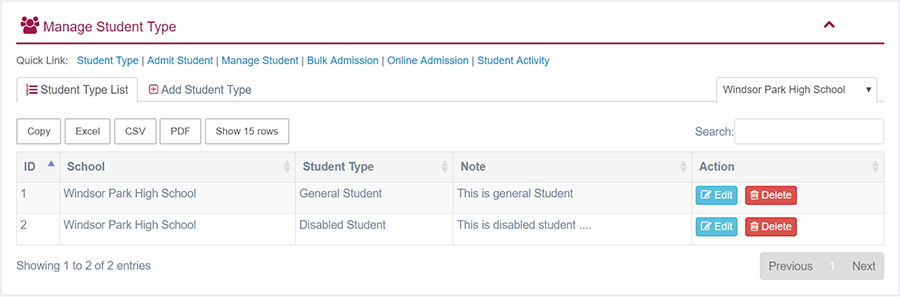
1. Login to System Admin Panel.
2. Select Student Type sub menu under Student Type main menu from left side bar.
3. To Add/Create new Student Type click Add Student Type  tab.
4. To Edit Student Type Click Edit button in the Student Type list.
5. To Delete Student Type Click Delete button in the Student Type List.
6. You are done with Manage Student feature.

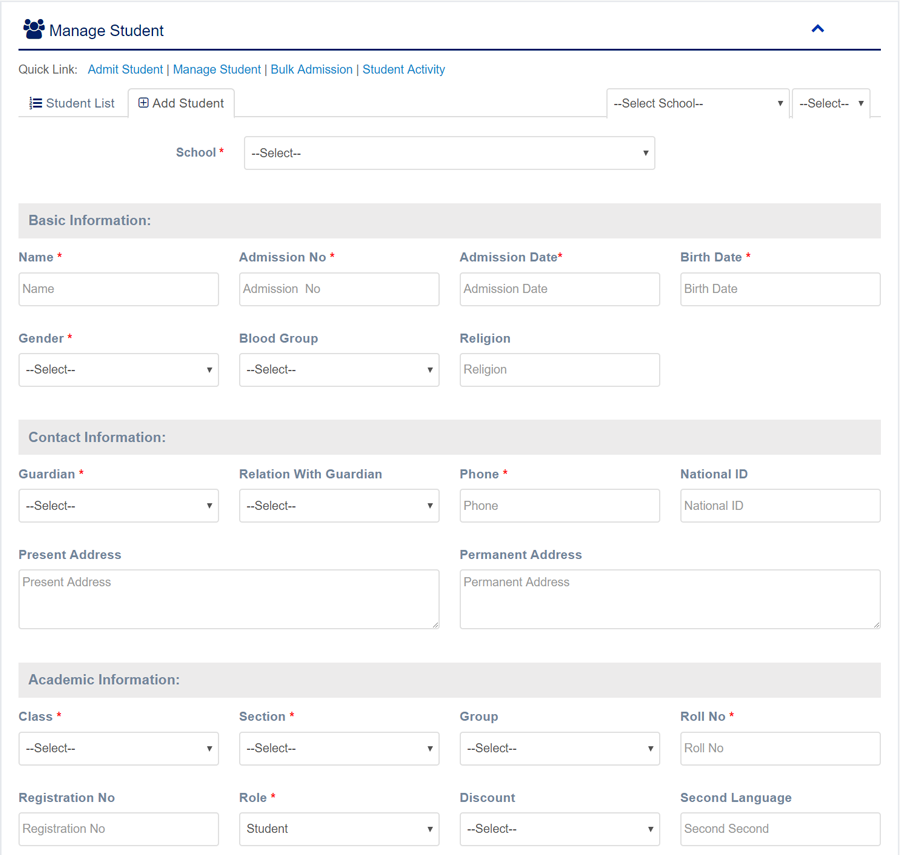
1. Login to System Admin Panel.
2. Select Student sub menu under Student main menu from left side bar.
3. To Add/Create new Student click Add Student tab.
4. To Edit Student Click Edit button in the Student list.
5. To Delete Student Click Delete button in the Student List.
6. You are done with Manage Student feature.

1. Login to System Admin Panel.
2. Select Admit Student sub menu under Student main menu from left side bar.
3. To Add/Create new Student Please fill up the form and click submit button.
4. You are done with Manage Guardian feature.
1. Login to System Admin Panel.
2. Select Bulk Admission sub menu under Student main menu from left side bar.
3. To Add/Create new Bulk Admission Please follow the bulk upload process instruction in the Bulk Admission page.
6. You are done with Bulk Admission feature.

Instruction:
- First select the Academic Year, Class, and Section
- Generate CSV file
- Open the downloaded CSV file and enter student information with a unique username
- Gender: [ male, female ] *
- Academic Group: [ science, arts, commerce ]
- Blood Group: [ a_positive, a_negative, b_positive, b_negative, o_positive, o_negative, ab_positive, ab_negative ]
- Take the Student Type ID from the Student Type list Student Type
- Take the Dsicount ID from here Discount
- Save the edited CSV file
- Upload the CSV file you just edited and submit

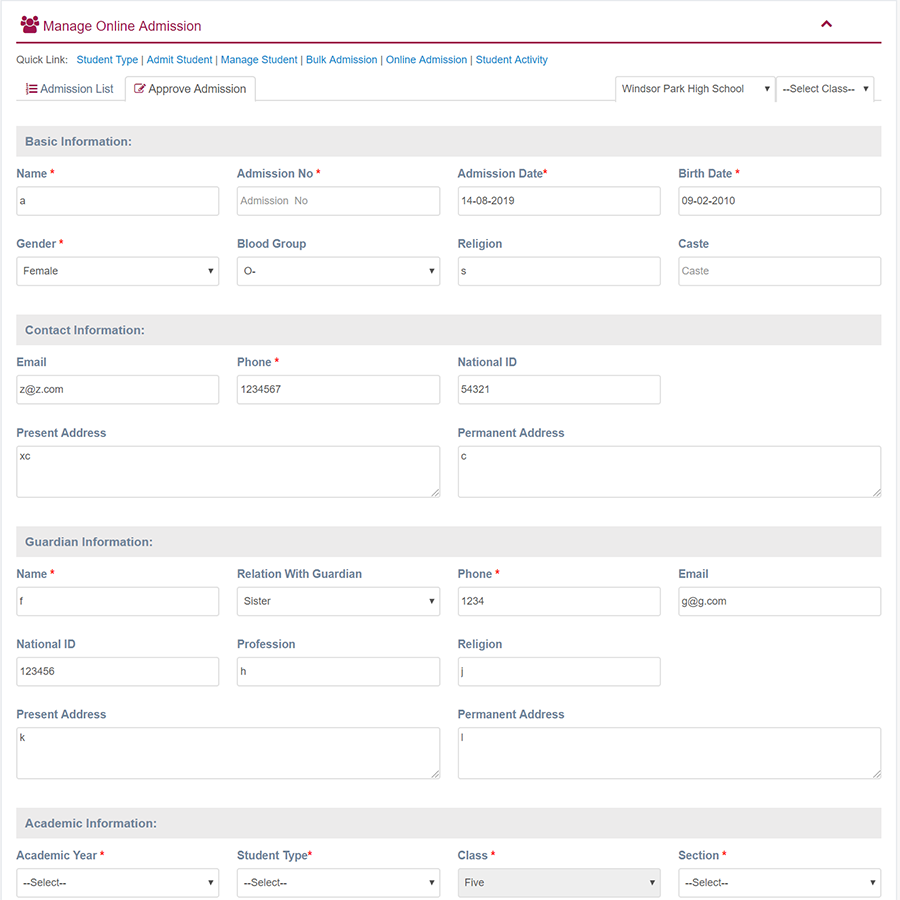
1. Login to System Admin Panel.
2. Select Online Admission sub menu under Student main menu from left side bar.
4. To Approve Online Admission Click Approve button in the Online Admission list.
5. To Delete Online Admission Click Delete button in the Online Admission List.
6. You are done with Manage Online Admission feature.

1. Login to System Admin Panel.
2. Select Student Activity sub menu under Student main menu from left side bar.
3. To Add/Create new Student Activity click Add Activity  tab.
4. To Edit Activity Click Edit button in the Activity list.
5. To Delete Student Click Delete button in the Activity List.
6. You are done with Manage Student Activity feature.


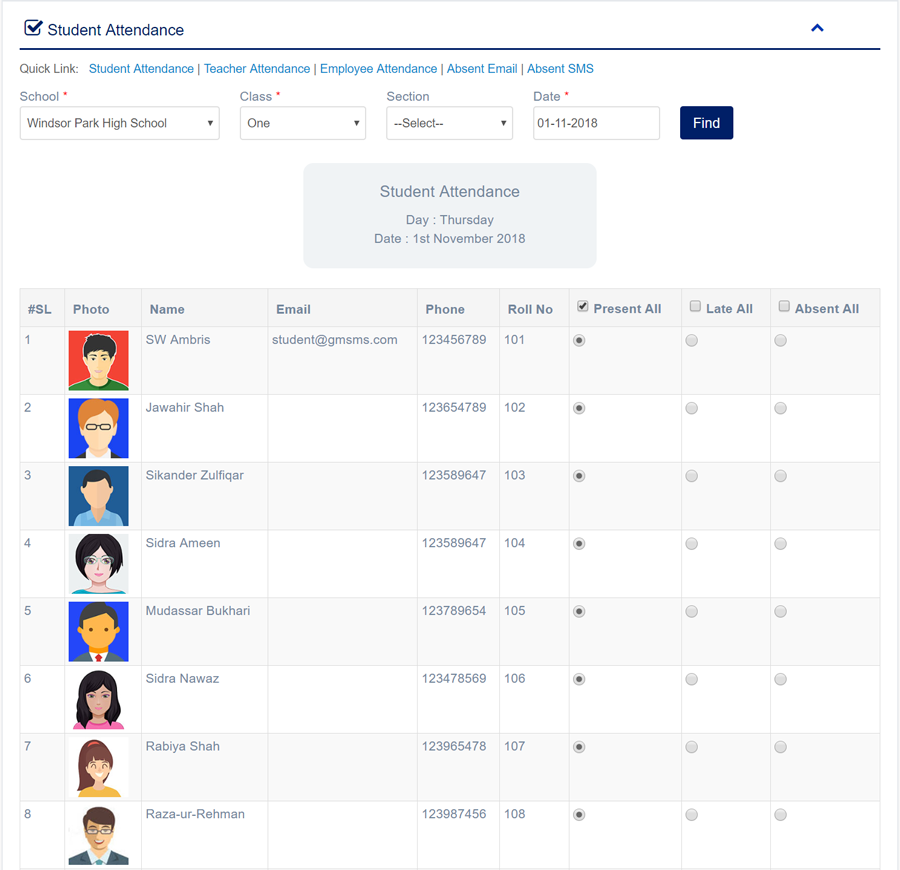
1. Login to System Admin Panel.
2. Select Student Attendance sub menu under Attendance main menu from left side bar.
3. Then choose Class, Section & Date
4. Then click Find  button to get Student list
5. To Manage Student Attendance Check for Present All or Late All or Absent All
6. You are done with Student Attendance feature.
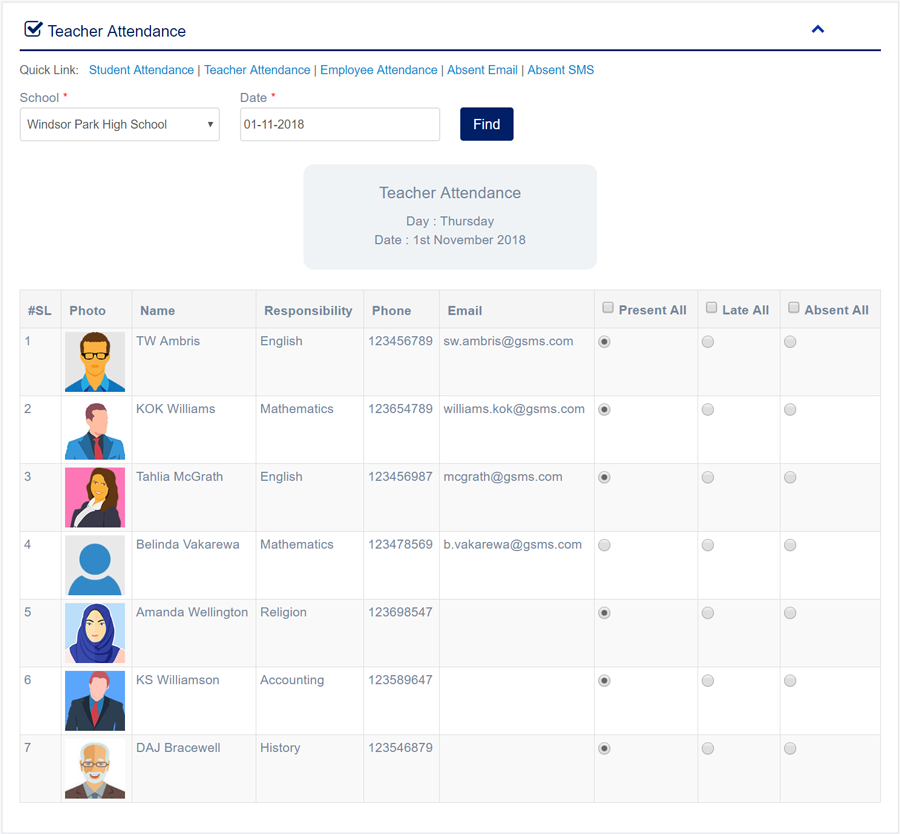
1. Login to System Admin Panel.
2. Select Teacher Attendance sub menu under Attendance main menu from left side bar.
3. Then choose Date  and click  Find  button to get Teacher list
4. To Manage Teacher Attendance Check for Present All or Late All or Absent All
5. You are done with Teacher Attendance feature.
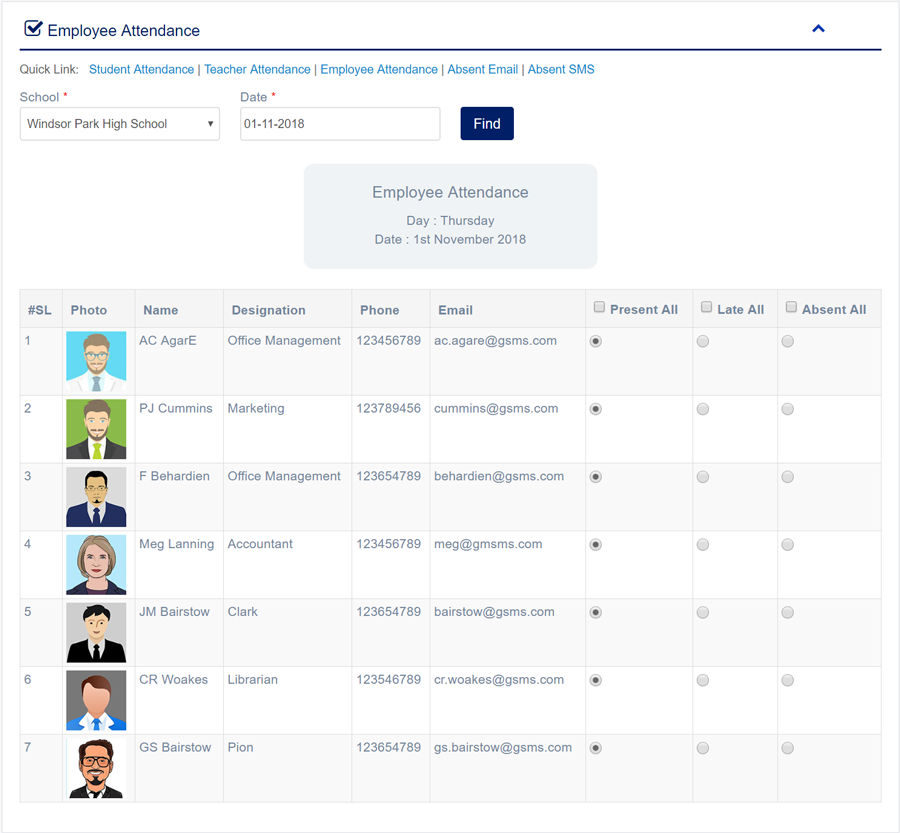
1. Login to System Admin Panel.
2. Select Employee Attendance sub menu under Attendance main menu from left side bar.
3. Then choose Date  and click  Find  button to get Employee list
4. To Manage Employee Attendance Check for Present All or Late All or Absent All
5. You are done with Employee Attendance feature.
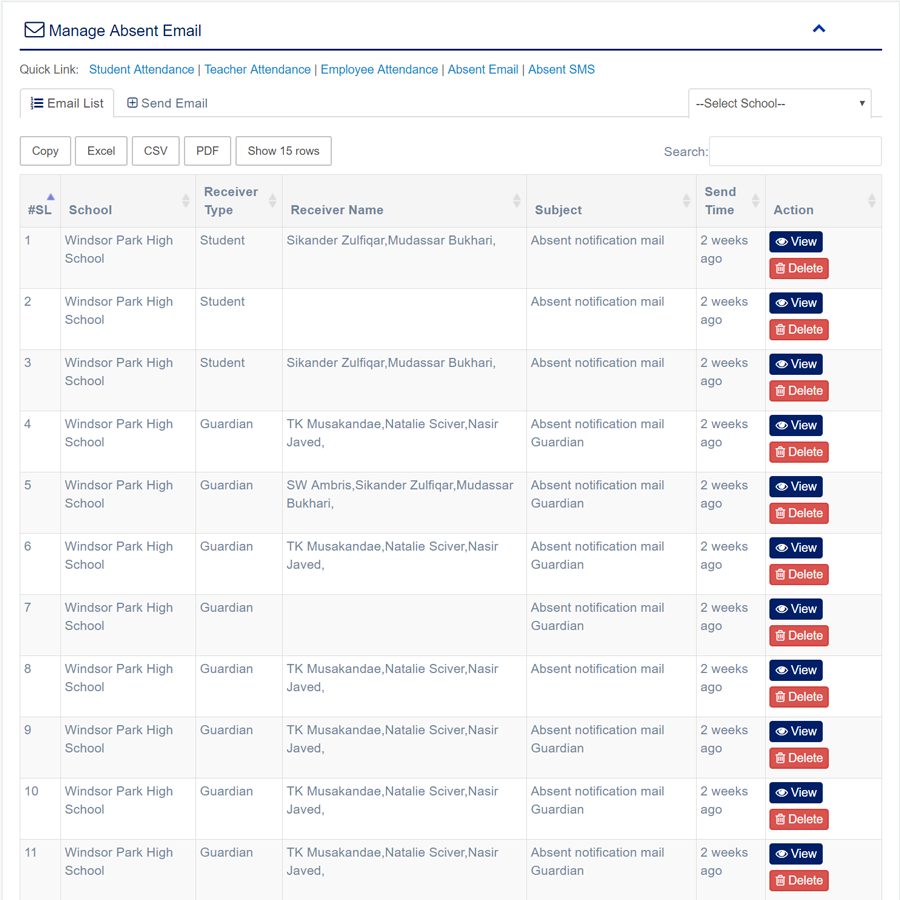
1. Login to System Admin Panel.
2. Select Absent Email sub menu under Attendance main menu from left side bar.
3. To Send Absent Email Click Send Email  tab in the page.
4. To Delete Absent Email Click Delete  button in the Absent Email List.
5. You are done with Absent Email feature.

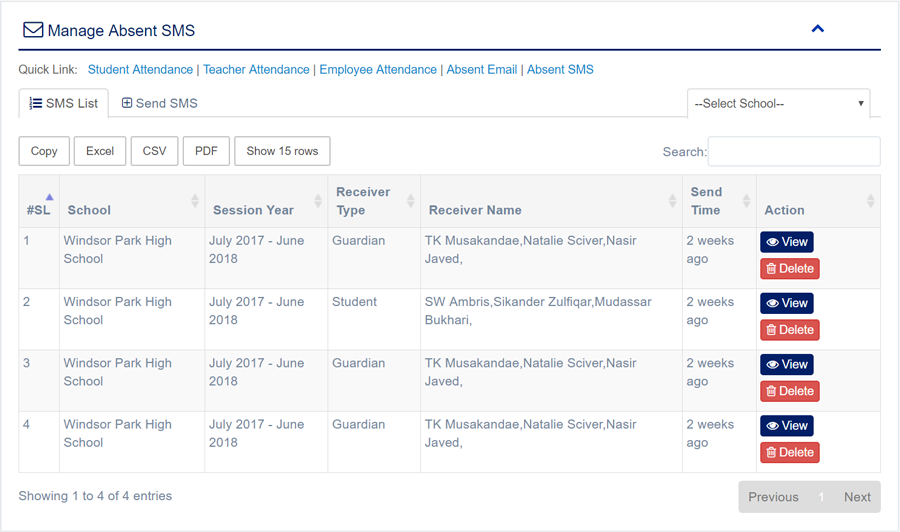
1. Login to System Admin Panel.
2. Select Absent SMS sub menu under Attendance main menu from left side bar.
3. To Send Absent SMS Click Send SMS  tab in the page.
4. To Delete Absent SMS Click Delete  button in the Absent SMS List.
5. You are done with Absent SMS feature.

1. Login to System Admin Panel.
2. Select Id Card Setting sub menu under Generate Card main menu from left side bar.
3. To Add/Create new Id Card Setting click Add Id Card Setting  tab.
4. To Edit Id Card Setting Click Edit  button in the Id Card Setting list.
5. To Delete Id Card Setting Click Delete  button in the Id Card Setting List.
6. You are done with Manage Id Card Setting feature.

- Card Logo
- Top Background
- ID No Background
- Employee/ Teacher/ Student Profile Photo
- Title Font Size / Title Color
- Signature Background
- Card School Name/ School Name Font Size/ School Name Color
- School Address/ School Address Color
- ID No Font Size/ ID No Color
- Value Font Size/ Value Color
- Bottom Signature/ Signature Color/ Signature Align


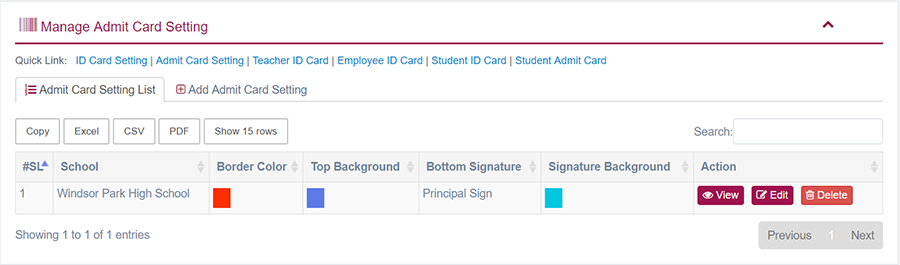
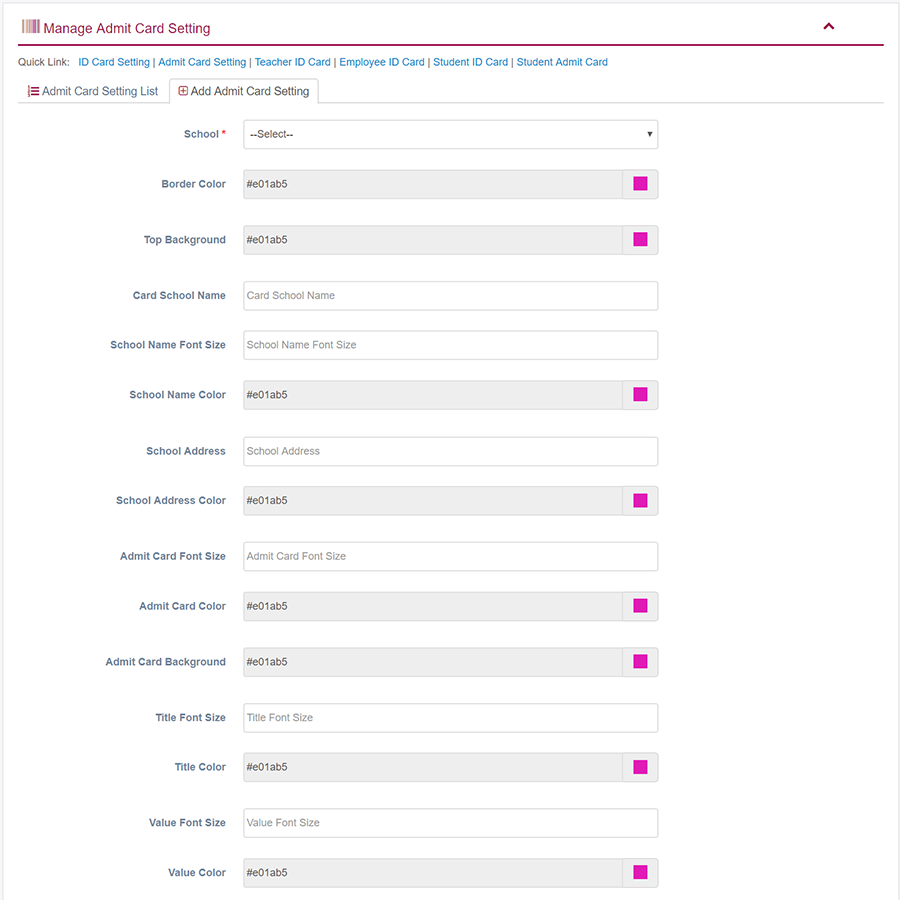
1. Login to System Admin Panel.
2. Select Admit Card Setting sub menu under Generate Card main menu from left side bar.
3. To Add/Create new Admit Card Setting click Add Admit Card Setting  tab.
4. To Edit Admit Card Setting Click Edit  button in the Admit Card Setting list.
5. To Delete Admit Card Setting Click Delete  button in the Admit Card Setting List.
6. You are done with Manage Admit Card Setting feature.

- Admit Card Logo
- Top Background
- Admit Card Background
- Card School Name/ School Name Font Size/ School Name Color
- School Address / School Address Color
- Admit Card Font Size/ Admit Card Color
- Exam Font Size/ Exam Color
- Student Profile Photo
- Title Font Size/ Title Color
- Signature Background
- Bottom Signature/ Signature Color/ Signature Align
- Value Font Size/ Value Color
- Subject Font Size/ Subject Color
- Subject Head
1. Login to System Admin Panel.
2. Select Teacher ID Card sub menu under Generate Card main menu from left side bar.
3. Then choose Teacher  and click  Find  button to get Teacher ID Card list
4. You are done with generate Teacher ID Card feature.

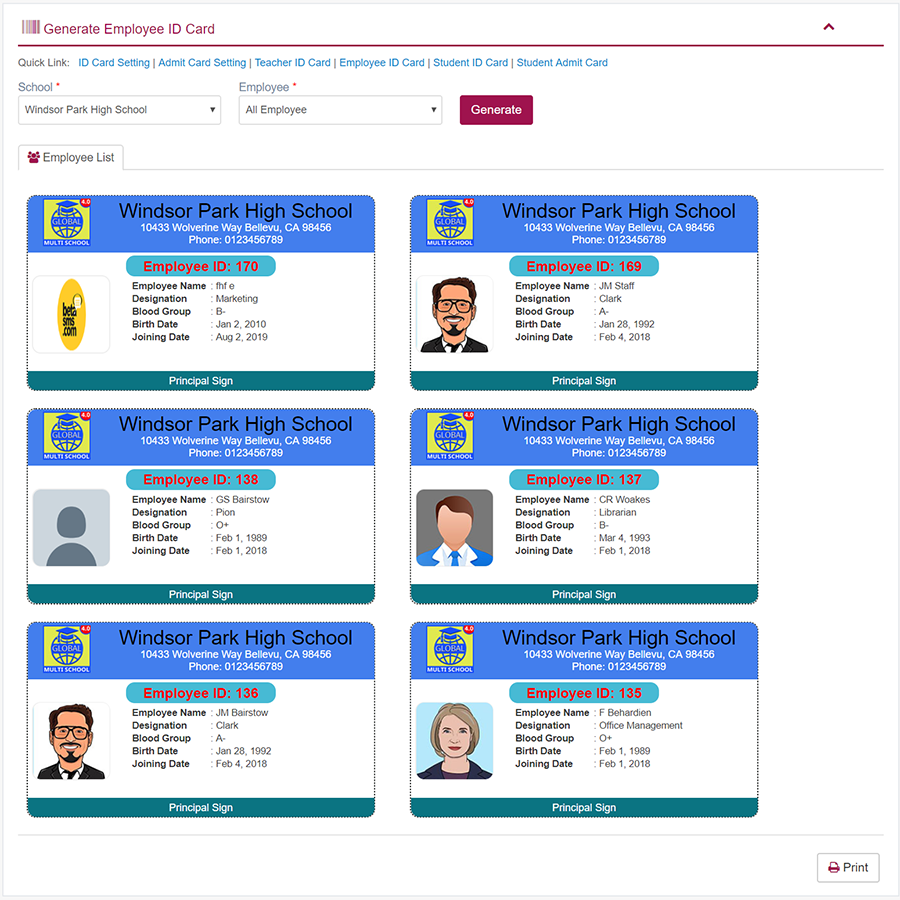
1. Login to System Admin Panel.
2. Select Employee ID Card sub menu under Generate Card main menu from left side bar.
3. Then choose Employee  and click  Find  button to get Employee ID Card list
4. You are done with generate Employee ID Card feature.
1. Login to System Admin Panel.
2. Select Student ID Card sub menu under Generate Card main menu from left side bar.
3. Then choose Class/Section/Student  and click  Find  button to get Student ID Card list
4. You are done with generate Student ID Card feature.

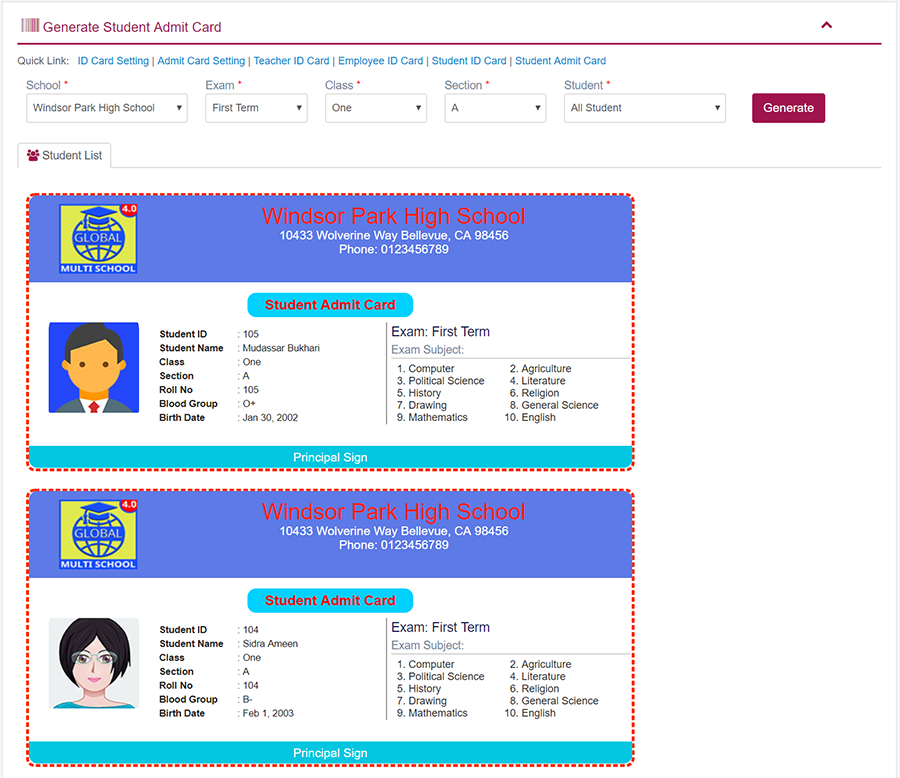
1. Login to System Admin Panel.
2. Select Student Admit Card sub menu under Generate Card main menu from left side bar.
3. Then choose Class/Section/Student   and click  Find  button to get Student Admit Card list
4. You are done with generate Student ID Card feature.
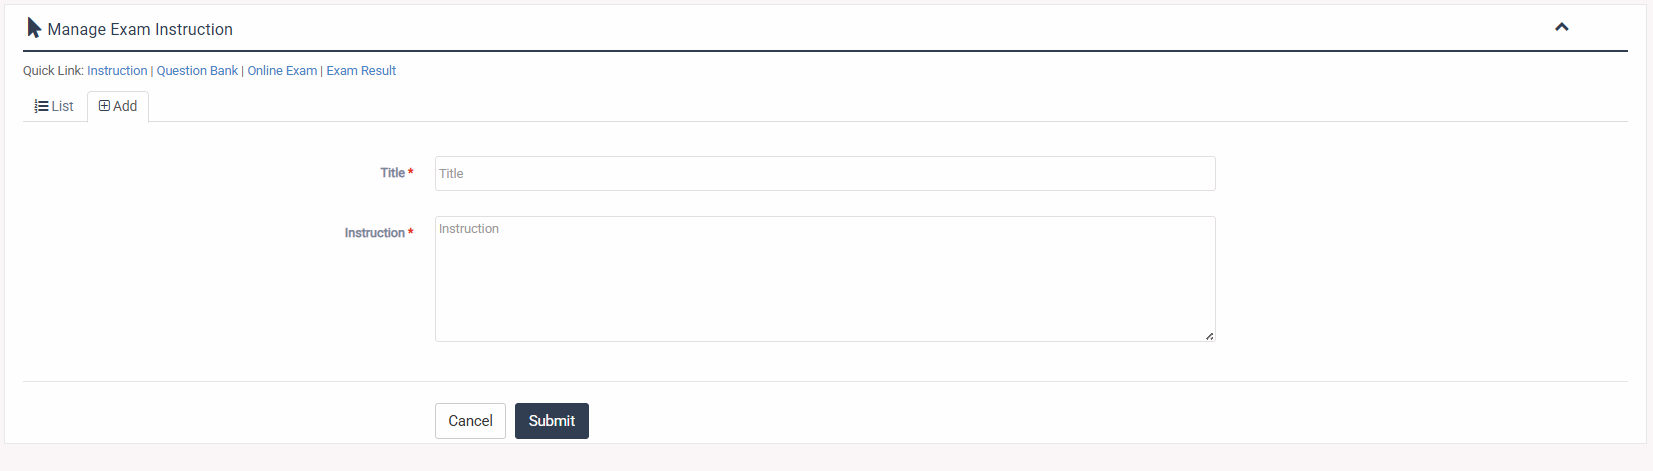
1. Login to System Admin Panel.
2. Select Instruction sub menu under Online Exam main menu from left side bar.
3. To Add/Create new Instruction click Add tab.
4. To Edit Instruction Click Edit button in the Instruction list.
5. To Delete Instruction Click Delete button in the Instruction List.
6. You are done with Instruction feature.
1. Login to System Admin Panel.
2. Select Question Bank sub menu under Online Exam main menu from left side bar.
3. To Add/Create new Question Bank click Add tab.
4. To Edit Question Click Edit button in the Question Bank list.
5. To Delete Question Click Delete button in the Question Bank List.
6. To list all Questions Select the Grade and Subject and click on find button.
6. You are done with Manage Question Bank feature.


1. Login to System Admin Panel.
2. Select Online Exam sub menu under Online Exam main menu from left side bar.
3. To Add/Create new Online Exam click Add tab.
4. To Edit Online Exam Click Edit button in the Online Exam list.
5. To Delete Discount Click Delete button in the Online Exam List.
6. You are done with Manage Online Exam feature.
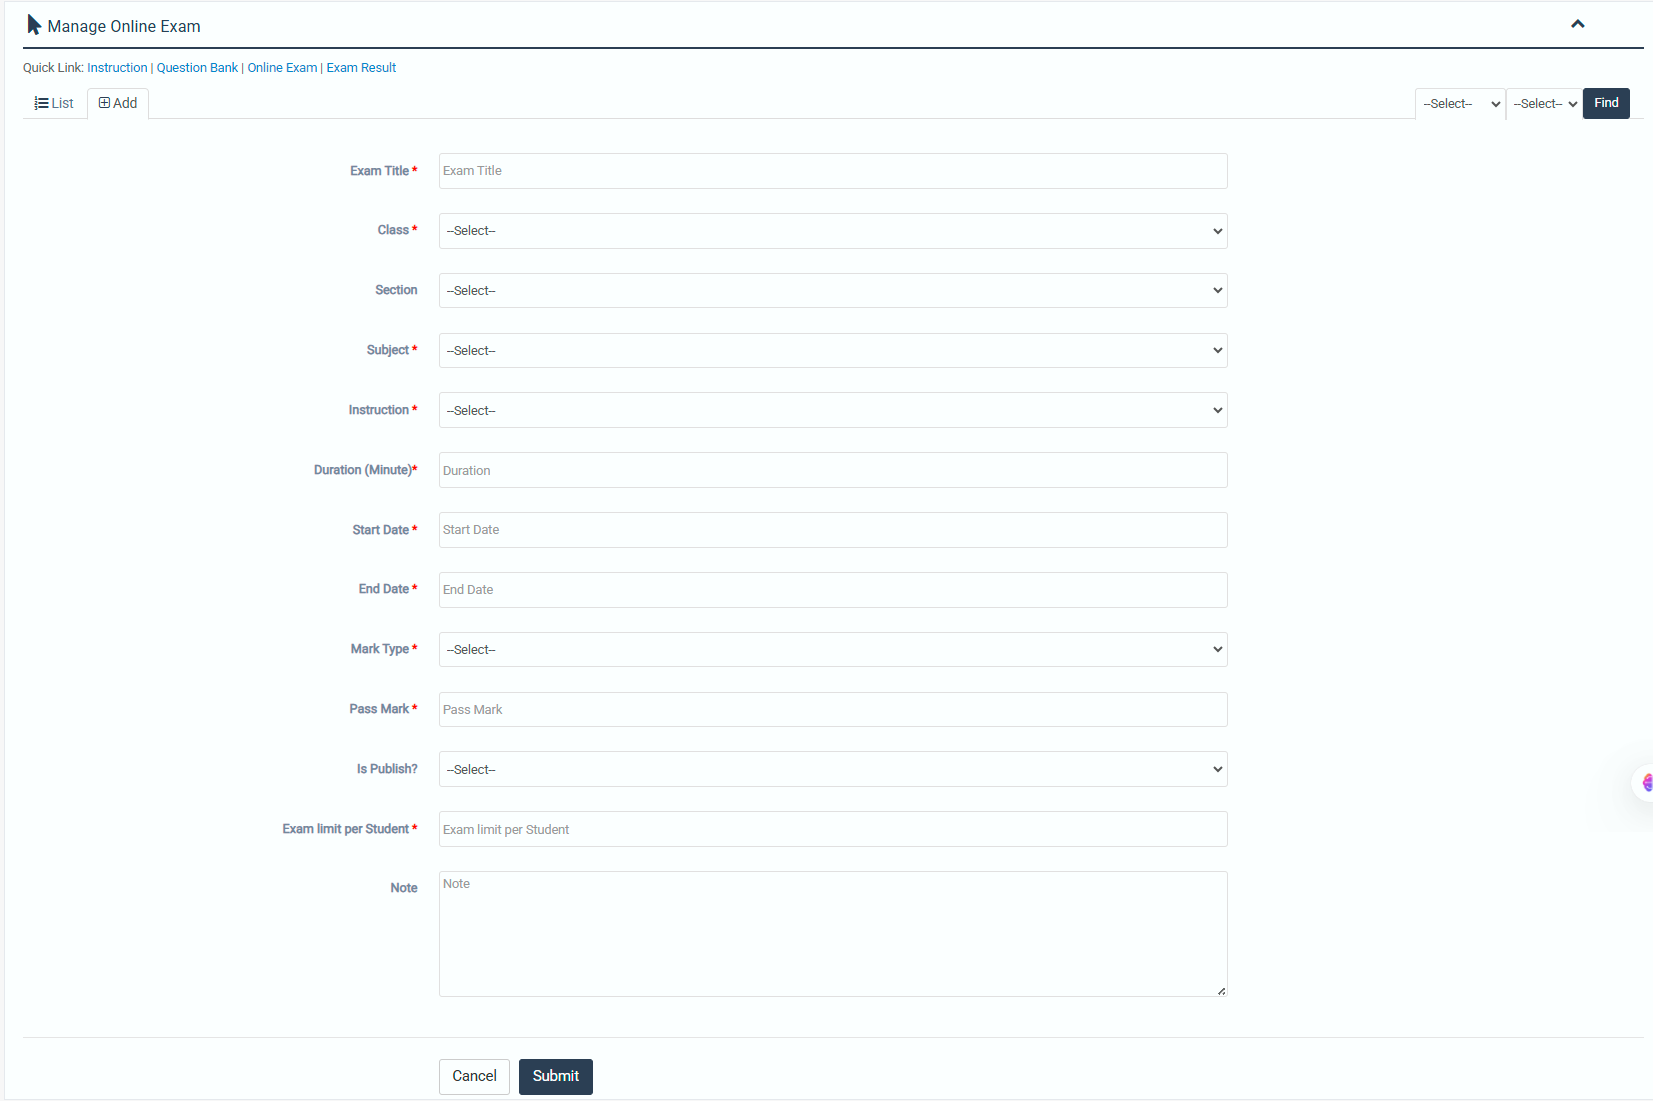

To add questions to the online exam:
1. Click on the Add Question button.
2. Click on the blue action button and all previously added questions will be listed.

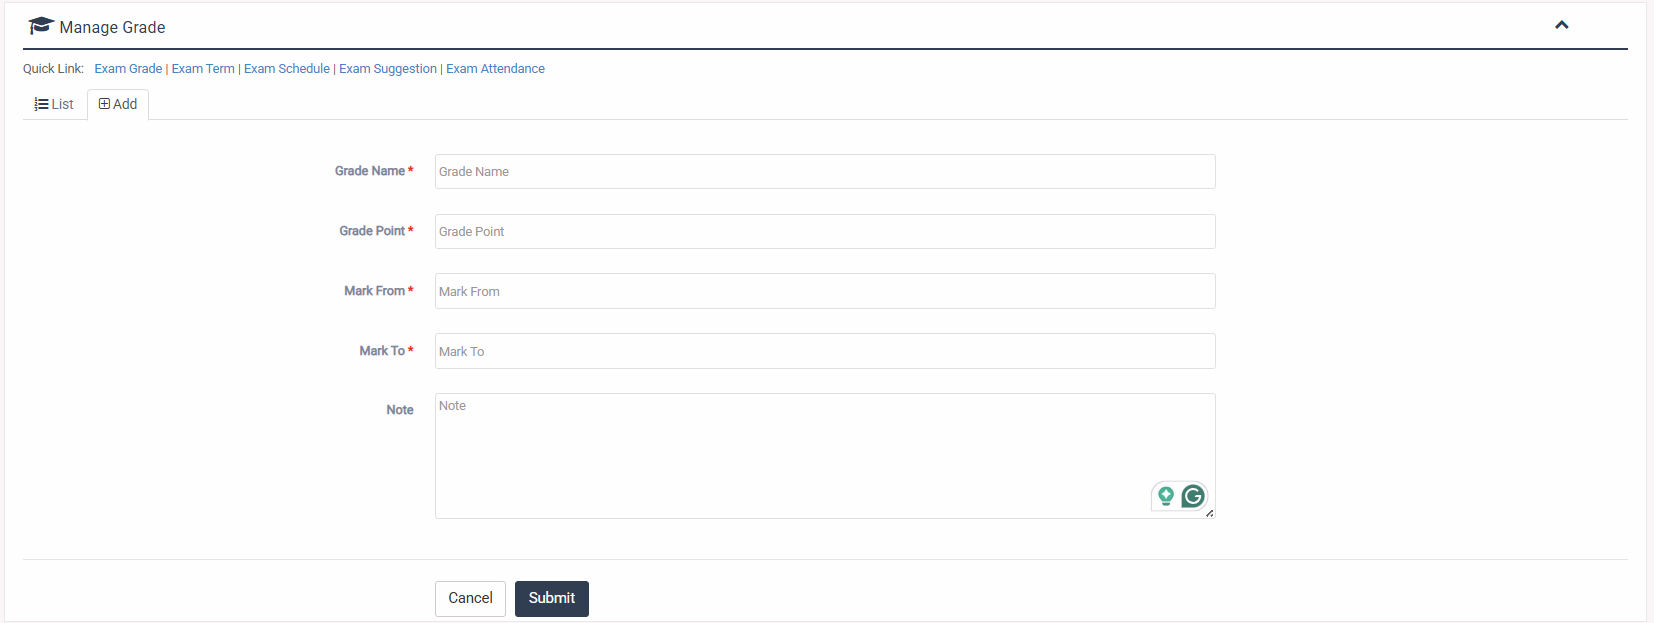
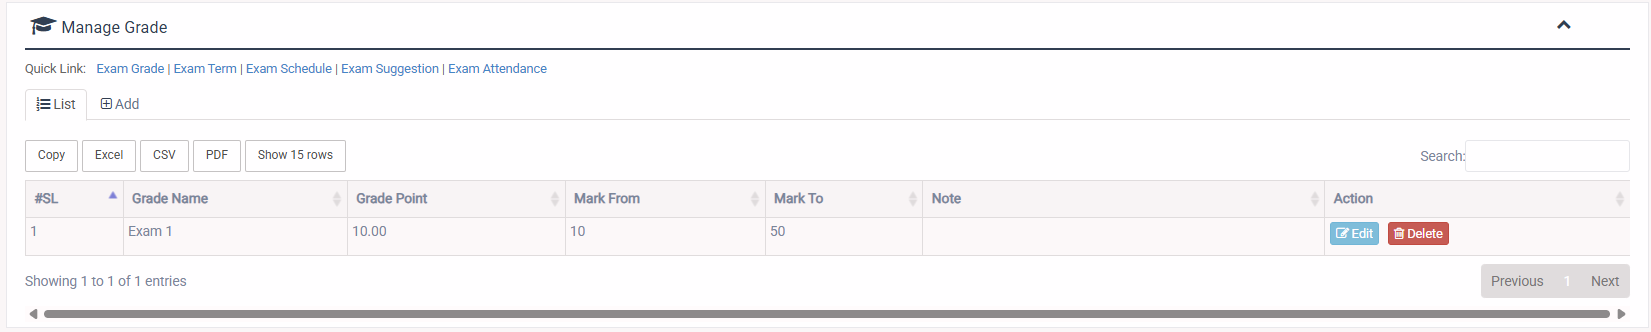
1. Login to System Admin Panel.
2. Select Exam Grade sub menu under Manage Exam main menu from left side bar.
3. To Add Exam Grade select Add button.
4. To Edit Exam Grade select Edit button.
5. To Delete Exam Grade select Delete button.
6. You are done with Exam Grade feature.
1. Login to System Admin Panel.
2. Select Exam Term sub menu under Manage Exam main menu from left side bar.
3. To Add Exam Term select Add button.
4. To Edit Exam Term select Edit button.
5. To Delete Exam Term select Delete button.
6. You are done with Exam Term feature.


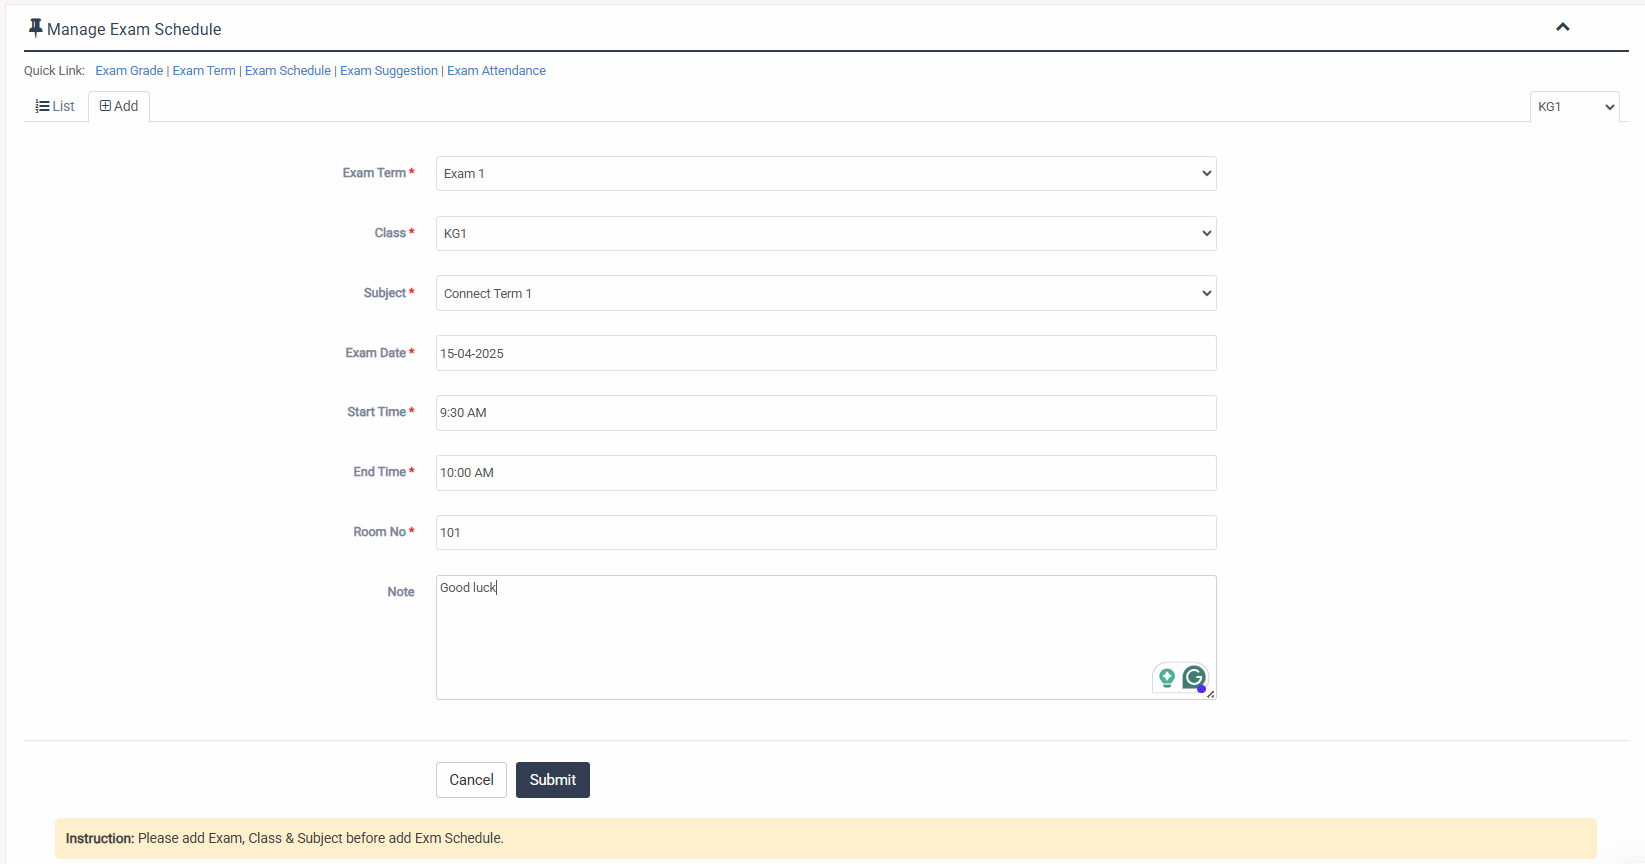
2. Select Exam Schedule sub menu under Manage Exam main menu from left side bar.
3. To Add Exam Schedule select Add button.
4. To Edit Exam Schedule select Edit button.
5. To Delete Exam Schedule select Delete button.
6. You are done with Exam Schedule feature.

1. Login to System Admin Panel.
2. Select Exam Suggestion sub menu under Manage Exam main menu from left side bar.
3. To Add/Create new Suggestion click Add tab.
4. To Edit Suggestion Click Edit button in the Exam Grade list.
5. To Delete Suggestion Click Delete button in the Exam Grade List.
6. You are done with Manage Suggestion feature.
1. Login to System Admin Panel.
2. Select Exam Attendance main menu from left side bar.
3. Then choose Exam, Class, Section & Subject
4. Then click Find  button to get Student list
5. To Manage Exam Attendance Check for Attend All
6. You are done with Student Attendance feature.

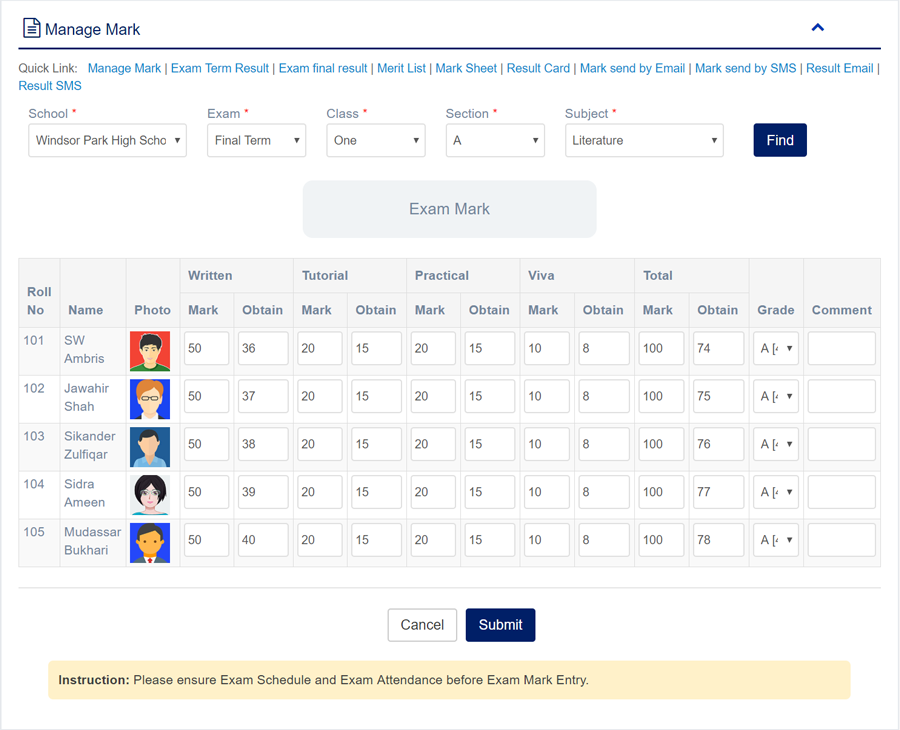
1. Login to System Admin Panel.
2. Select Manage Mark sub menu under Exam Mark main menu from left side bar.
3. To Manage Mark select Exam, Class, Section & Subject.
4. Then click Find button to get Student list.
5. Fill up the form with correct data/value and click Submit
6. You are done with Manage Mark feature.
1. Login to System Admin Panel.
2. Select Exam Term Result sub menu under Exam Mark main menu from left side bar.
3. To Manage Exam Term Result select Exam, Class, Section.
4. Then click Find button to get Student list.
5. Fill up the form with correct data/value and click Submit
6. You are done with Exam Term Result feature.

. Login to System Admin Panel.
2. Select Exam Final Result sub menu under Exam Mark main menu from left side bar.
3. To Manage Exam Final Result select Class, Section.
4. Then click Find button to get Student list.
5. Fill up the form with correct data/value and click Submit
6. You are done with Exam Final Result feature.

1. Login to System Admin Panel.
2. Select Exam Merit List sub menu under Exam Mark main menu from left side bar.
3. To Manage Exam Merit List select Academic Year, Class, Section.
4. Then click Find button to get Student Merit list.
5. Fill up the form with correct data/value and click Submit
6. You are done with Exam Merit List feature.

1. Login to System Admin Panel.
2. Select Student Mark Sheet sub menu under Mark main menu from left side bar.
3. To Manage Mark Sheet select Exam, Class, Section & Student.
4. Then click Find button to get Student Subject list.
5. Fill up the form with correct data/value and click Submit
6. You are done with Student Mark Sheet feature.

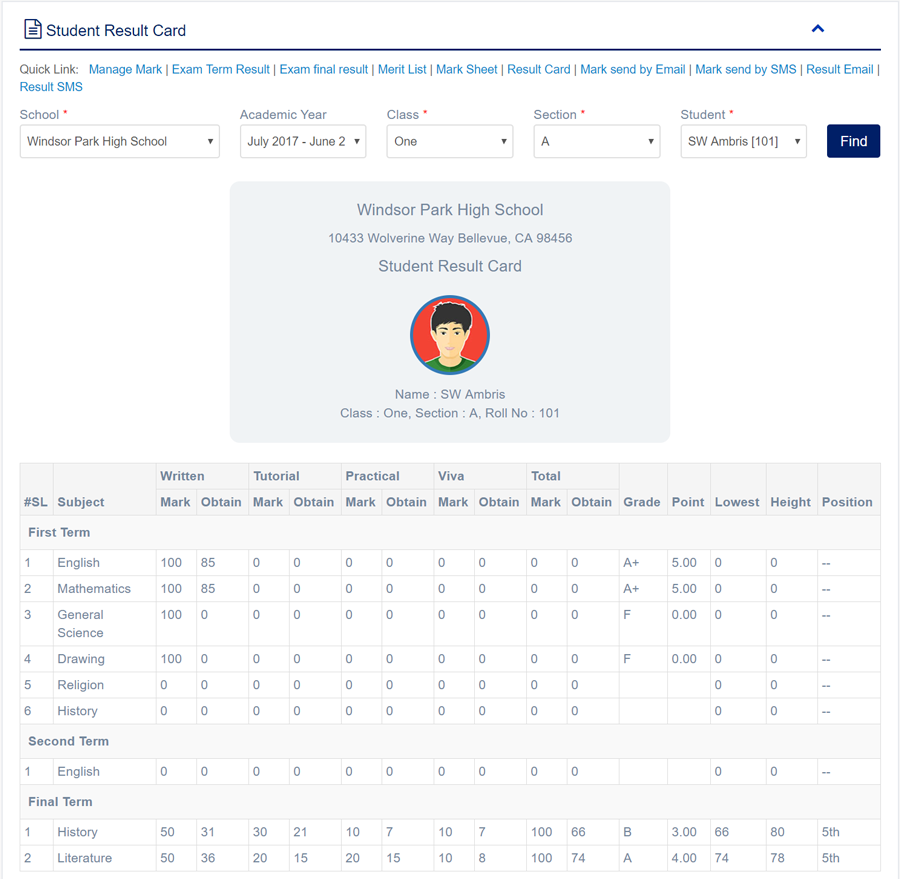
1. Login to System Admin Panel.
2. Select Student Result Card sub menu under Exam Mark main menu from left side bar.
3. To Manage Student Result Card select Academic Year, Exam, Class, Section & Student.
4. Then click Find button to get Student Result Card.
6. You are done with Student Result Card feature.
1. Login to System Admin Panel.
2. Select Mark send by Email sub menu under Exam Mark main menu from left side bar.
3. To send Mark with Email click Send Email tab.
4. Then select Exam, Class, Receiver type, Subject and then click Submit button
5. To Delete Email click delete button from Email List
6. You are done with Mark send by Email feature.

1. Login to System Admin Panel.
2. Select Mark send by SMS sub menu under Exam Mark main menu from left side bar.
3. To send Mark with SMS click Send SMS tab.
4. Then select Exam, Class, Receiver type, SMS Gateway and then click Submit button
5. To Delete SMS click delete button from SMS List
6. You are done with Mark send by SMS feature.


1. Login to System Admin Panel.
2. Select Result send by Email sub menu under Exam Mark main menu from left side bar.
3. To send Result with Email click Send Email tab.
5. To Delete Email click delete button from Email List
6. You are done with Result send by Email feature.


1. Login to System Admin Panel.
2. Select Result send by SMS sub menu under Exam Mark main menu from left side bar.
3. To send Result with SMS click Send SMS tab.
5. To Delete SMS click delete button from SMS List
6. You are done with Result send by SMS feature.


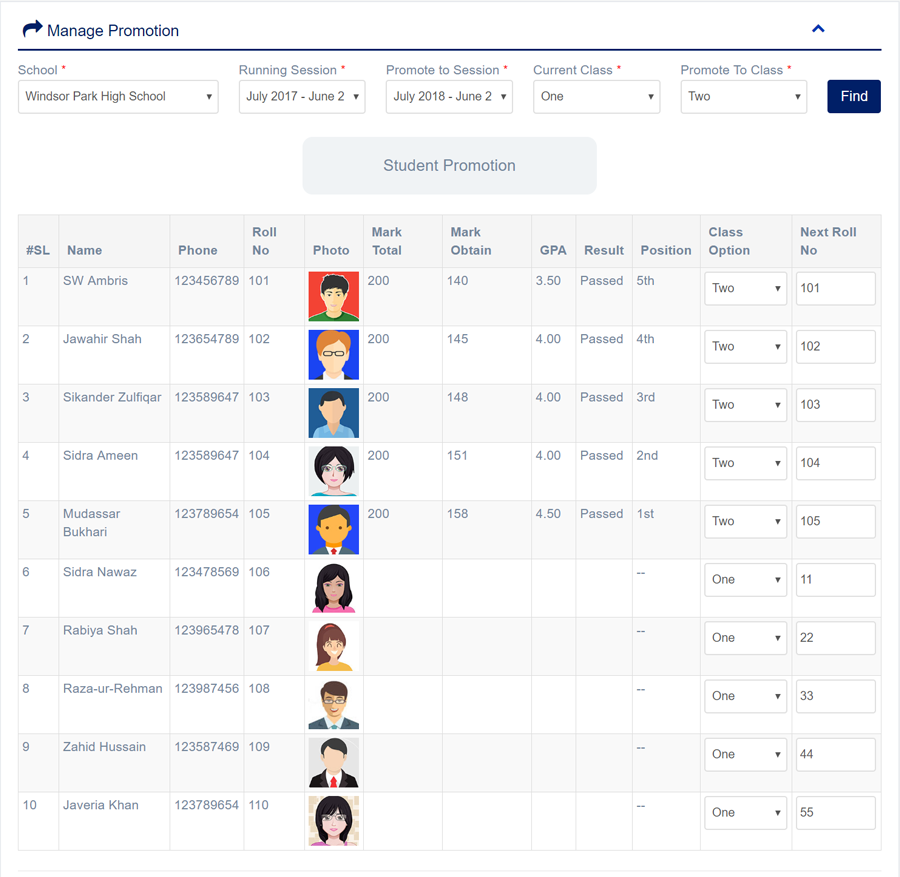
1. Login to System Admin Panel.
2. Select Promotion main menu from left side bar.
3. Then choose Running Session, Promote to Session, Current Class, Promote To Class & Exam
4. Then click Find  button to get Student list
5. Then fill up the form carefully as per required and Promote button to promote next class.
6. You are done with Promotion feature.
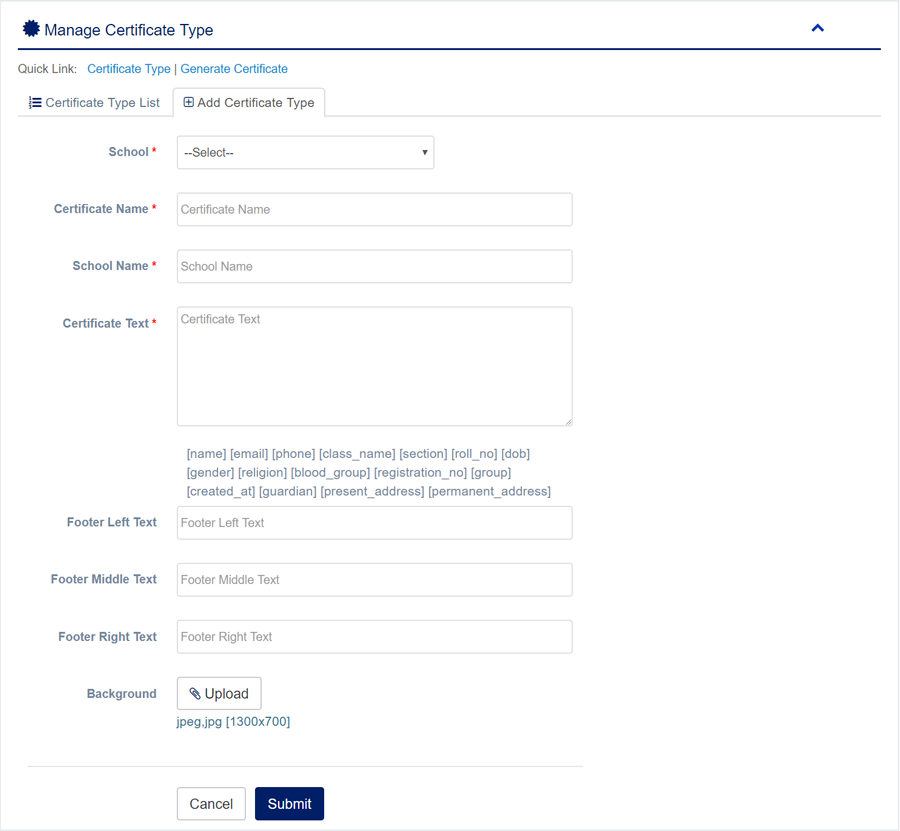
1. Login to System Admin Panel.
2. Select Certificate Type sub menu under Certificate main menu from left side bar.
3. To Add/Create new Certificate Type click Add Certificate Type tab.
4. To Edit Certificate Type Click Edit button in the Certificate Type list.
5. To Delete Certificate Type Click Delete button in the Certificate Type List.
6. You are done with Manage Certificate Type feature.

1. Login to System Admin Panel.
2. Select Generate Certificate sub menu under Certificate main menu from left side bar.
3. To Generate Certificate select class and certificate type and then click find.
4. Then click Generate  button to Generate student specific Certificate.
6. You are done with Generate Certificate feature.


1. Login to System Admin Panel.
2. Select Supplier sub menu under Inventory main menu from left side bar.
3. To Add/Create new Supplier click Add tab.
4. To Edit Supplier Click Edit  button in the Supplier list.
5. To Delete Supplier Click Delete  button in the Supplier List.
6. You are done with Manage Supplier feature.

1. Login to System Admin Panel.
2. Select Warehouse sub menu under Inventory main menu from left side bar.
3. To Add/Create new Warehouse click Add tab.
4. To Edit Warehouse Click Edit  button in the Warehouse list.
5. To Delete Warehouse Click Delete  button in the Warehouse List.
6. You are done with Manage Warehouse feature.

1. Login to System Admin Panel.
2. Select Category sub menu under Inventory main menu from left side bar.
3. To Add/Create new Category click Add tab.
4. To Edit Category Click Edit  button in the Category list.
5. To Delete Category Click Delete  button in the Category List.
6. You are done with Manage Category feature.

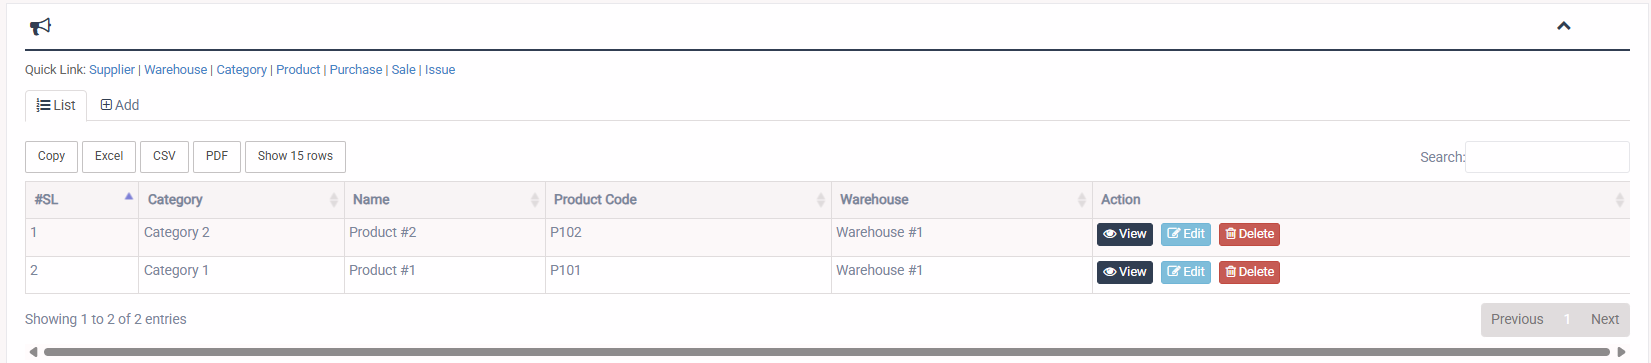
1. Login to System Admin Panel.
2. Select Product sub menu under Inventory main menu from left side bar.
3. To Add/Create new Product click Add tab.
4. To Edit Product Click Edit  button in the Product list.
5. To Delete Product Click Delete  button in the Product List.
6. You are done with Manage Product feature.
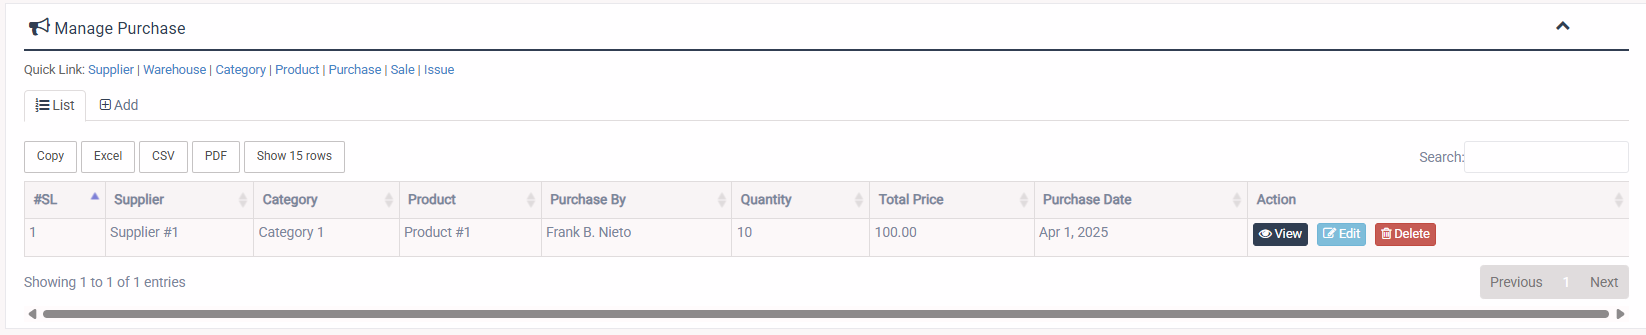
1. Login to System Admin Panel.
2. Select Purchase sub menu under Inventory main menu from left side bar.
3. To Add/Create new Purchase click Add tab.
4. To Edit Purchase Click Edit  button in the Purchase list.
5. To Delete Purchase Click Delete  button in the Purchase List.
6. You are done with Manage Purchase feature.
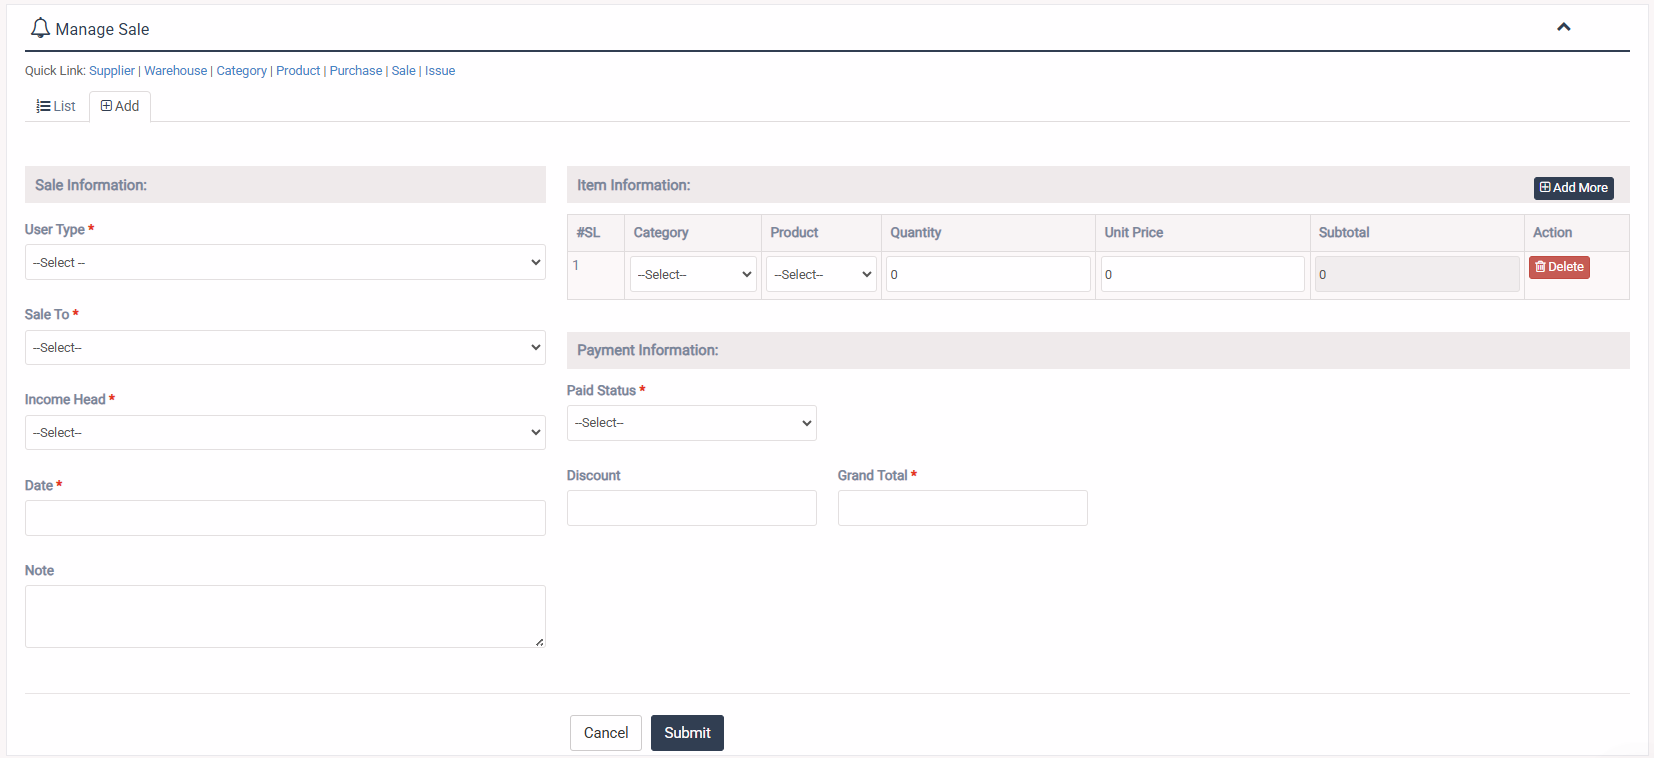
1. Login to System Admin Panel.
2. Select Sale sub menu under Inventory main menu from left side bar.
3. To Add/Create new Sale click Add tab.
4. To Edit Sale Click Edit  button in the Sale list.
5. To Delete Sale Click Delete  button in the Sale List.
6. You are done with Manage Sale feature.
1. Login to System Admin Panel.
2. Select Issue sub menu under Inventory main menu from left side bar.
3. To Add/Create new Issue click Add tab.
4. To Edit Issue Click Edit  button in the Issue list.
5. To Delete Issue Click Delete  button in the Issue List.
6. You are done with Manage Issue feature.

1. Login to System Admin Panel.
2. Select Vendor sub menu under Asset Management main menu from left side bar.
3. To Add/Create new Vendor click Add Book tab.
4. To Edit Vendor Click Edit  button in the Vendor list.
5. To Delete Vendor Click Delete  button in the Vendor List.
6. You are done with Manage Vendor feature.

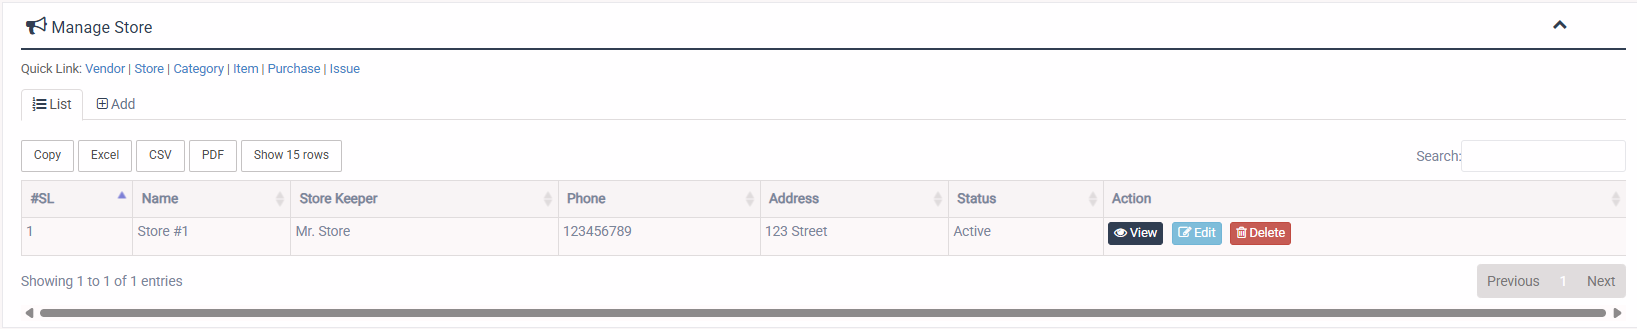
1. Login to System Admin Panel.
2. Select Store sub menu under Asset Management main menu from left side bar.
3. To Add/Create new Store click Add Book tab.
4. To Edit Store Click Edit  button in the Store list.
5. To Delete Store Click Delete  button in the Store List.
6. You are done with Manage Store feature.
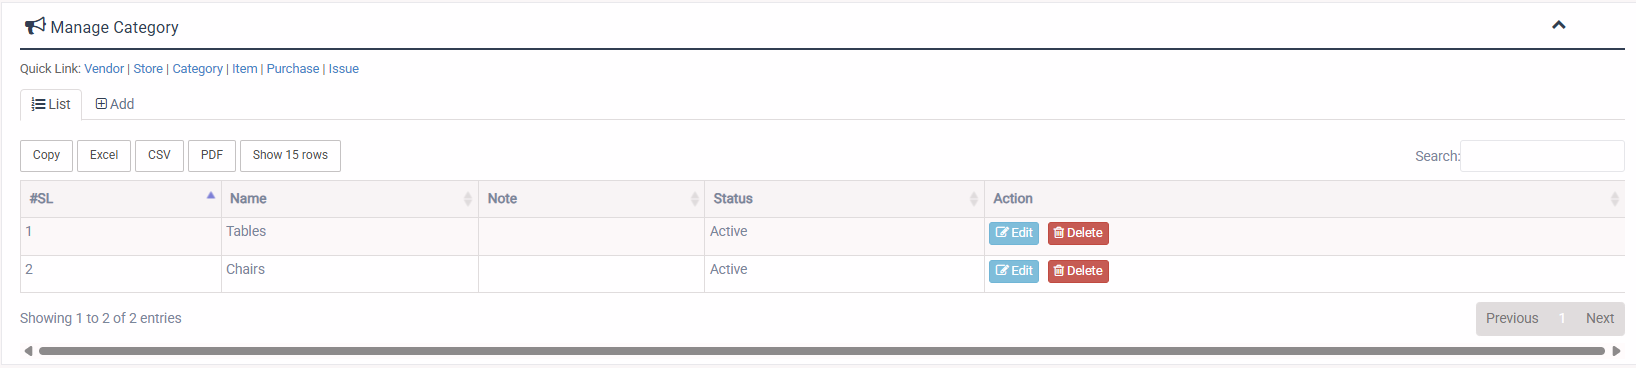
1. Login to System Admin Panel.
2. Select Category sub menu under Asset Management main menu from left side bar.
3. To Add/Create new Category click Add Book tab.
4. To Edit Category Click Edit  button in the Category list.
5. To Delete Category Click Delete  button in the Category List.
6. You are done with Manage Category feature.
1. Login to System Admin Panel.
2. Select Item sub menu under Asset Management main menu from left side bar.
3. To Add/Create new Item click Add Book tab.
4. To Edit Item Click Edit  button in the Item list.
5. To Delete Item Click Delete  button in the Item List.
6. You are done with Manage Item feature.

1. Login to System Admin Panel.
2. Select Purchase sub menu under Asset Management main menu from left side bar.
3. To Add/Create new Purchase click Add Book tab.
4. To Edit Purchase Click Edit  button in the Purchase list.
5. To Delete Purchase Click Delete  button in the Purchase List.
6. You are done with Manage Purchase feature.

1. Login to System Admin Panel.
2. Select Issue sub menu under Asset Management main menu from left side bar.
3. To Add/Create new Issue click Add Book tab.
4. To Edit Issue Click Edit  button in the Issue list.
5. To Delete Issue Click Delete  button in the Issue List.
6. You are done with Manage Issue feature.

1. Login to System Admin Panel.
2. Select Book sub menu under Library main menu from left side bar.
3. To Add/Create new Book click Add Book tab.
4. To Edit Book Click Edit  button in the Book list.
5. To Delete Book Click Delete  button in the Book List.
6. You are done with Manage Book feature.


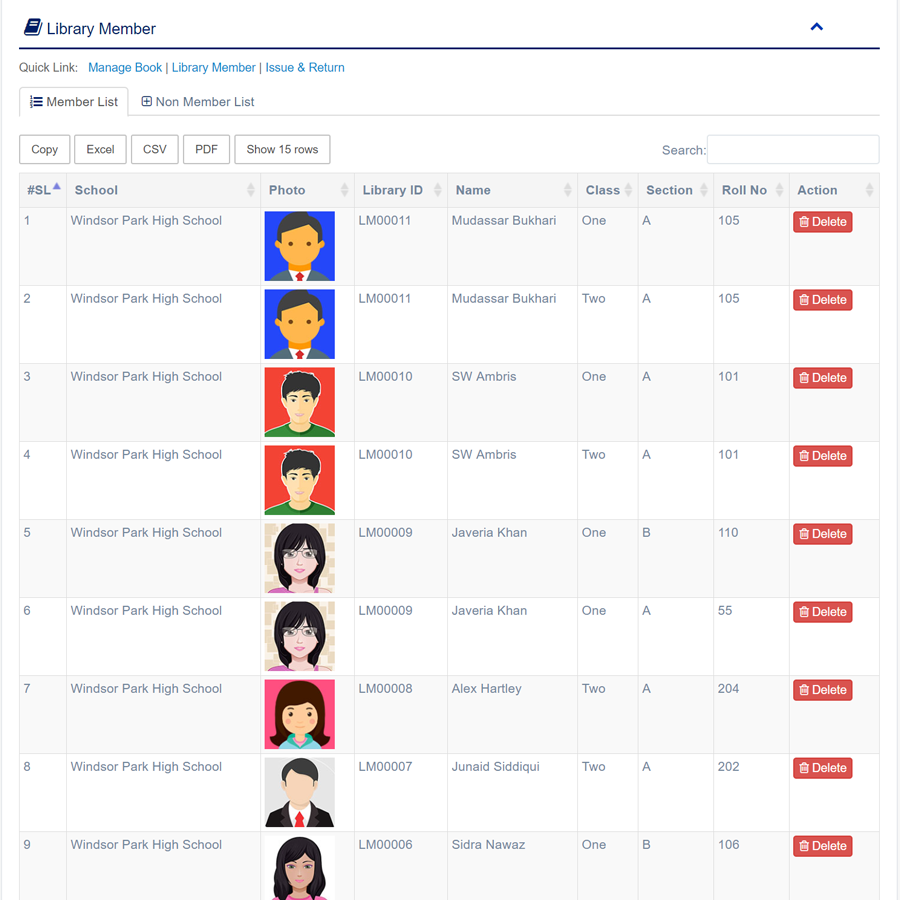
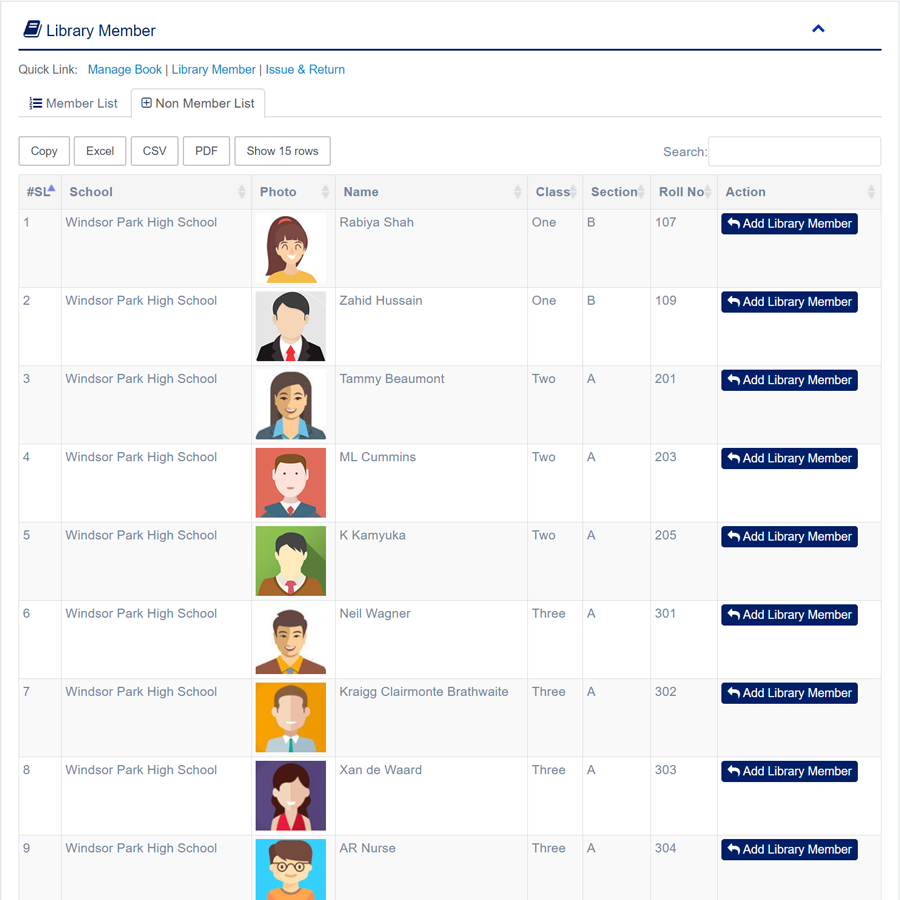
1. Login to System Admin Panel.
2. Select Library Member sub menu under Library main menu from left side bar.
3. To Add new Library Member click Non Member List tab.
4. Then click Add Library Member button to get add Library Member.
5. To Delete Library Member click delete button from Member List tab.
6. You are done with Library Member feature.
1. Login to System Admin Panel.
2. Select Issue & Return sub menu under Library main menu from left side bar.
3. To Issue new Book click New Issue tab.
4. To Return Book Click Return This  button in the Issue List List.
6. You are done with Manage Issue & Return feature.


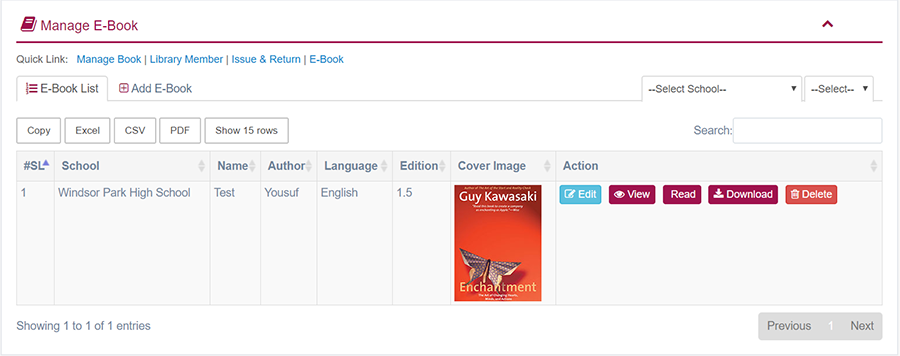
1. Login to System Admin Panel.
2. Select E-Book sub menu under Library main menu from left side bar.
3. To Add new E-Book click Add E-Book tab.
4. To Edit E-Book Click Edit  button in the E-Book  List.
6. You are done with Manage E-Book feature.

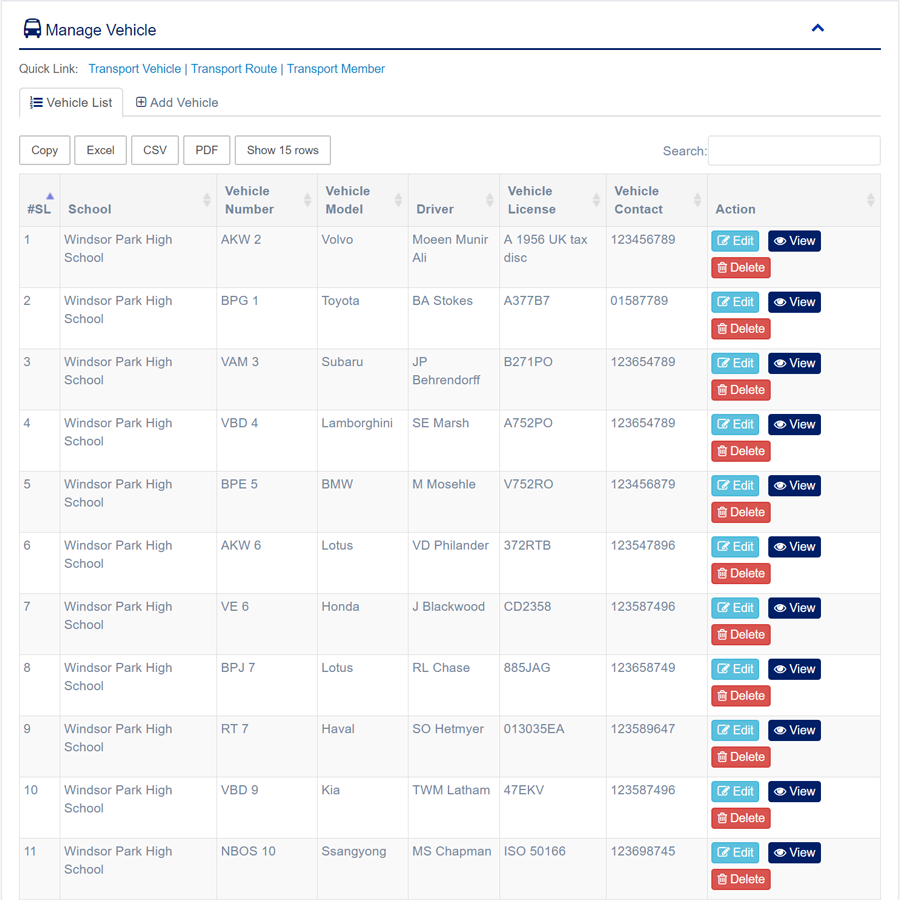
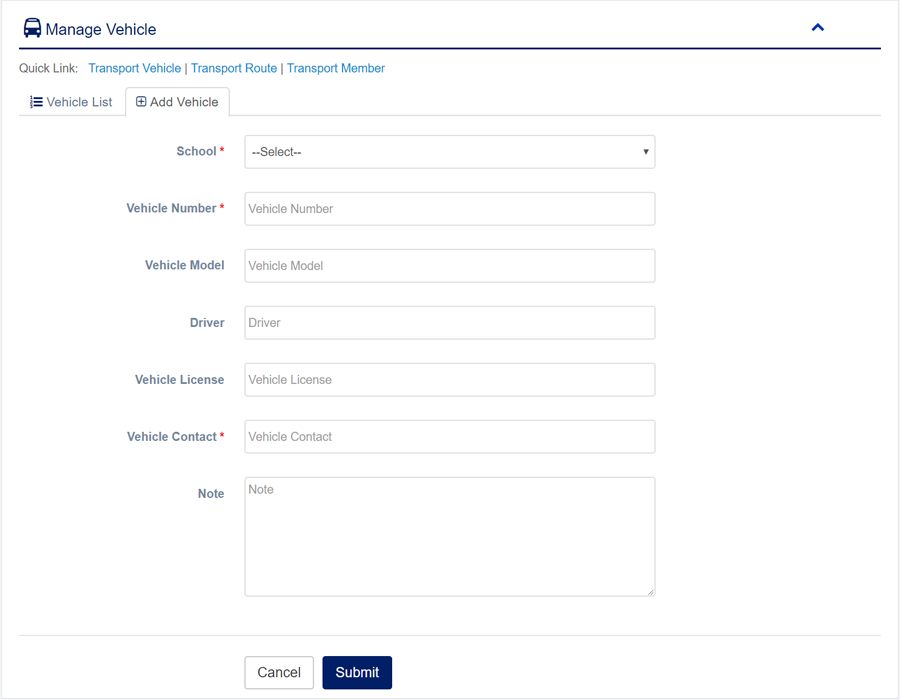
1. Login to System Admin Panel.
2. Select Manage Vehicle sub menu under Transport main menu from left side bar.
3. To Add/Create new Vehicle click Add Vehicle tab.
4. To Edit Vehicle Click Edit  button in the Vehicle list.
5. To Delete Vehicle Click Delete  button in the Vehicle List.
6. You are done with Manage Vehicle feature.
1. Login to System Admin Panel.
2. Select Transport Route sub menu under Transport main menu from left side bar.
3. To Add/Create new Transport Route click Add Transport Route tab.
4. To Edit Transport Route Click Edit  button in the Transport Route list.
5. To Delete Transport Route Click Delete  button in the Transport Route List.
6. You are done with Manage Transport Route feature.
1. Login to System Admin Panel.
2. Select Transport Member sub menu under Transport Member main menu from left side bar.
3. To add Transport Member go Non Transport Member tab select route and Stop then add to Transport.
4. You are done with Transport Member feature.
1. Login to System Admin Panel.
2. Select Manage Hostel sub menu under Hostel main menu from left side bar.
3. To Add/Create new Hostel click Add Hostel tab.
4. To Edit Hostel Click Edit  button in the Hostel list.
5. To Delete Hostel Click Delete  button in the Hostel List.
6. You are done with Manage Hostel feature.


1. Login to System Admin Panel.
2. Select Manage Room sub menu under Transport main menu from left side bar.
3. To Add/Create new Room click Add Room tab.
4. To Edit Room Click Edit  button in the Room list.
5. To Delete Room Click Delete  button in the Room List.
6. You are done with Manage Room feature.


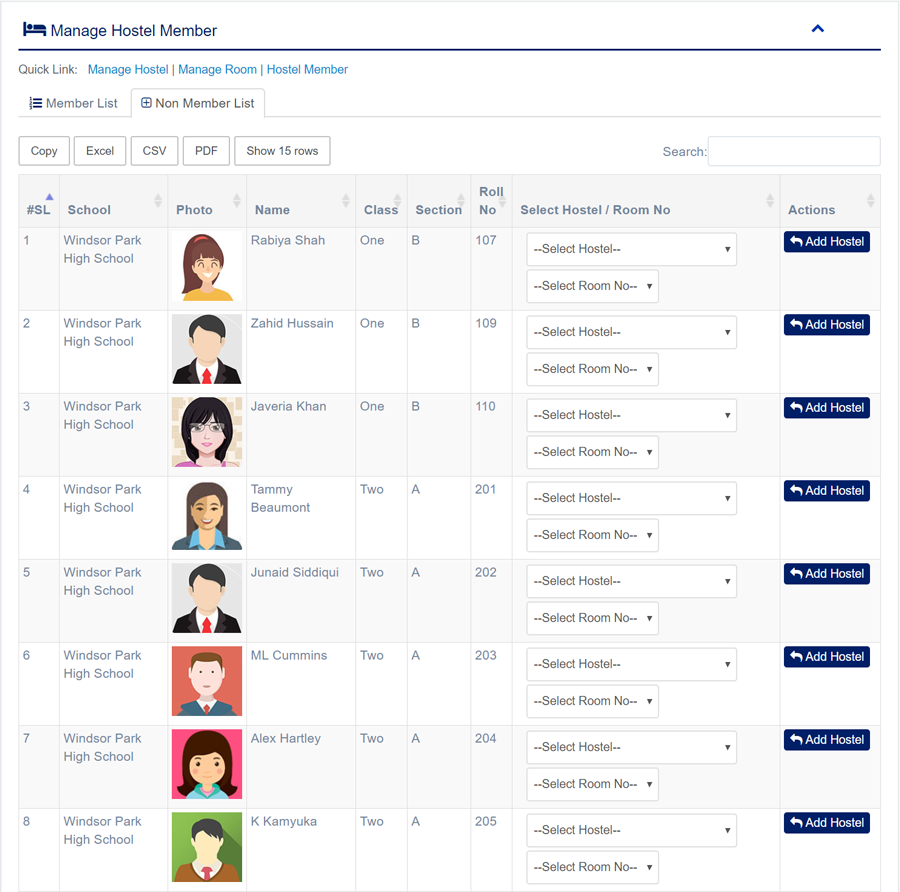
1. Login to System Admin Panel.
2. Select Hostel Member sub menu under Hostel main menu from left side bar.
3. To Add new Hostel Member click Non Member List tab.
4. Then click Add Hostel button to get add Hostel Member.
5. To Delete Hostel Member click delete button from Member List tab.
6. You are done with Hostel Member feature.

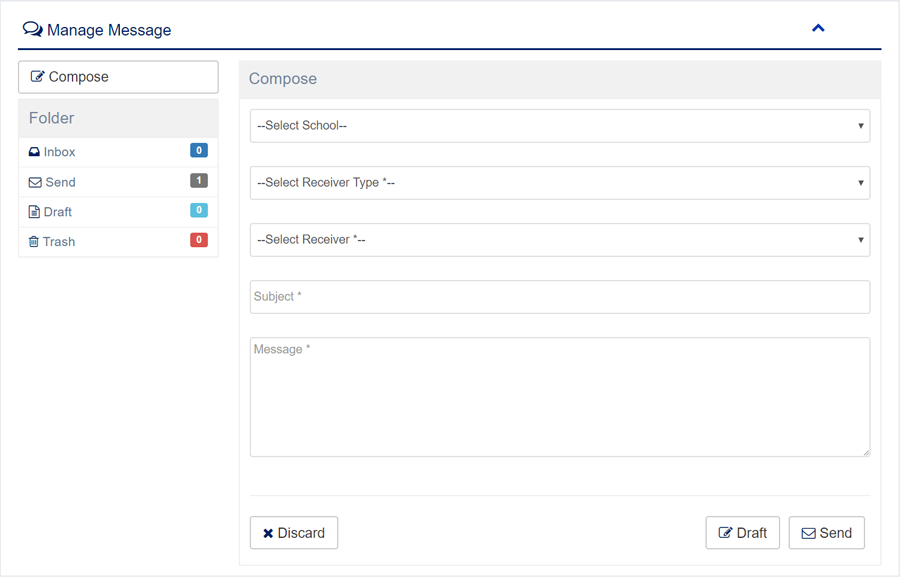
1. Login to System Admin Panel.
2. Select Message main menu from left side bar.
3. Click Compose button to write new message.
3. Click Inbox button to see incoming message.
3. Click Send button to see outgoing message.
3. Click Draft button to see Drafts message.
3. Click Trash button to see Trashed message.
6. You are done with Message feature.


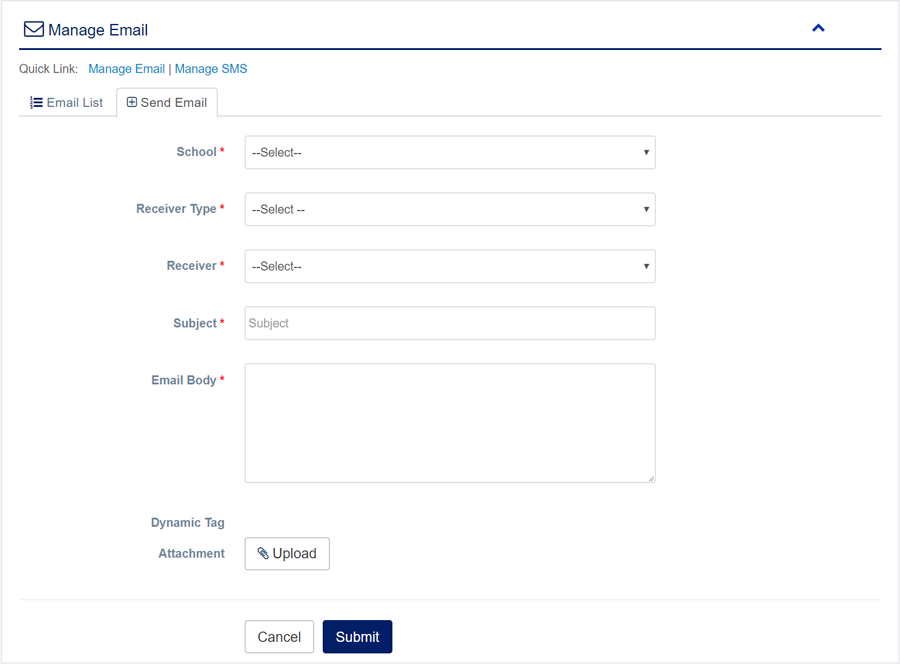
1. Login to System Admin Panel.
2. Select Email sub menu under Mail & SMS main menu from left side bar.
3. To send new Email click Send Email tab.
4. To View Email Click View  button in the Email list.
5. To Delete Email Click Delete  button in the Email List.
6. You are done with Manage Email feature.

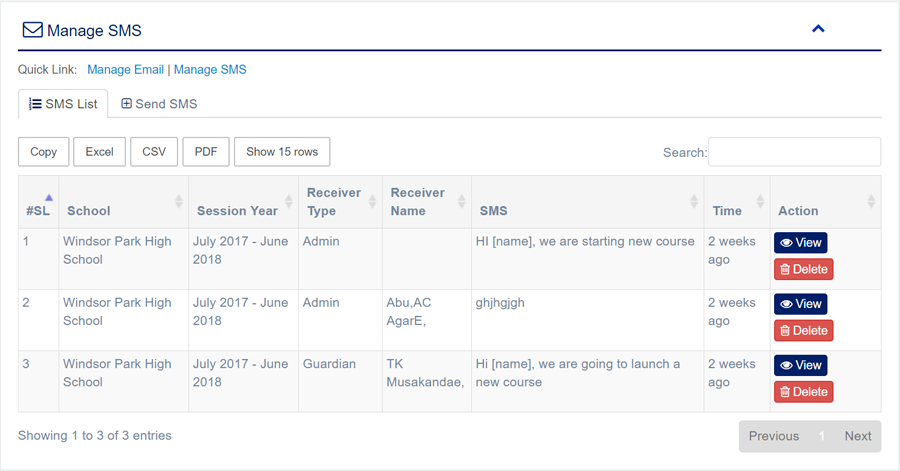
1. Login to System Admin Panel.
2. Select SMS sub menu under Mail & SMS main menu from left side bar.
3. To send new SMS click Send SMS tab.
4. To Delete SMS Click Delete button in the SMS List.
5. You are done with Manage SMS feature.

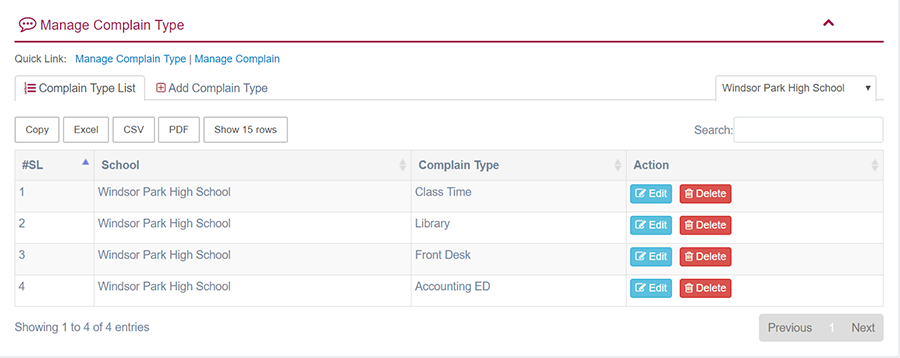
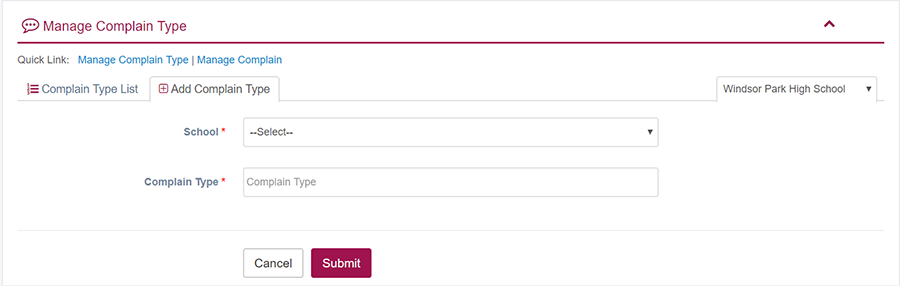
1. Login to System Admin Panel.
2. Select Complain Type sub menu under Complain main menu from left side bar.
3. To Add/Create new Complain Type click Add Complain Type tab.
4. To Edit Complain Type Click Edit  button in the Notice list.
5. To Delete Complain Type Click Delete  button in the Complain Type List.
6. You are done with Manage Complain Type feature.
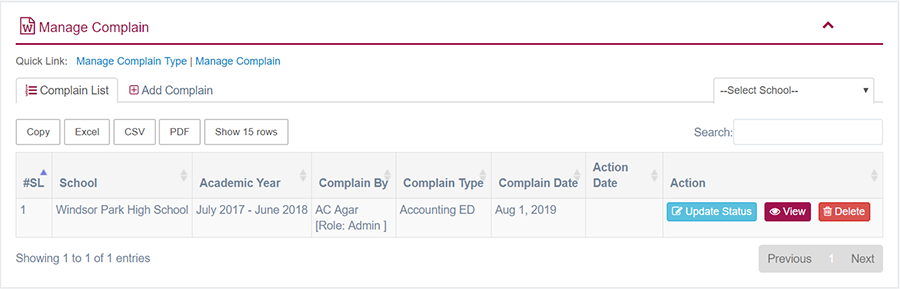
1. Login to System Admin Panel.
2. Select Complain sub menu under Complain main menu from left side bar.
3. To Add/Create new Complain click Add Complain tab.
4. To View Complain Click View  button in the Complain list.
5. To Edit Complain Click Edit  button in the Complain list.
6. To Delete Complain Click Delete  button in the Complain List.
7. You are done with Manage Complain feature.

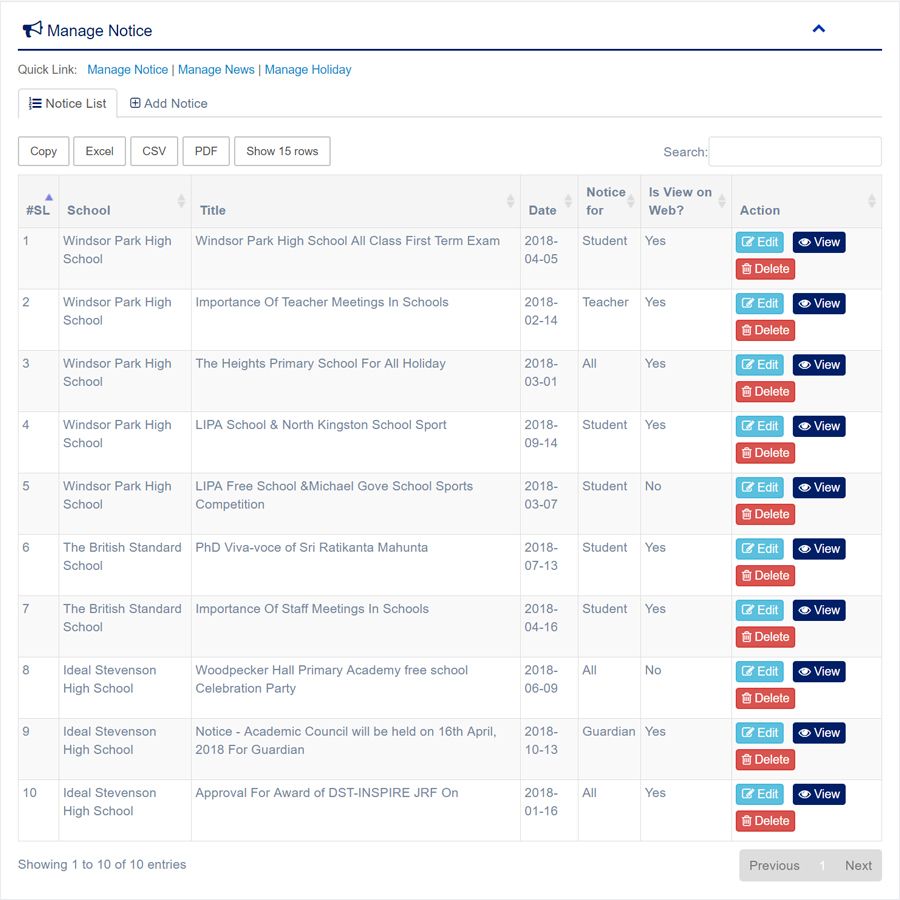
1. Login to System Admin Panel.
2. Select Notice sub menu under Announcement main menu from left side bar.
3. To Add/Create new Notice click Add Notice tab.
4. To View Notice Click View  button in the Notice list.
5. To Edit Notice Click Edit  button in the Notice list.
6. To Delete Notice Click Delete  button in the Notice List.
7. You are done with Manage Notice feature.

1. Login to System Admin Panel.
2. Select News sub menu under Announcement main menu from left side bar.
3. To Add/Create new News click Add News tab.
4. To View News Click View  button in the News list.
5. To Edit News Click Edit  button in the News list.
6. To Delete News Click Delete  button in the News List.
7. You are done with Manage News feature.


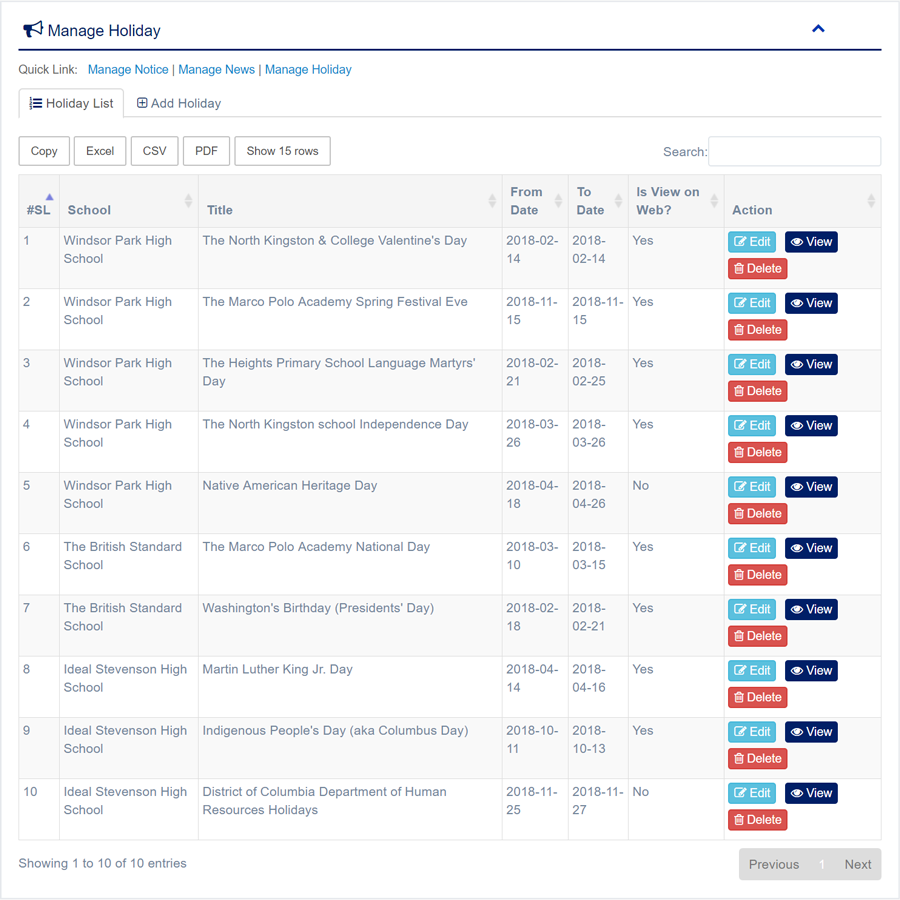
1. Login to System Admin Panel.
2. Select Holiday sub menu under Announcement main menu from left side bar.
3. To Add/Create new Holiday click Add Holiday tab.
4. To View Holiday Click View  button in the Holiday list.
5. To Edit Holiday Click Edit  button in the Holiday list.
6. To Delete Holiday Click Delete  button in the Holiday List.
7. You are done with Manage Holiday feature.

1. Login to System Admin Panel.
2. Select Event main menu from left side bar.
3. To Add/Create new Event click Add Event tab.
4. To View Event Click View  button in the Event list.
5. To Edit Event Click Edit  button in the Event list.
6. To Delete Event Click Delete  button in the Event List.
7. You are done with Manage Event feature.


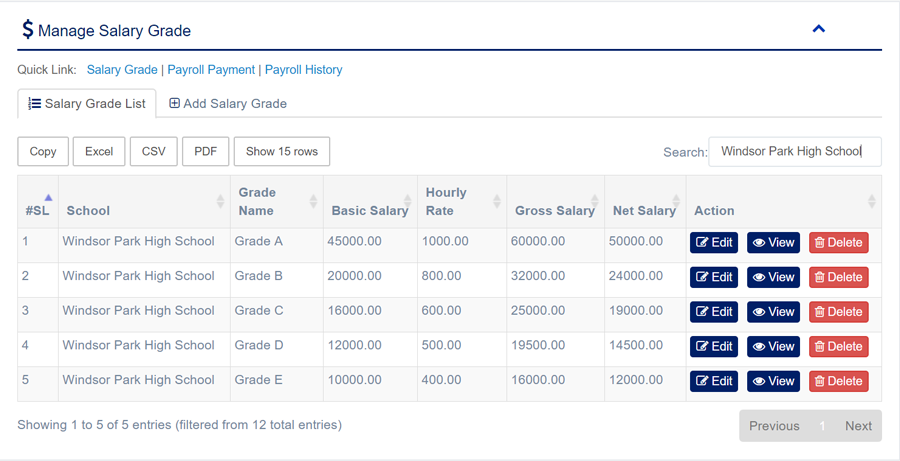
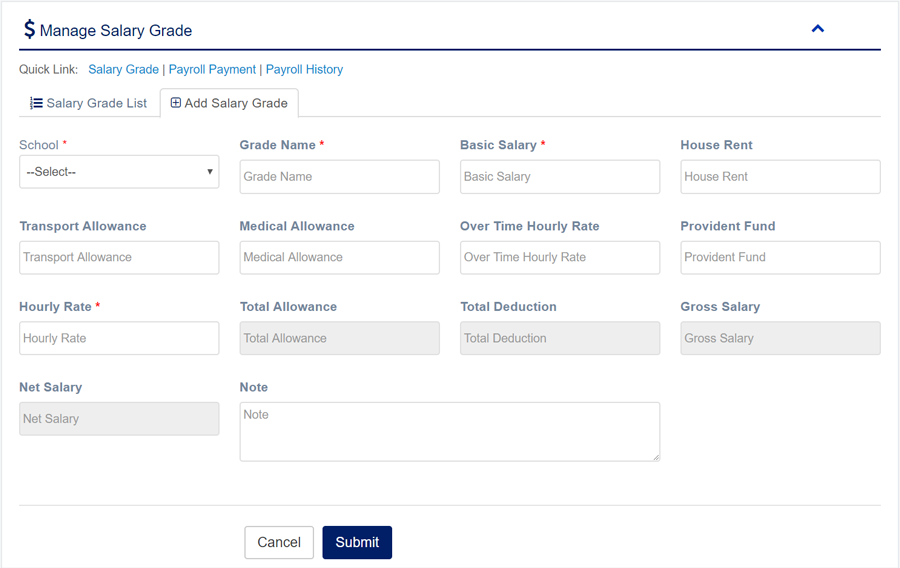
1. Login to System Admin Panel.
2. Select Salary Grade sub menu under Payroll main menu from left side bar.
3. To Add/Create new Salary Grade click Add Salary Grade tab.
4. To Edit Salary Grade Click Edit button in the Salary Grade list.
5. To Delete Salary Grade Click Delete button in the Salary Grade List.
6. You are done with Manage Salary Grade feature.
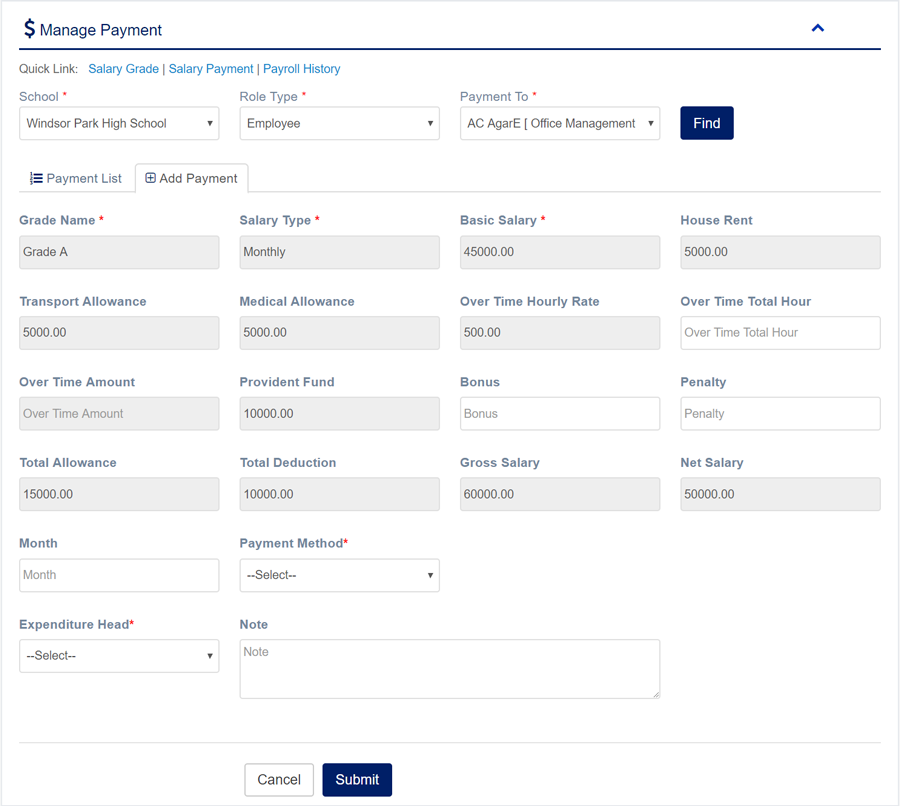
1. Login to System Admin Panel.
2. Select Salary Payment sub menu under Payroll main menu from left side bar.
3. To Salary Payment select Role Type and payment to and then click find.
4. Then Input Month/Bonus/Hour/Penalty etc submit Salary Payment for Employee or Teacher.
6. You are done with Salary Payment feature.

1. Login to System Admin Panel.
2. Select Salary History sub menu under Payroll main menu from left side bar.
3. To see Salary History select Role Type and payment to and then click find.
6. You are done with Salary History feature.

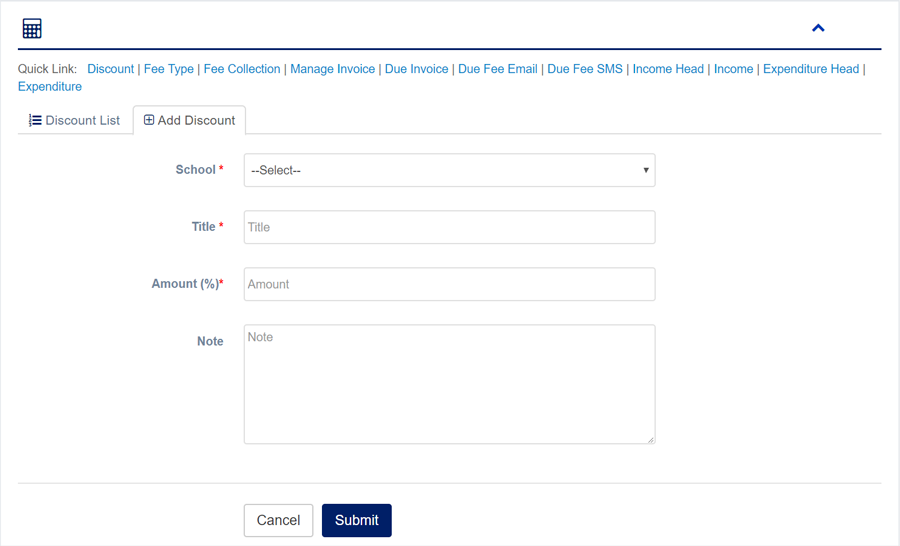
1. Login to System Admin Panel.
2. Select Discount sub menu under Accounting main menu from left side bar.
3. To Add/Create new Discount click Add Discount tab.
4. To Edit Discount Click Edit  button in the Discount list.
5. To Delete Discount Click Delete  button in the Discount List.
6. You are done with Manage Discount feature.

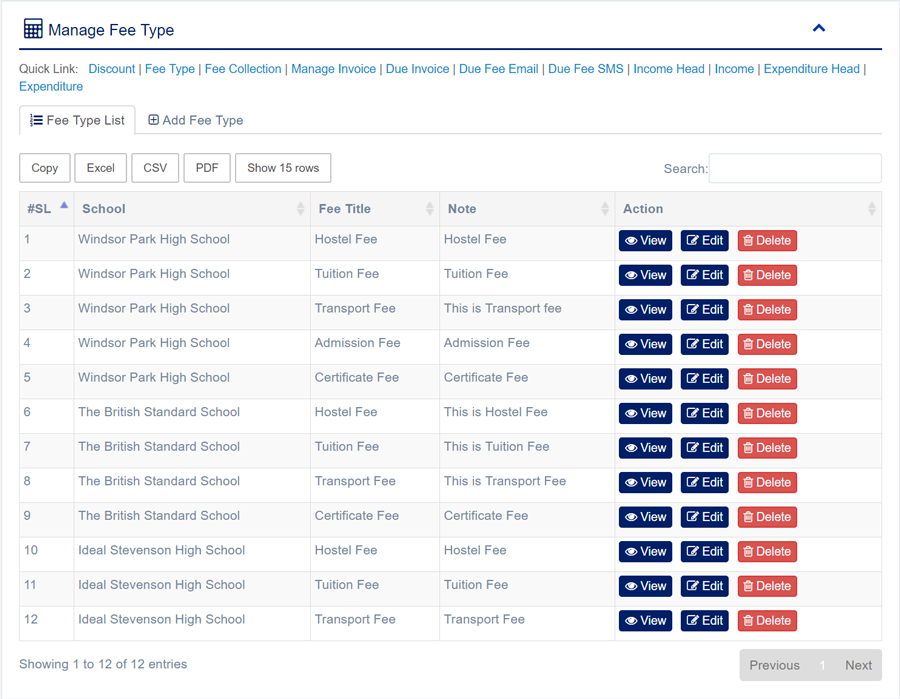
1. Login to System Admin Panel.
2. Select Fee Type sub menu under Accounting main menu from left side bar.
3. To Add/Create new Fee Type click Add Fee Type tab.
4. To Edit Fee Type Click Edit  button in the Fee Type list.
5. To Delete Fee Type Click Delete  button in the Fee Type List.
6. You are done with Manage Fee Type feature.

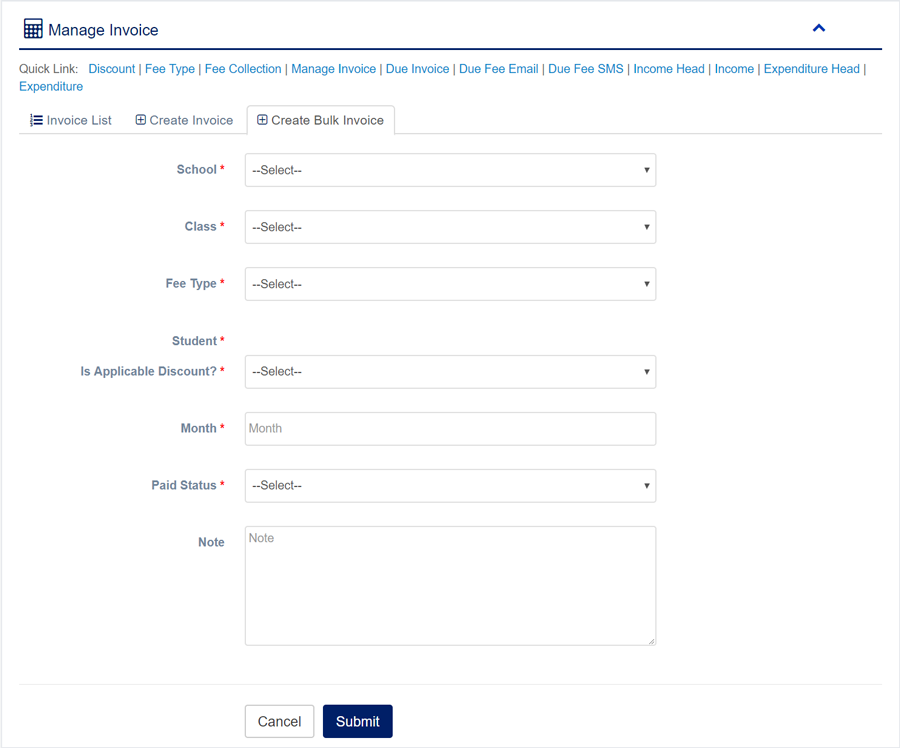
1. Login to System Admin Panel.
2. Select Fee Collection/ Invoice sub menu under Accounting main menu from left side bar.
3. To Create new Invoice click Create Invoice tab.
4. To Create Bulk Invoice click Create Bulk Invoice tab.
5. To View Invoice Click View  button in the Invoice list.
6. To Edit Invoice Click Edit  button in the Invoice list.
7. To Delete Invoice Click Delete  button in the Invoice List.
8. You are done with Manage Fee Collection/Invoice feature.


1. Login to System Admin Panel.
2. Select Due Invoice sub menu under Accounting main menu from left side bar.
3. To View Due Invoice Click View button in the Due Invoice list.
4. To Payment Due Invoice Click Payment button in the Due Invoice List.
5. You are done with Manage Due Invoice feature.

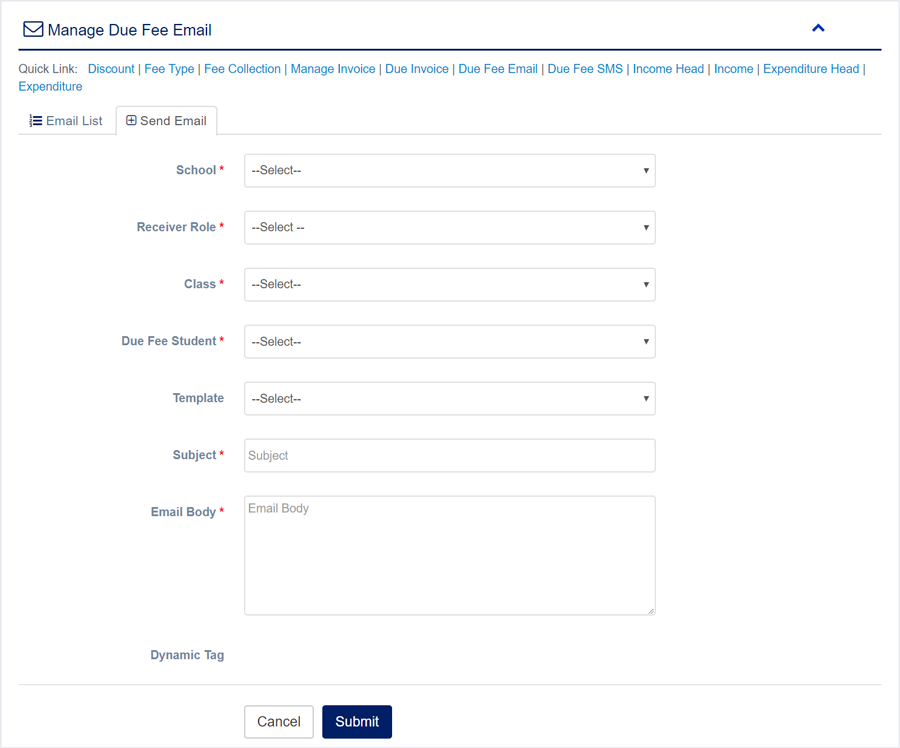
1. Login to System Admin Panel.
2. Select Due Fee Email sub menu under Accounting main menu from left side bar.
3. To View Due Fee Email Click View button in the Due Fee Email list.
4. To Delete Due Fee Email Click Delete button in the Due Fee Email List.
5. You are done with Manage Due Fee Email feature.

1. Login to System Admin Panel.
2. Select Due Fee SMS sub menu under Accounting main menu from left side bar.
3. To View Due Fee SMS Click View button in the Due Fee SMS list.
4. To Delete Due Fee SMS Click Delete button in the Due Fee SMS List.
5. You are done with Manage Due Fee SMS feature.


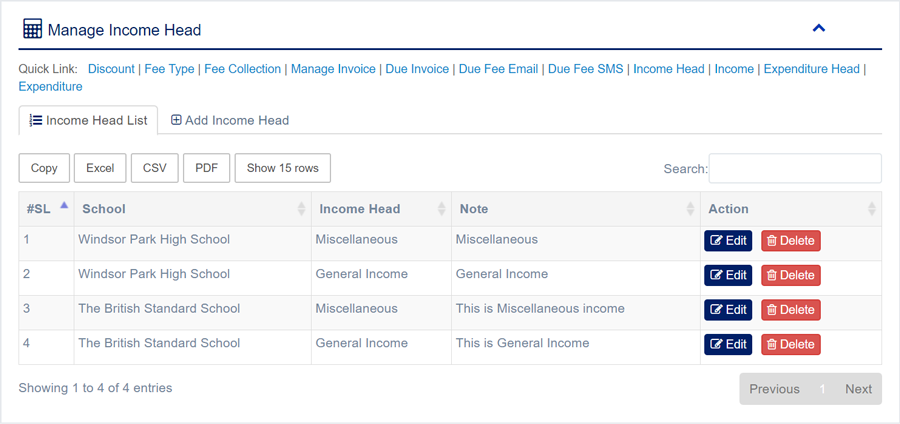
1. Login to System Admin Panel.
2. Select Income Head sub menu under Accounting main menu from left side bar.
3. To Add/Create new Income Head click Add Income Head tab.
4. To Edit Income Head Click Edit  button in the Income Head list.
5. To Delete Income Head Click Delete  button in the Income Head List.
6. You are done with Manage Income Head feature.

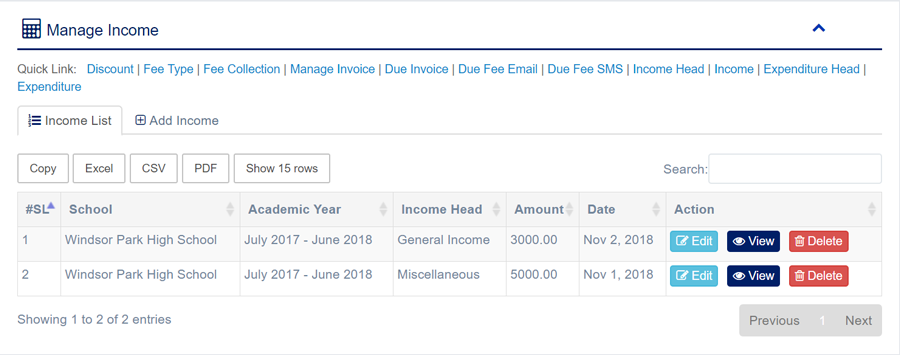
1. Login to System Admin Panel.
2. Select Income sub menu under Accounting main menu from left side bar.
3. To Add/Create new Income click Add Income tab.
4. To View Income Click View  button in the Income list.
5. To Edit Income Click Edit  button in the Income list.
6. To Delete Income Click Delete  button in the Income List.
7. You are done with Manage Income feature.

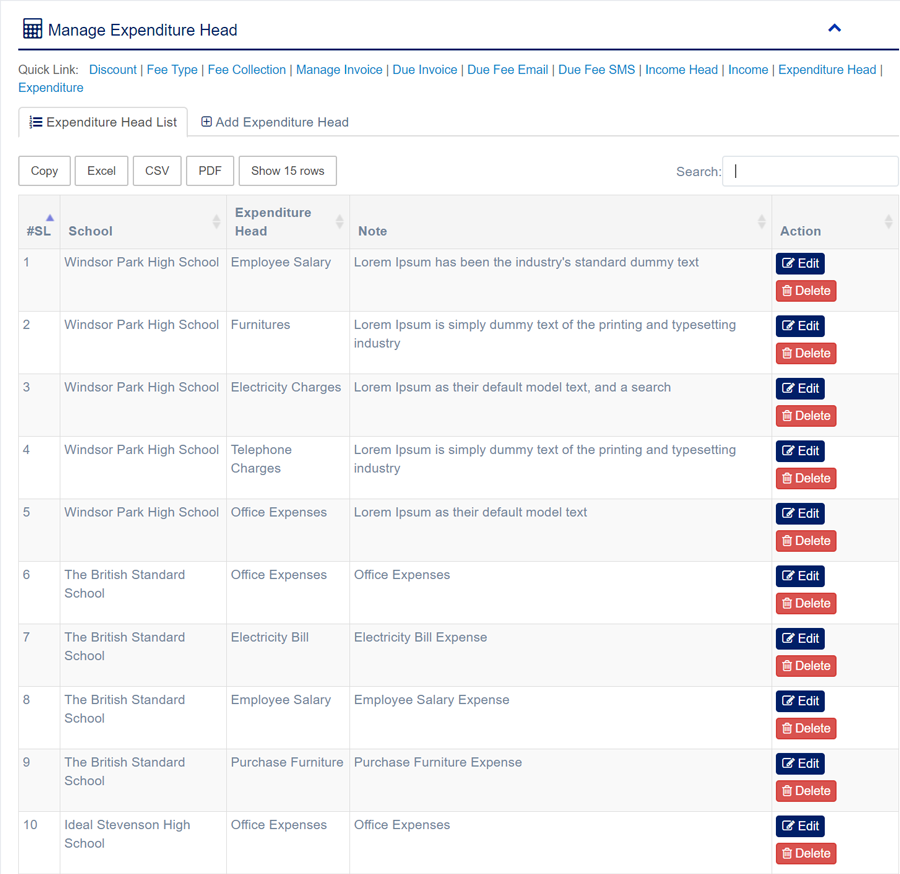
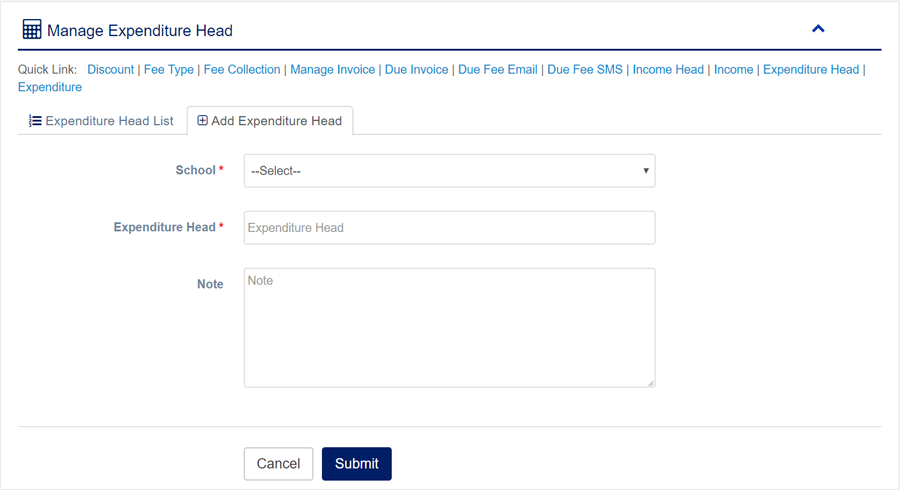
1. Login to System Admin Panel.
2. Select Expenditure Head sub menu under Accounting main menu from left side bar.
3. To Add/Create new Expenditure Head click Add Expenditure Head tab.
4. To Edit Expenditure Head Click Edit  button in the Expenditure Head list.
5. To Delete Expenditure Head Click Delete  button in the Expenditure Head List.
6. You are done with Manage Expenditure Head feature.
1. Login to System Admin Panel.
2. Select Expenditure sub menu under Accounting main menu from left side bar.
3. To Add/Create new Expenditure click Add Expenditure tab.
4. To View Expenditure Click View  button in the Expenditure list.
5. To Edit Expenditure Click Edit  button in the Expenditure list.
6. To Delete Expenditure Click Delete  button in the Expenditure List.
7. You are done with Manage Expenditure feature.


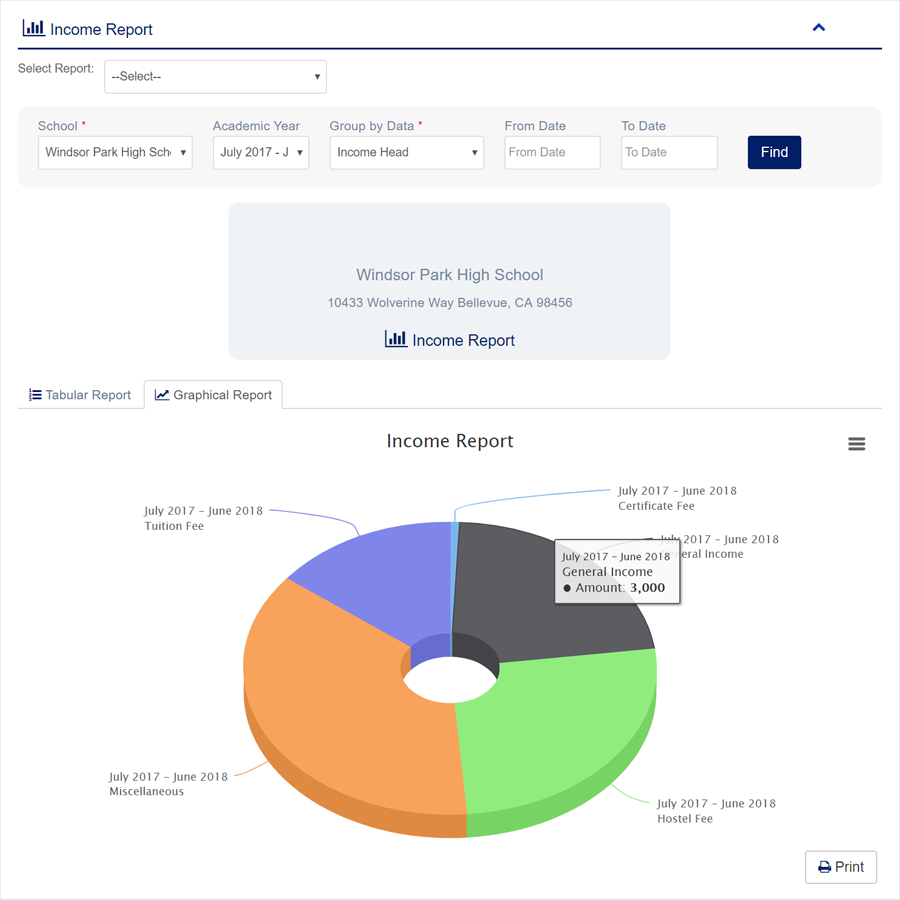
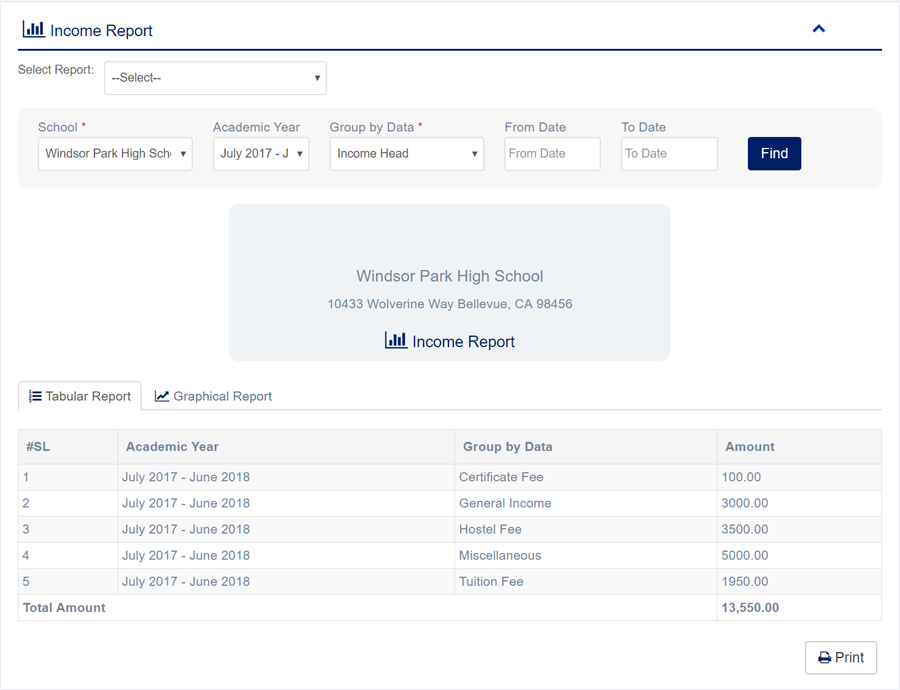
1. Login to System Admin Panel.
2. Select Income Report sub menu under Report main menu from left side bar.
3. To View Income Report choose Academic Year, Group by Data, From Date & To Date.
4. Then click Find button and you will see Graphical Report.
4. To view Tabular Data click Tabular Report
6. You are done with Manage Income Report feature.
1. Login to System Admin Panel.
2. Select Expenditure Report sub menu under Report main menu from left side bar.
3. To View Expenditure Report choose Academic Year, Group by Data, From Date & To Date.
4. Then click Find button and you will see Graphical Report.
4. To view Tabular Data click Tabular Report
6. You are done with Manage Expenditure Report feature.


1. Login to System Admin Panel.
2. Select Invoice Report sub menu under Report main menu from left side bar.
3. To View Invoice Report choose Academic Year, Group by Data, From Date & To Date.
4. Then click Find button and you will see Graphical Report.
4. To view Tabular Data click Tabular Report
6. You are done with Manage Invoice Report feature.


1. Login to System Admin Panel.
2. Select Due Fee Report sub menu under Report main menu from left side bar.
3. To View Due Fee Report choose Academic Year, Class, Student and click find Button.
4. You are done with Manage Due Fee Report feature.

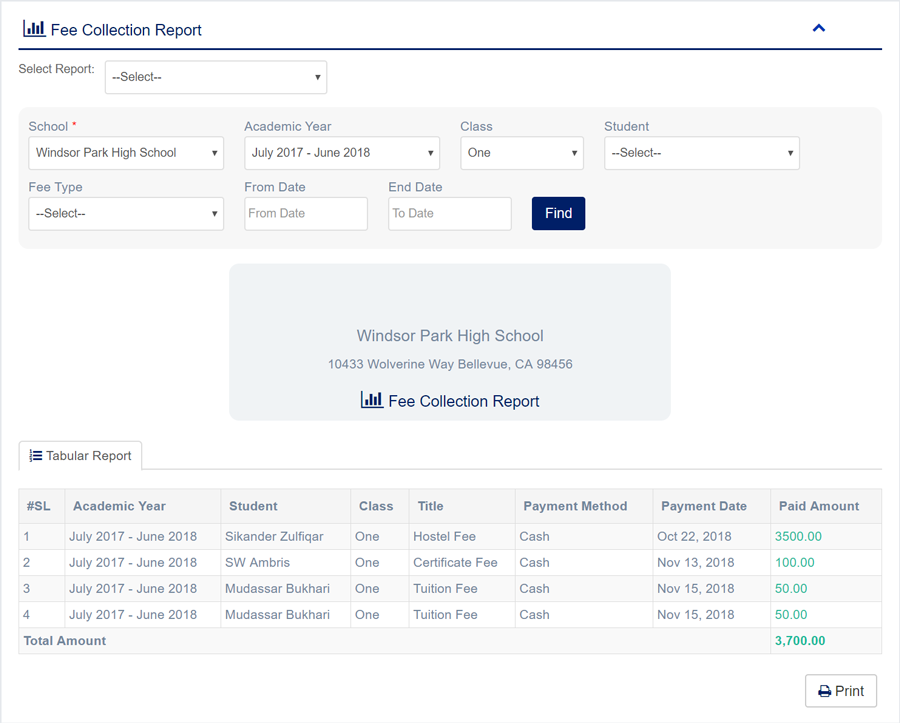
1. Login to System Admin Panel.
2. Select Fee Collection Report sub menu under Report main menu from left side bar.
3. To View Fee Collection Report choose Academic Year, Class, Student, Fee Type, From Date and To date and click find Button.
4. You are done with Manage Fee Collection Report feature.
1. Login to System Admin Panel.
2. Select Balance Report sub menu under Report main menu from left side bar.
3. To View Balance Report choose Academic Year, Group by Data, From Date & To Date.
4. Then click Find button and you will see Graphical Report.
4. To view Tabular Data click Tabular Report
6. You are done with Manage Balance Report feature.


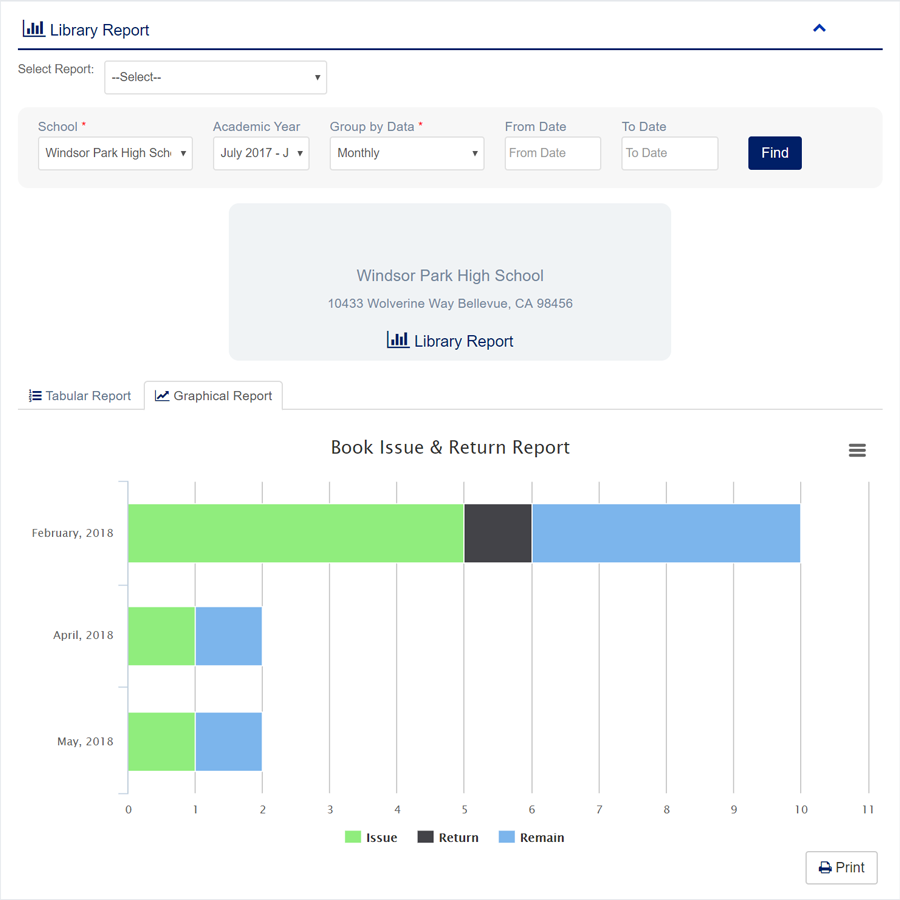
1. Login to System Admin Panel.
2. Select Library Report sub menu under Report main menu from left side bar.
3. To View Library Report choose Academic Year, Group by Data, From Date & To Date.
4. Then click Find button and you will see Graphical Report.
4. To view Tabular Data click Tabular Report
6. You are done with Manage Library Report feature.

1. Login to System Admin Panel.
2. Select Student Attendance Report sub menu under Report main menu from left side bar.
3. To View Student Attendance Report choose Academic Year, Class, Section, Month.
4. Then click Find button and you will see Student Attendance.
6. You are done with Student Attendance Report feature.

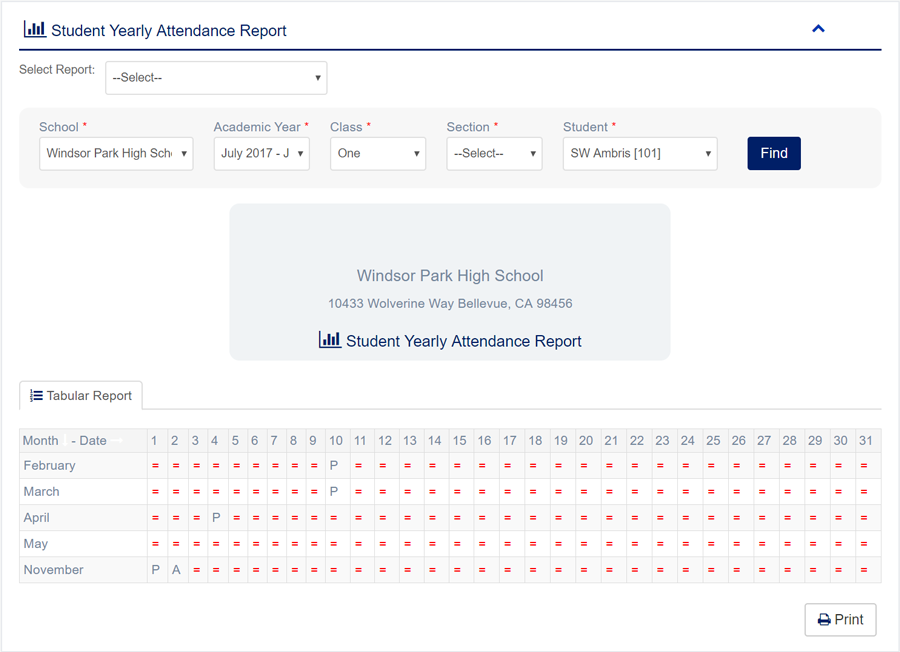
1. Login to System Admin Panel.
2. Select Student Yearly Attendance Report sub menu under Report main menu from left side bar.
3. To View Student Yearly Attendance Report choose Academic Year, Class,Section, Student.
4. Then click Find button and you will see Student Yearly Attendance Report.
5. You are done with Student Yearly Attendance Report feature.
1. Login to System Admin Panel.
2. Select Teacher Attendance Report sub menu under Report main menu from left side bar.
3. To View Teacher Attendance Report choose Academic Year, Month.
4. Then click Find button and you will see Teacher Attendance Report.
5. You are done with Teacher Attendance Report feature.

1. Login to System Admin Panel.
2. Select Teacher Yearly Attendance Report sub menu under Report main menu from left side bar.
3. To View Teacher Yearly Attendance Report choose Academic Year, Teacher.
4. Then click Find button and you will see Teacher Yearly Attendance Report.
5. You are done with Teacher Yearly Attendance Report feature.

1. Login to System Admin Panel.
2. Select Employee Attendance Report sub menu under Report main menu from left side bar.
3. To View Employee Attendance Report choose Academic Year, Month.
4. Then click Find button and you will see Employee Attendance Report.
6. You are done with Employee Attendance Report feature.

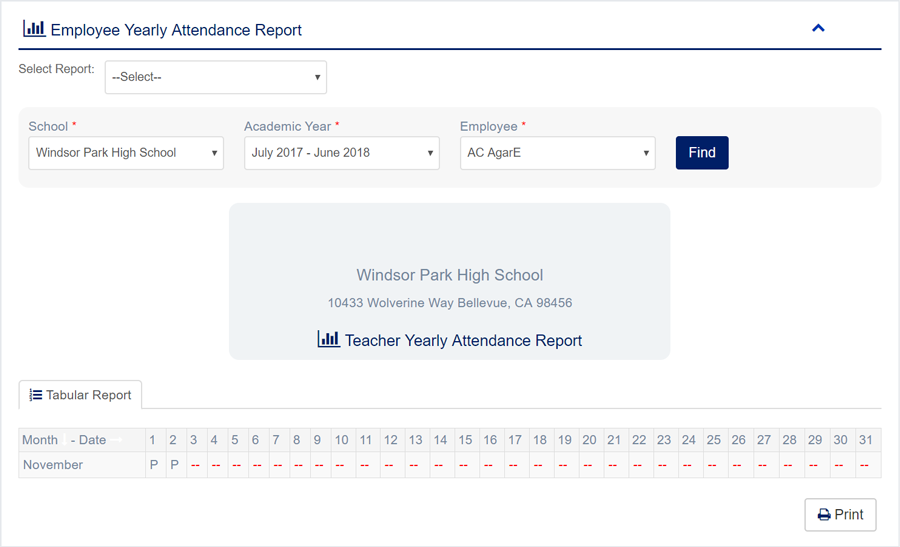
1. Login to System Admin Panel.
2. Select Employee Yearly Attendance Report sub menu under Report main menu from left side bar.
3. To View Employee Yearly Attendance Report choose Academic Year, Employee.
4. Then click Find button and you will see Employee Yearly Attendance Report.
6. You are done with Employee Yearly Attendance Report feature.
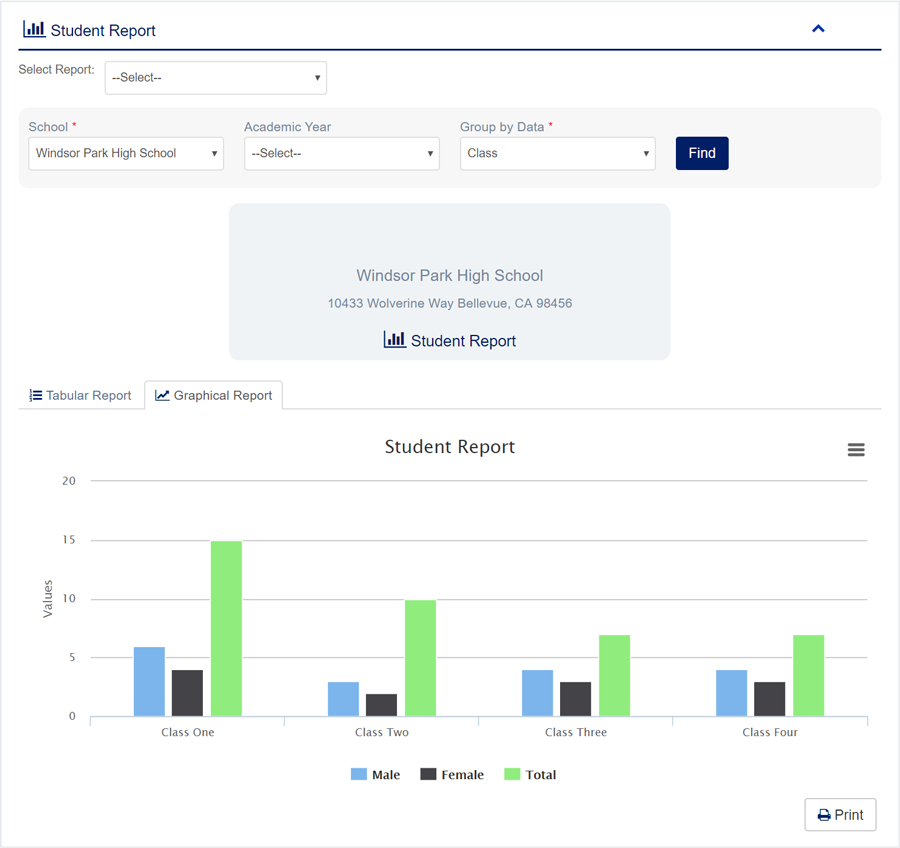
1. Login to System Admin Panel.
2. Select Student Report sub menu under Report main menu from left side bar.
3. To View Student Report choose Academic Year, Group by Data.
4. Then click Find button and you will see Graphical Report.
4. To view Tabular Data click Tabular Report
6. You are done with Student Report feature.

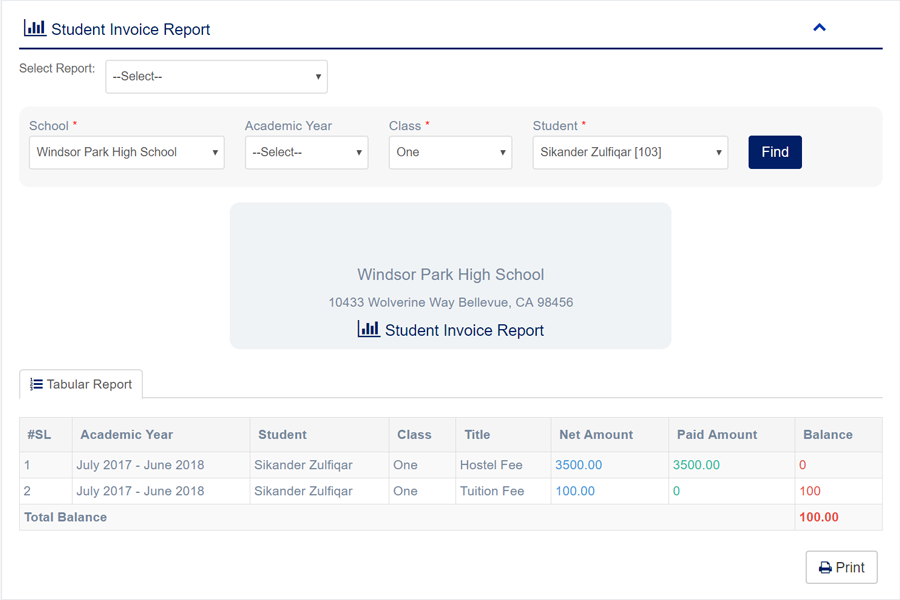
1. Login to System Admin Panel.
2. Select Student Invoice Report sub menu under Report main menu from left side bar.
3. To View Student Invoice Report choose Academic Year, Class, Student.
4. Then click Find button and you will see Student Invoice Report.
6. You are done with Student Invoice Report feature.
1. Login to System Admin Panel.
2. Select Student Activity Report sub menu under Report main menu from left side bar.
3. To View Student Activity Report choose Academic Year, Class, Student.
4. Then click Find button and you will see Student Activity Report.
6. You are done with Student Activity Report feature.

1. Login to System Admin Panel.
2. Select Payroll Report sub menu under Report main menu from left side bar.
3. To View Payroll Report choose Academic Year, Class, Student.
4. Then click Find button and you will see Student Activity Report.
6. You are done with Student Activity Report feature.


1. Login to System Admin Panel.
2. Select Daily Transaction Report sub menu under Report main menu from left side bar.
3. To View Daily Transaction Report choose Academic Year, From Date, To Date.
4. Then click Find button and you will see Daily Transaction Report.
6. You are done with Daily Transaction Report feature.
1. Login to System Admin Panel.
2. Select Daily Statement Report sub menu under Report main menu from left side bar.
3. To View Daily Statement Report choose From Date, To Date.
4. Then click Find button and you will see Daily Statement Report.
6. You are done with Daily Statement Report feature.

1. Login to System Admin Panel.
2. Select >Exam Result Report sub menu under Report main menu from left side bar.
3. To View Exam Result Report choose Academic Year, Class, Section.
4. Then click Find button and you will see >Exam Result Report.
6. You are done with >Exam Result Report feature.

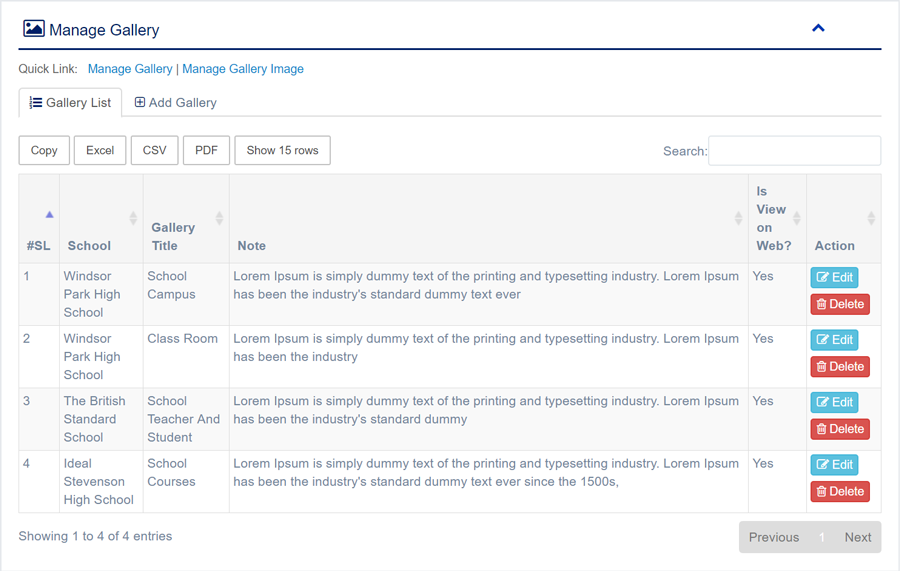
1. Login to System Admin Panel.
2. Select Manage Gallery sub menu under Media Gallery main menu from left side bar.
3. To Add/Create new Gallery click Add Gallery tab.
4. To Edit Gallery Click Edit button in the Gallery list.
5. To Delete Gallery Click Delete button in the Gallery List.
6. You are done with Manage Gallery feature.

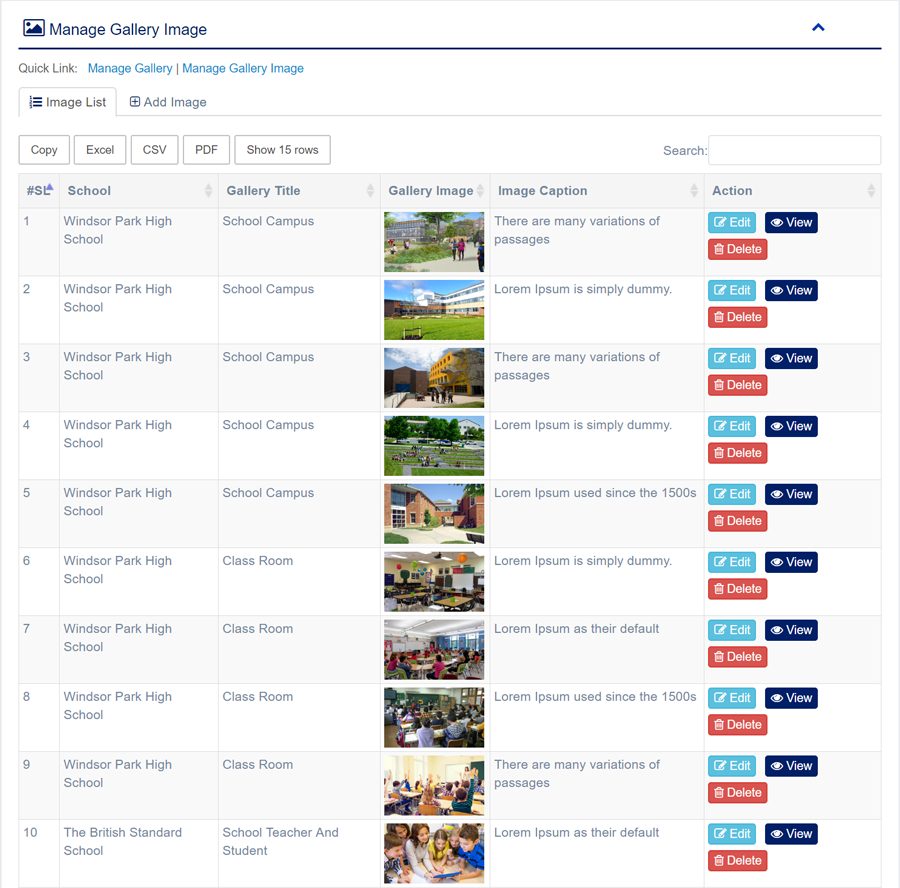
1. Login to System Admin Panel.
2. Select Manage Gallery Image sub menu under Media Gallery main menu from left side bar.
3. To Add/Create new Gallery Image click Add Gallery Image tab.
4. To Edit Gallery Image Click Edit button in the Gallery Image list.
5. To Delete Gallery Image Click Delete button in the Gallery Image List.
6. You are done with Manage Gallery Image feature.

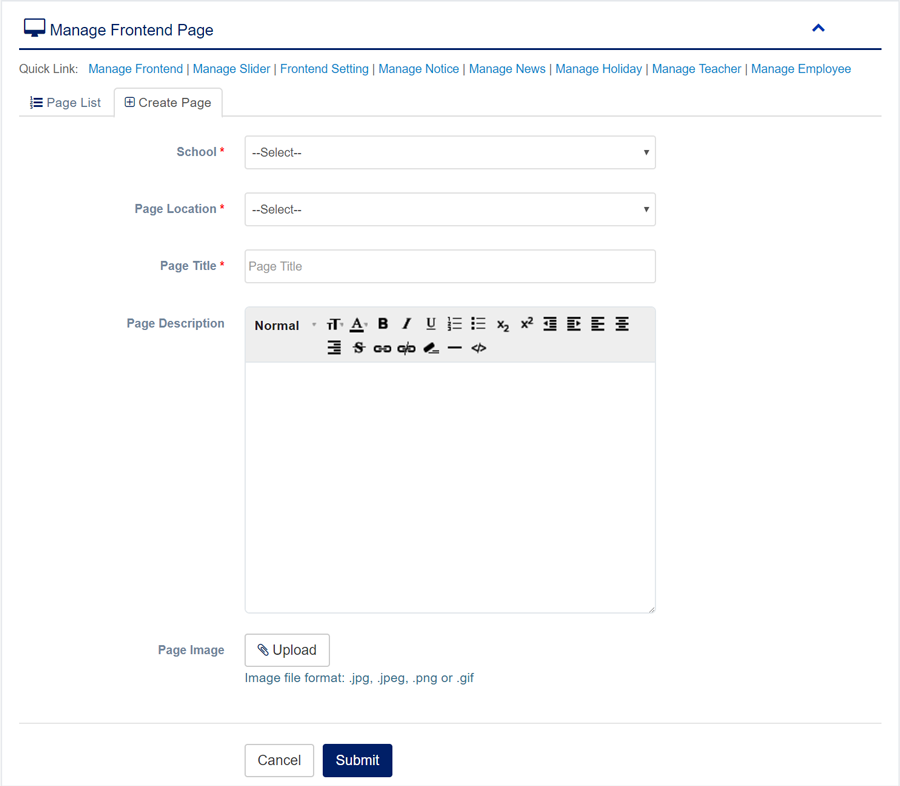
1. Login to System Admin Panel.
2. Select Manage Frontend sub menu under Frontend main menu from left side bar.
4. To Edit Frontend Pages Click Edit button in the Frontend Page list.
5. To View Frontend Page Click View button in the Frontend Page List.
6. You are done with Manage Frontend Pages feature.

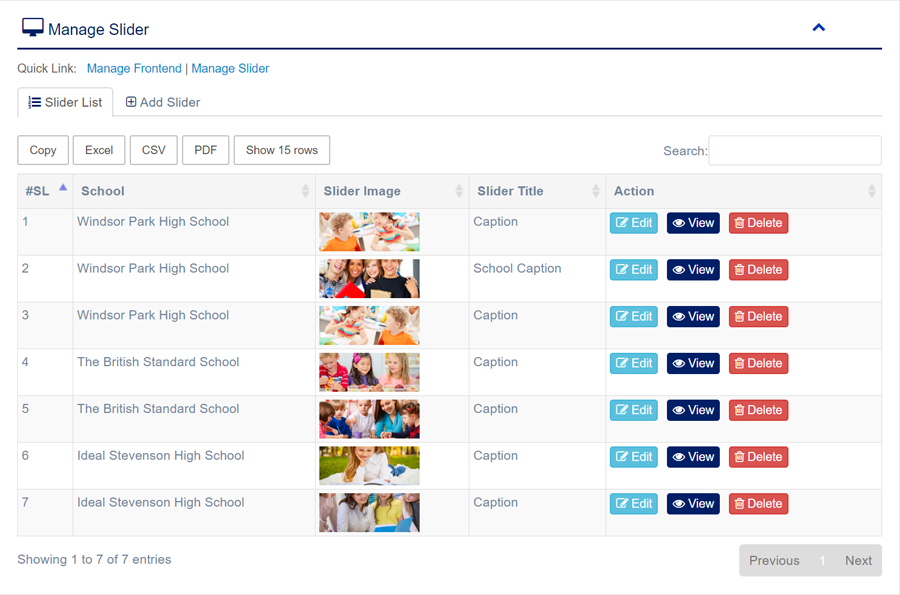
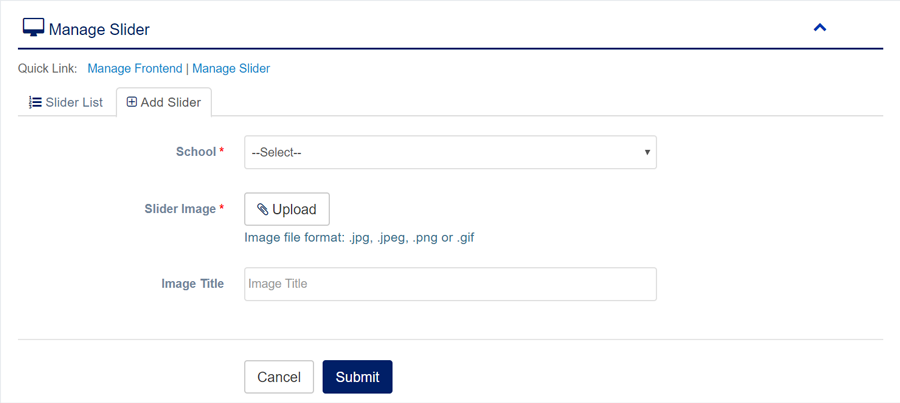
1. Login to System Admin Panel.
2. Select Manage Slider sub menu under Frontend main menu from left side bar.
3. To Add/Create new Slider click Add Slider tab.
4. To Edit Slider Image Click Edit button in the Slider Image list.
5. To Delete Slider Image Click Delete button in the Slider Image List.
6. You are done with Manage Slider Image feature.
1. Login to System Admin Panel.
2. Select My Profile sub menu under Profile main menu from left side bar.
3. To Update Profile click Update Tab and click Update Button at the bottom.
4. You are done with Manage My Profile feature.

1. Login to System Admin Panel.
2. Select Reset Password sub menu under Profile main menu from left side bar.
3. To Reset Password  input your new password in the fields and click Submit Button.
4. You are done with Reset Password feature.
1. Login to System Admin Panel.
2. Click Logout sub menu under Profile main menu from left side bar.
3. You are done with Logout feature.
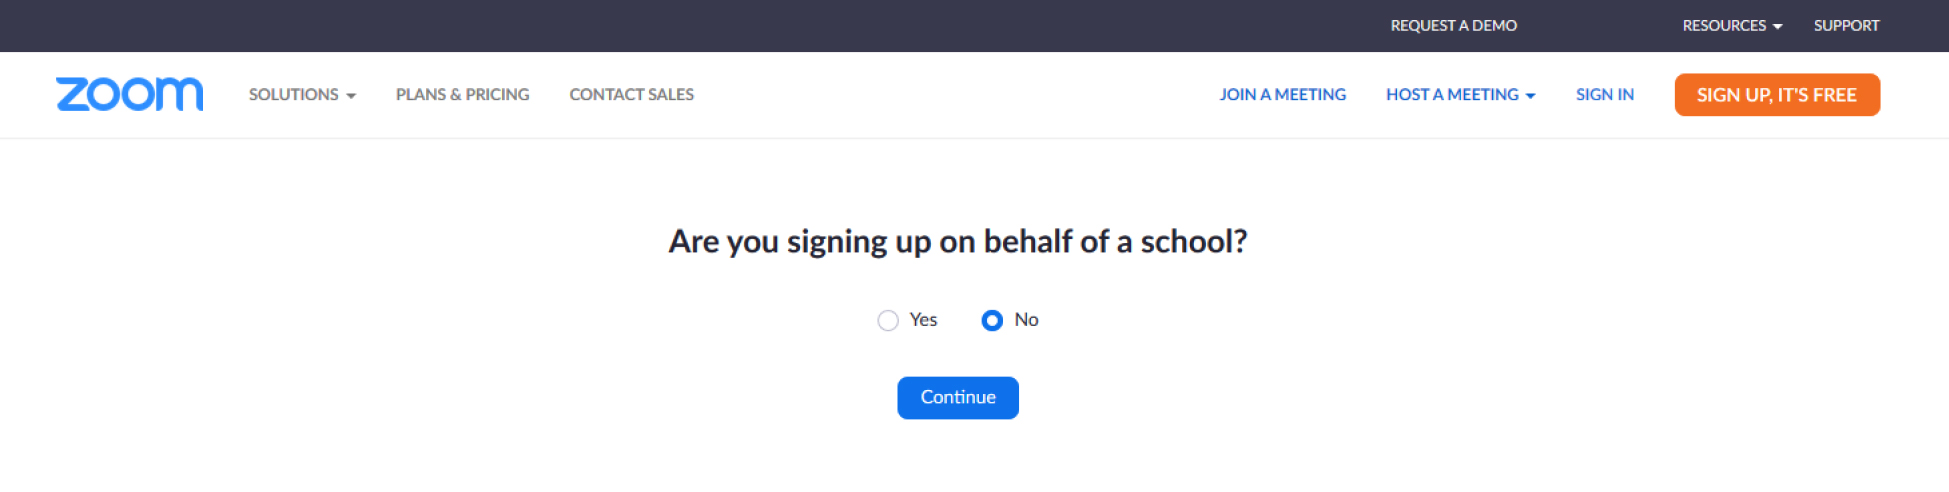
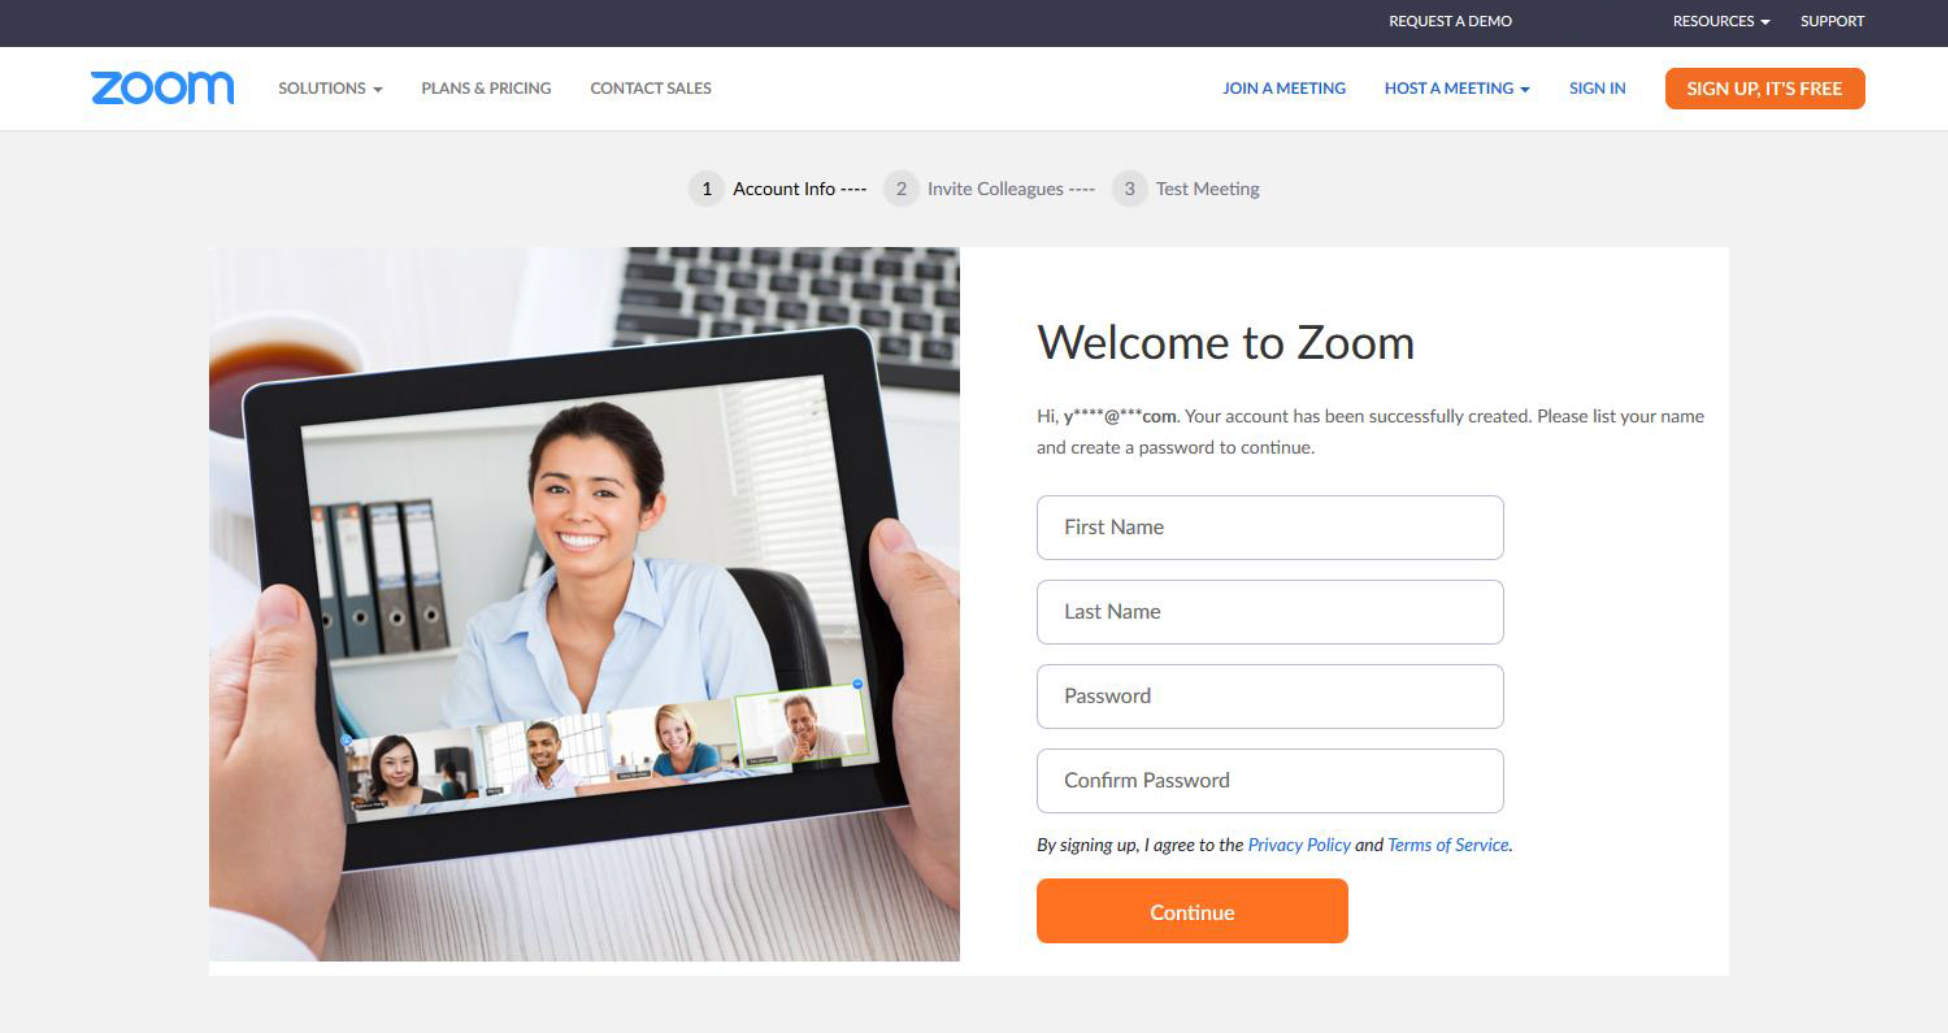
The following steps will help you to integrate ZOOM in the Software:-
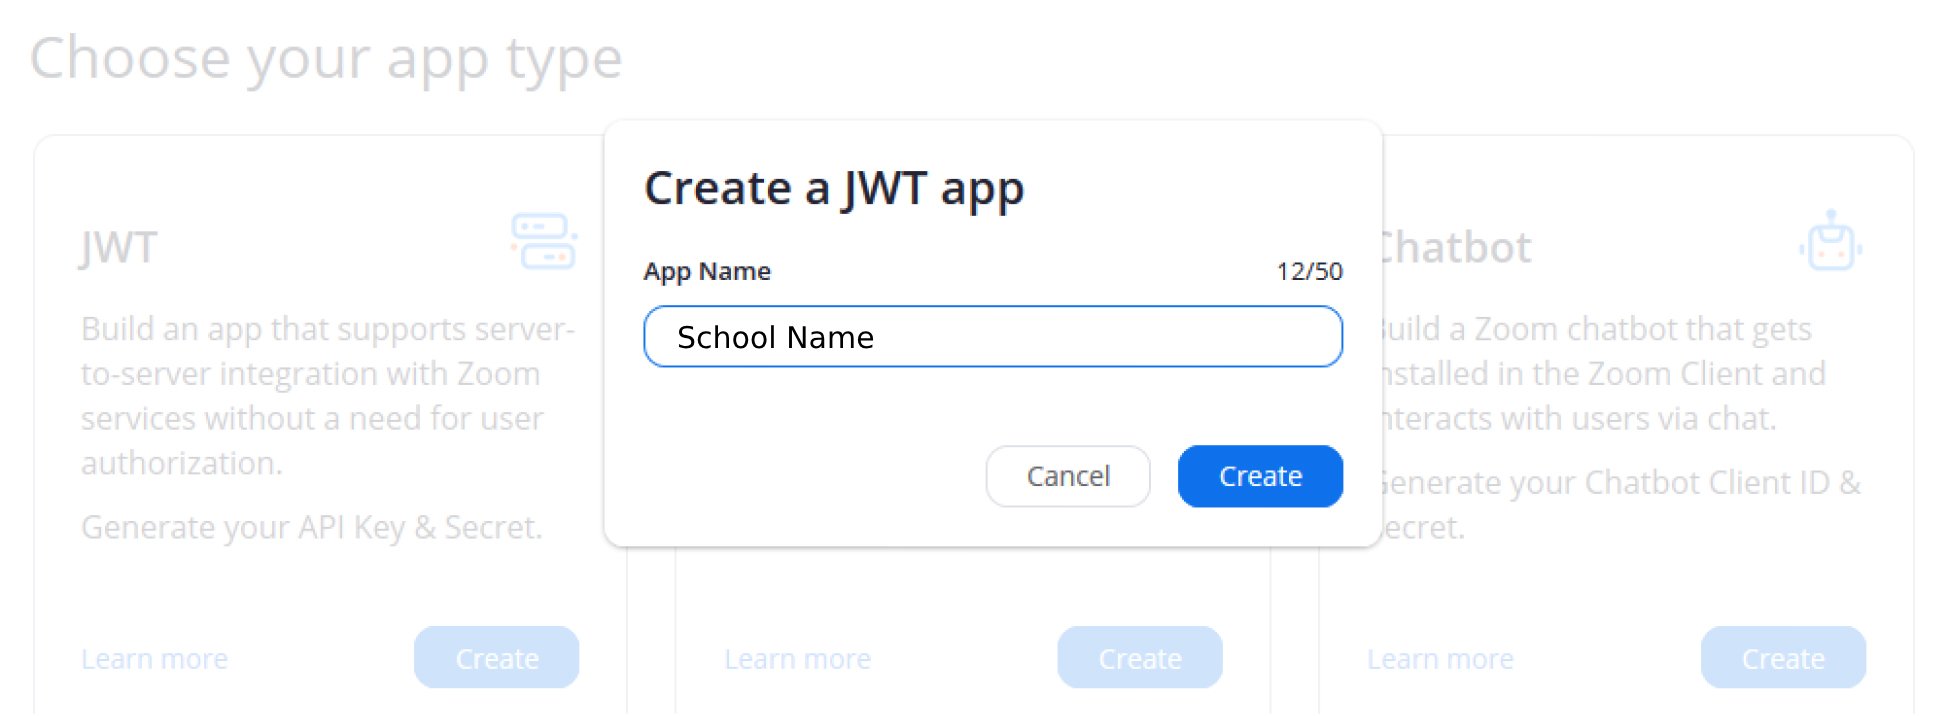
1. First, Please Sign up or sign in here, Zoom Marketplace Portal. Also, please follow the signup process and complete the steps in the screenshots below.


 02. After completing the Zoom account sign-up up collect the ZOOM Api Key and Api Secret and save them in the Software. The School Admin has to save under Left Menu-> Settings ->School Settings. Please see the following screenshot.
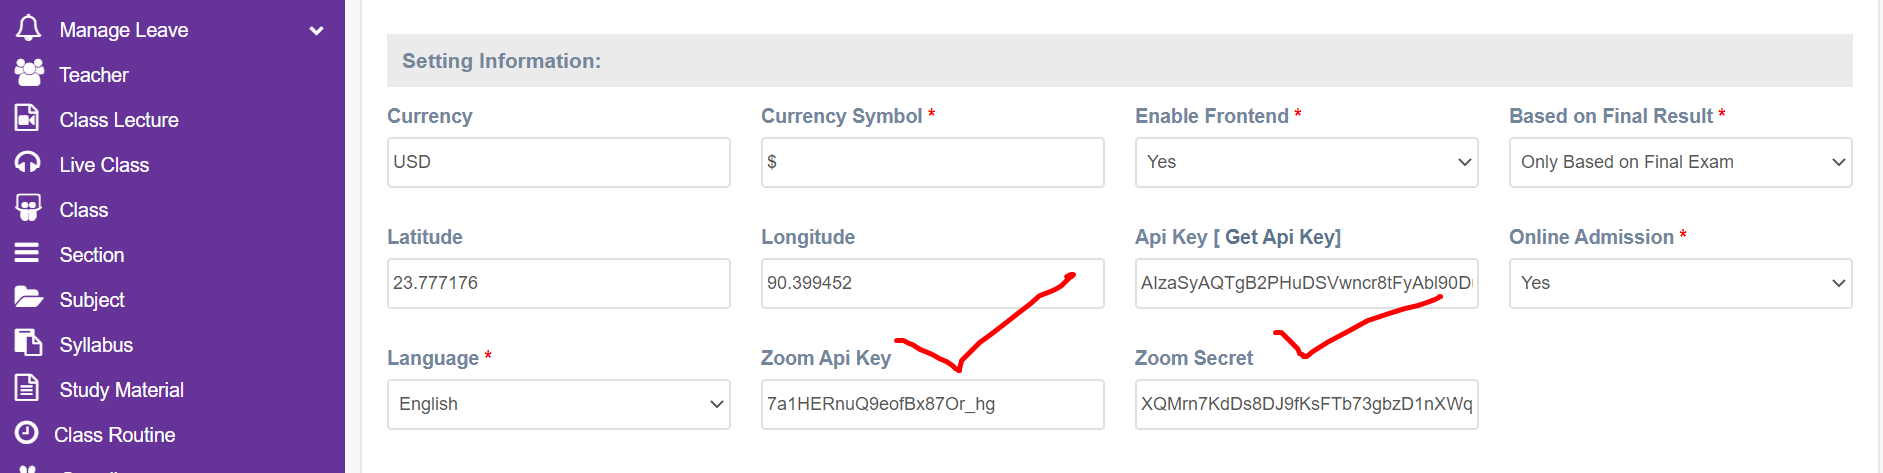 03. Now you have to create a meeting in your ZOOM account with a set date, time, and other settings as per your needs. From here, you will get the Meeting ID and Meeting Password. The following screenshots will help you to do this.

 04. Now you have to configure the live class in the Software and create a live class schedule as per your ZOOM meeting configuration. Please fill up all fields to create a live class schedule with all required fields. Most importantly, please enter the ZOOM Meeting ID and password correctly; otherwise meeting will fail. The following screenshots will help you to do this.
 05. Now, Teachers and Students will be able to communicate in Live Class using the ZOOM Feature. The following screenshot will help you to do this.